6 | Hardware Installation |
Installing SIMMs
1.Place the MCMaster board onto the anti static bag on a flat surface with the component side face up and the edge connector toward you.
2.Insert the edge of the SIMM into the socket with pin 1 to your right. If the pin number is not marked on the SIMM module, look for a notch cut out of one of the corners on the connector side of the SIMM. That notch will be at pin 1.
3.Slide the SIMM all the way into the socket and press down gently until the tabs snap the SIMM securely in place. Note that the SIMMs are angled down, toward the board's connector edge.
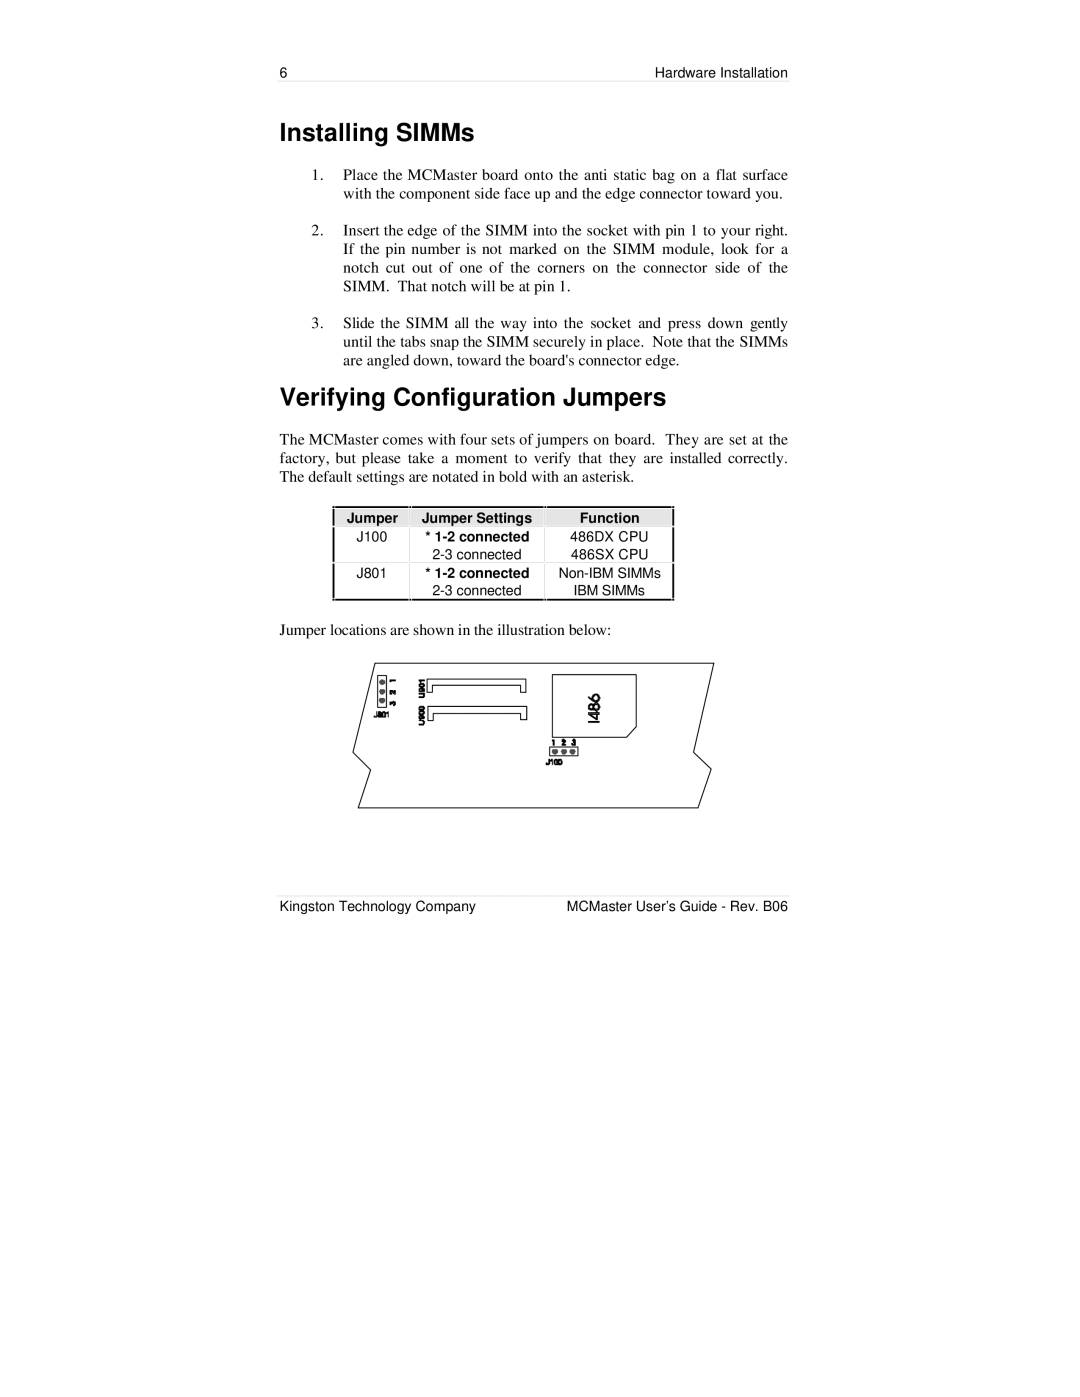
Verifying Configuration Jumpers
The MCMaster comes with four sets of jumpers on board. They are set at the factory, but please take a moment to verify that they are installed correctly. The default settings are notated in bold with an asterisk.
|
|
|
|
|
|
|
| Jumper |
| Jumper Settings |
| Function |
|
| J100 |
| * |
| 486DX CPU |
|
|
|
|
| |||
|
|
|
| 486SX CPU |
| |
| J801 |
| * |
|
| |
|
|
|
| IBM SIMMs |
|
Jumper locations are shown in the illustration below:
Kingston Technology Company | MCMaster User’s Guide - Rev. B06 |