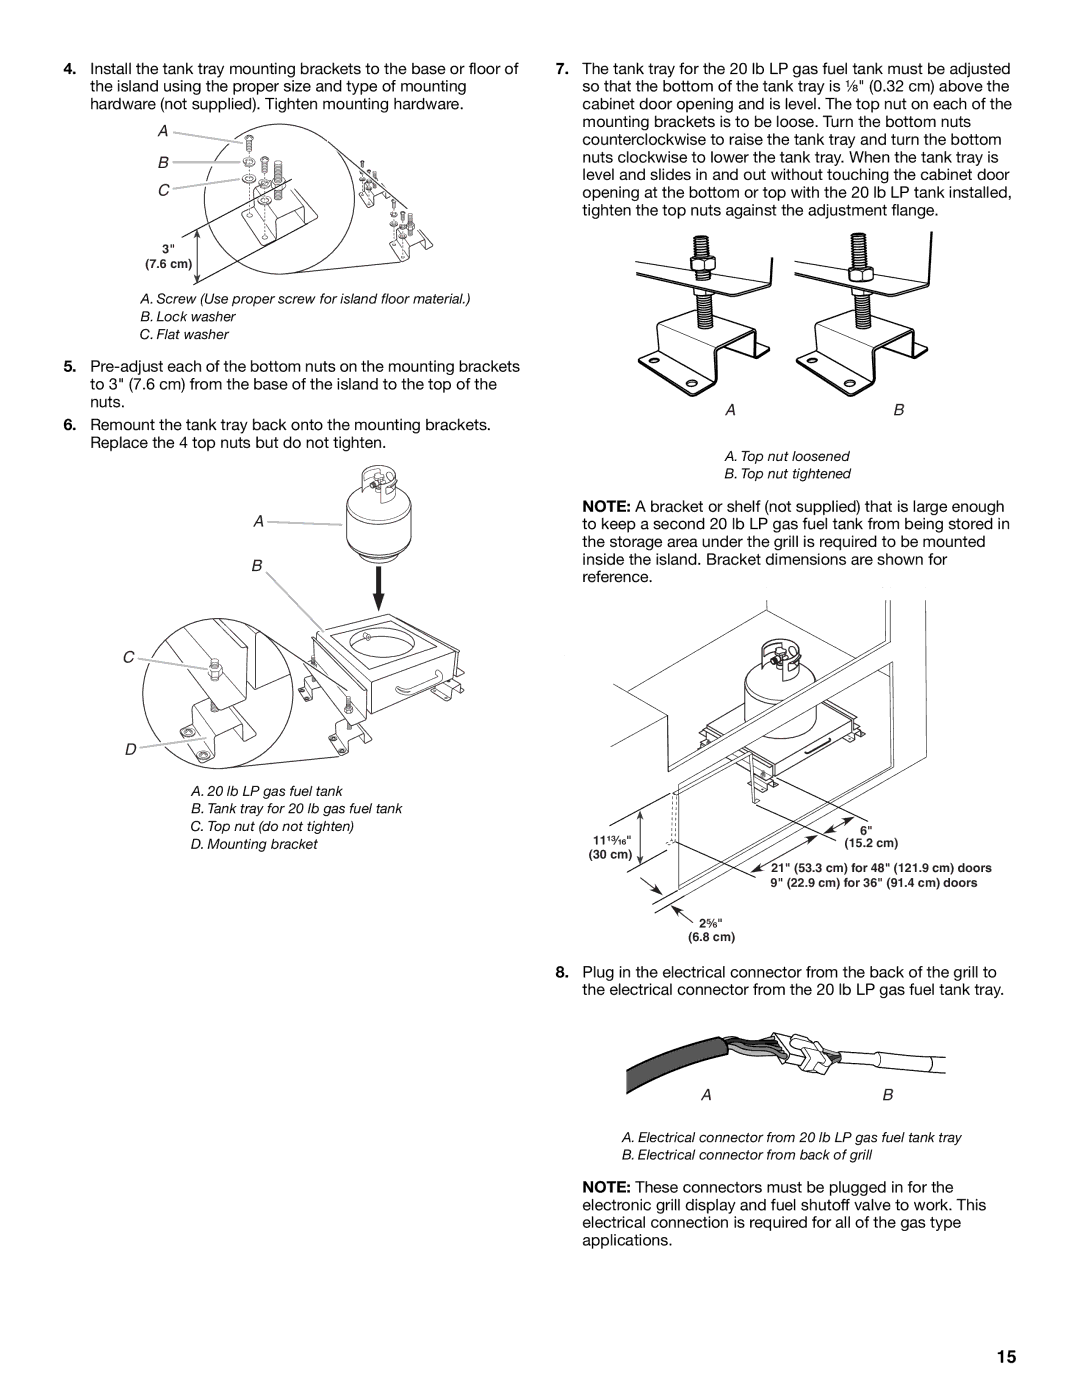
4.Install the tank tray mounting brackets to the base or floor of the island using the proper size and type of mounting hardware (not supplied). Tighten mounting hardware.
A ![]()
B ![]()
![]()
![]()
![]()
C
3"
(7.6 cm)
A. Screw (Use proper screw for island floor material.)
B. Lock washer
C. Flat washer
5.
6.Remount the tank tray back onto the mounting brackets. Replace the 4 top nuts but do not tighten.
A ![]()
![]()
B
C ![]()
![]()
D
A. 20 lb LP gas fuel tank
B. Tank tray for 20 lb gas fuel tank
C. Top nut (do not tighten)
D. Mounting bracket
7.The tank tray for the 20 lb LP gas fuel tank must be adjusted so that the bottom of the tank tray is ¹⁄₈" (0.32 cm) above the cabinet door opening and is level. The top nut on each of the mounting brackets is to be loose. Turn the bottom nuts counterclockwise to raise the tank tray and turn the bottom nuts clockwise to lower the tank tray. When the tank tray is level and slides in and out without touching the cabinet door opening at the bottom or top with the 20 lb LP tank installed, tighten the top nuts against the adjustment flange.
AB
A. Top nut loosened
B. Top nut tightened
NOTE: A bracket or shelf (not supplied) that is large enough to keep a second 20 lb LP gas fuel tank from being stored in the storage area under the grill is required to be mounted inside the island. Bracket dimensions are shown for reference.
11¹³⁄₁₆" | 6" |
(15.2 cm) | |
(30 cm) |
|
![]() 21" (53.3 cm) for 48" (121.9 cm) doors 9" (22.9 cm) for 36" (91.4 cm) doors
21" (53.3 cm) for 48" (121.9 cm) doors 9" (22.9 cm) for 36" (91.4 cm) doors
![]() 2⁵⁄₆" (6.8 cm)
2⁵⁄₆" (6.8 cm)
8.Plug in the electrical connector from the back of the grill to the electrical connector from the 20 lb LP gas fuel tank tray.
AB
A. Electrical connector from 20 lb LP gas fuel tank tray
B. Electrical connector from back of grill
NOTE: These connectors must be plugged in for the electronic grill display and fuel shutoff valve to work. This electrical connection is required for all of the gas type applications.
15
