
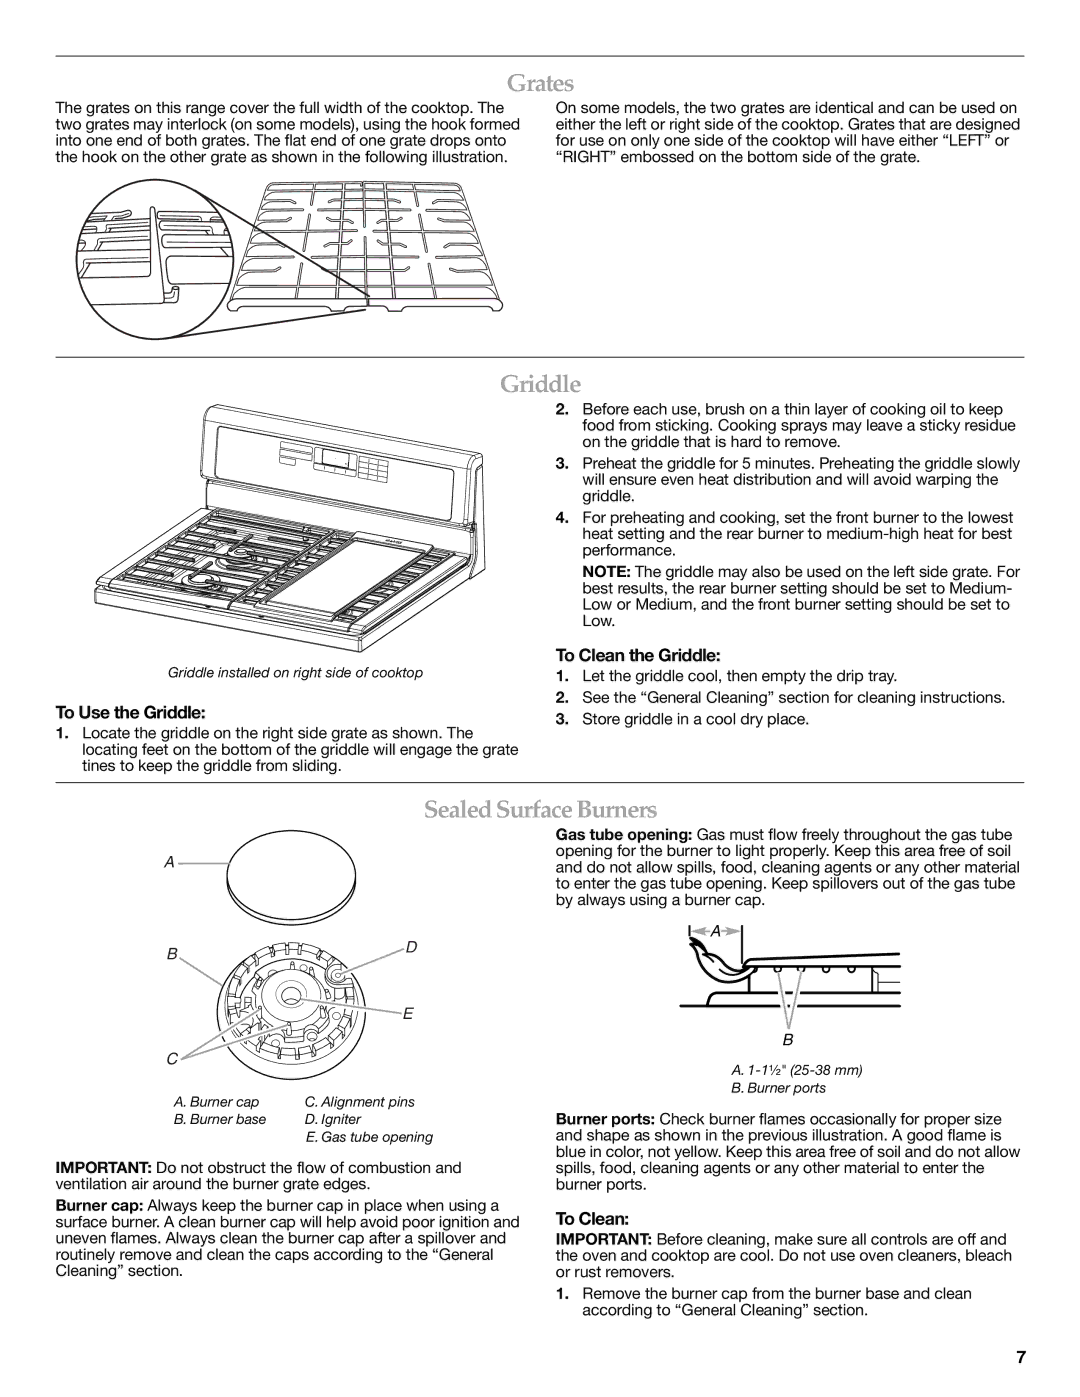
W10524723A specifications
The KitchenAid W10524723A is a premium stand mixer attachment designed to enhance the culinary experience for home cooks and baking enthusiasts alike. This versatile attachment is primarily crafted for use with KitchenAid stand mixers, which are renowned for their durability, performance, and user-friendly designs. The W10524723A enhances the already impressive capabilities of these stand mixers, allowing users to explore new culinary possibilities.One of the standout features of the W10524723A is its ability to transform the stand mixer into a powerful food processor. The attachment allows for quick and efficient slicing, shredding, and grating of various ingredients, from vegetables to cheese. This functionality not only saves time but also encourages creativity in the kitchen, as home cooks can experiment with diverse recipes.
The W10524723A is equipped with a range of stainless steel blades and discs designed for specific tasks. These include a thin slice, thick slice, and two shredding options (fine and coarse), providing users with the flexibility to achieve the desired texture and presentation in their dishes. The stainless steel construction ensures durability and longevity, making it a worthy investment for any kitchen.
In terms of ease of use, the W10524723A features an easy-to-assemble design, allowing users to quickly connect and detach the attachment from their stand mixer. This system ensures that transitioning between tasks is seamless, catering to the fast-paced environment often found in home kitchens.
The attachment also boasts a wide feed tube that accommodates larger ingredients, reducing the need for pre-cutting and thus streamlining the food prep process. Furthermore, the comprehensive user guide provides instructional tips and recipe ideas, helping users maximize the potential of their new attachment.
Safety and versatility are also key characteristics of the W10524723A. It is designed to be compatible with various KitchenAid stand mixer models, making it a versatile addition to any kitchen setup. Overall, the KitchenAid W10524723A is an innovative tool that significantly enhances food preparation capabilities, promoting efficiency and fostering creativity among home cooks. With its robust features and practical design, this attachment is sure to become a staple in the modern kitchen.