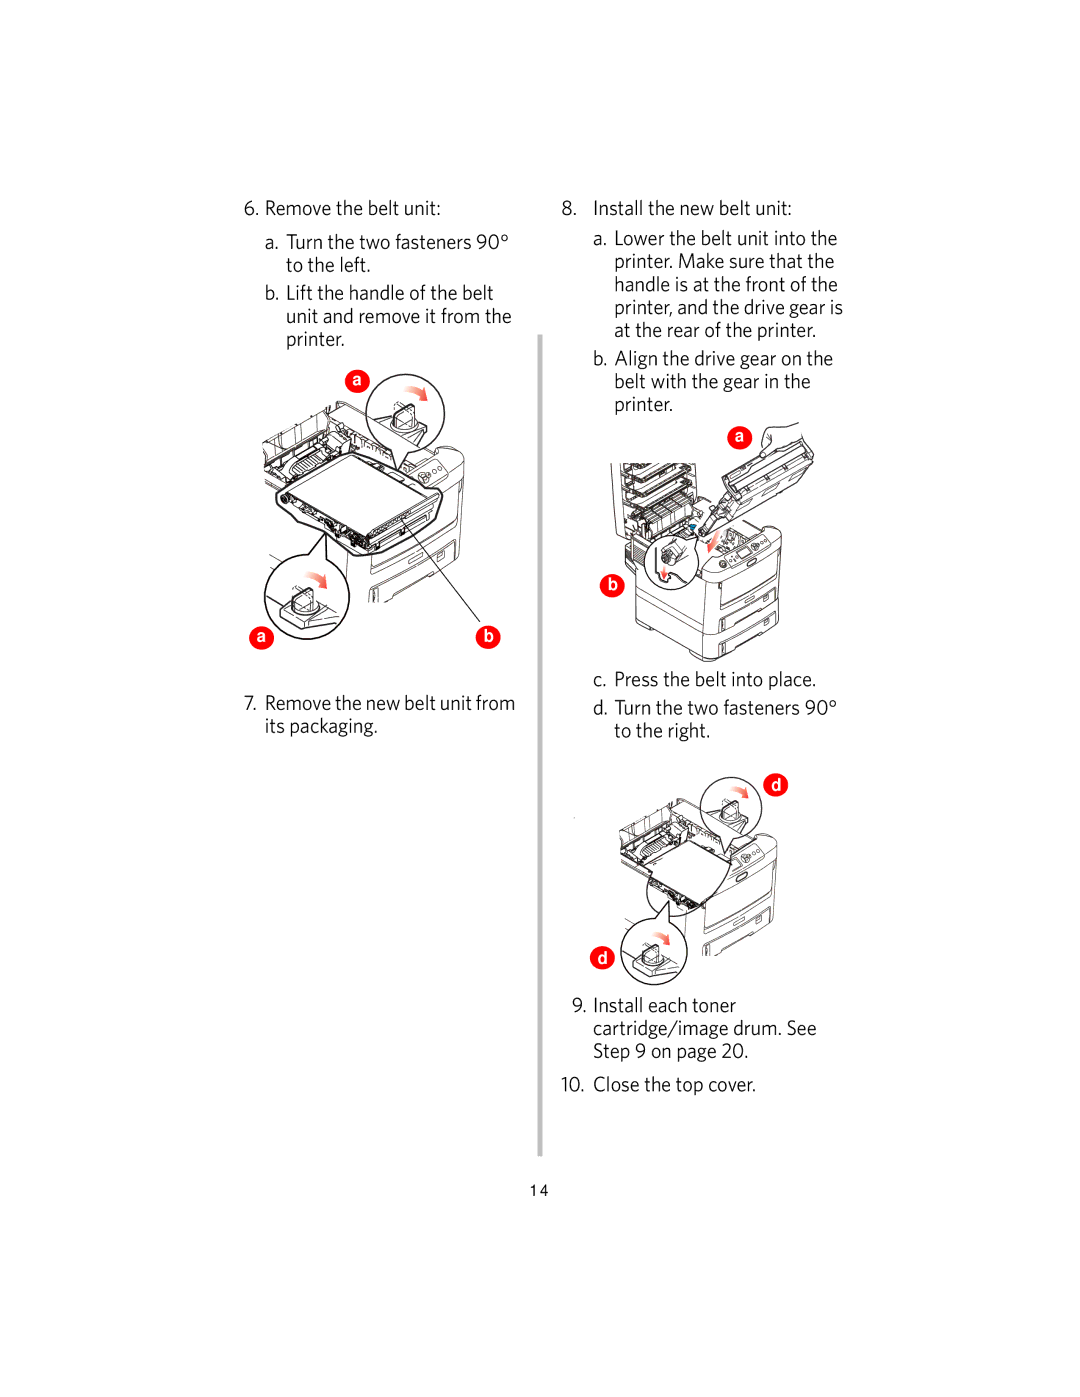
6.Remove the belt unit:
a.Turn the two fasteners 90° to the left.
b.Lift the handle of the belt unit and remove it from the printer.
a
ab
7.Remove the new belt unit from its packaging.
8.Install the new belt unit:
a.Lower the belt unit into the printer. Make sure that the handle is at the front of the printer, and the drive gear is at the rear of the printer.
b.Align the drive gear on the belt with the gear in the printer.
a
b![]()
![]()
c.Press the belt into place.
d.Turn the two fasteners 90° to the right.
![]() d
d
d![]()
![]()
9.Install each toner cartridge/image drum. See Step 9 on page 20.
10.Close the top cover.
14