Replacing the Fuser
The fuser is located inside the printer just behind the four image drums.
1.Turn off the printer.
2.Wait approximately 10 minutes for the fuser to cool.
3.Open the top cover.
Caution!
The fuser becomes extremely hot during normal operation. Do not touch it.
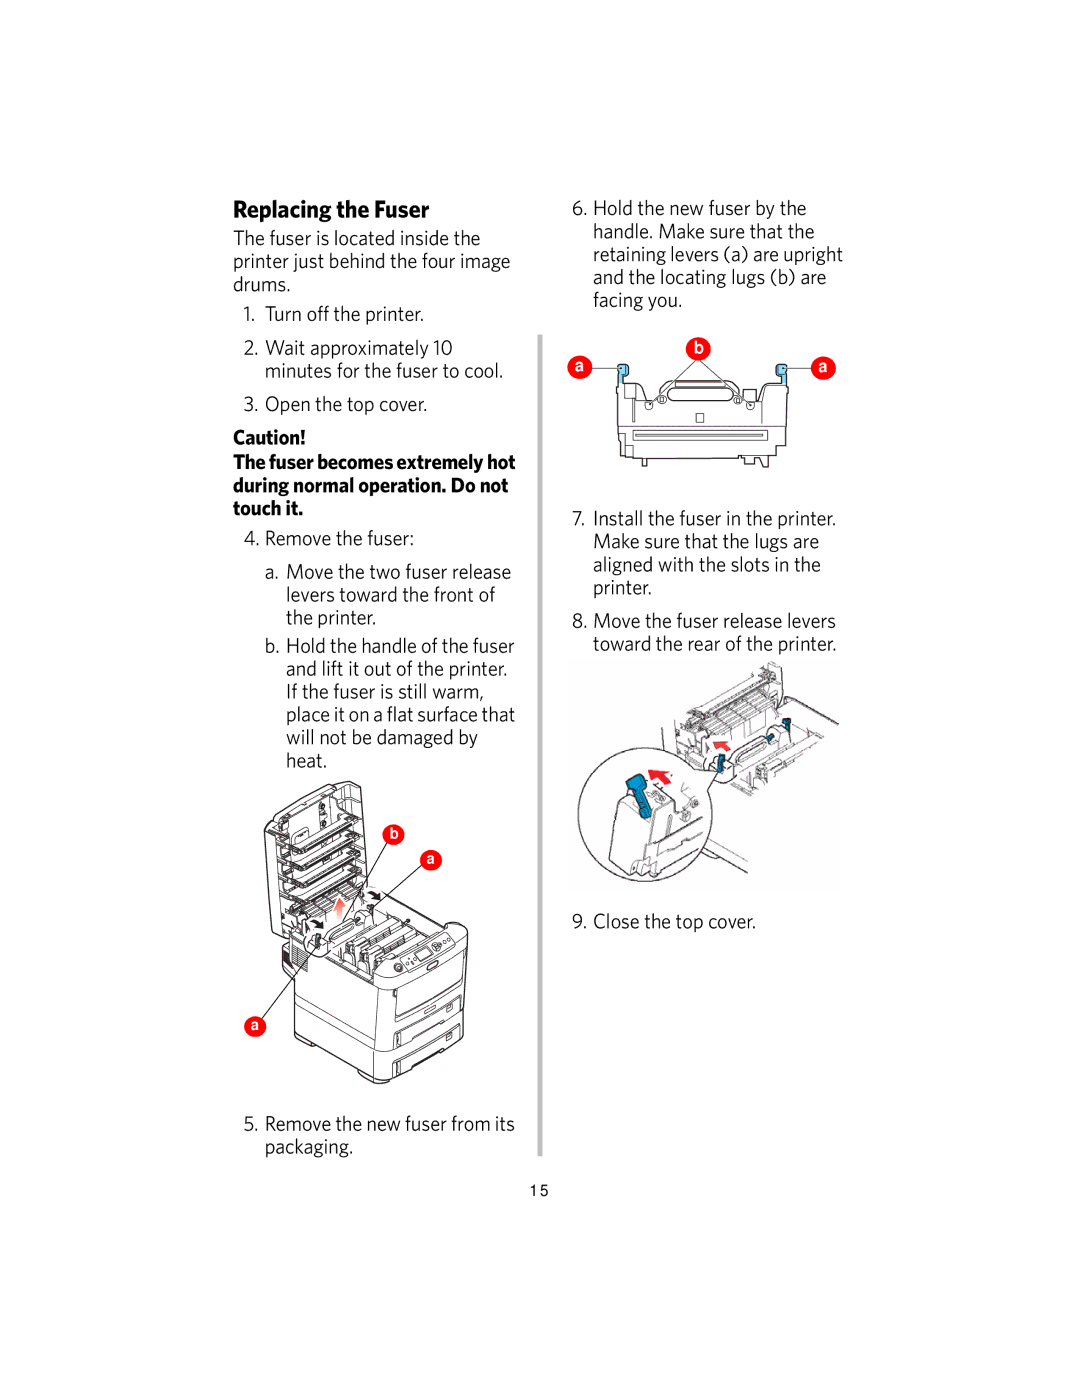
4.Remove the fuser:
a.Move the two fuser release levers toward the front of the printer.
b.Hold the handle of the fuser and lift it out of the printer. If the fuser is still warm, place it on a flat surface that will not be damaged by heat.
b
a
a![]()
![]()
5.Remove the new fuser from its packaging.
6.Hold the new fuser by the handle. Make sure that the retaining levers (a) are upright and the locating lugs (b) are facing you.
a | b |
a |
7.Install the fuser in the printer. Make sure that the lugs are aligned with the slots in the printer.
8.Move the fuser release levers toward the rear of the printer.
9. Close the top cover.
15