Installing the RC-8IR Universal Room Controller
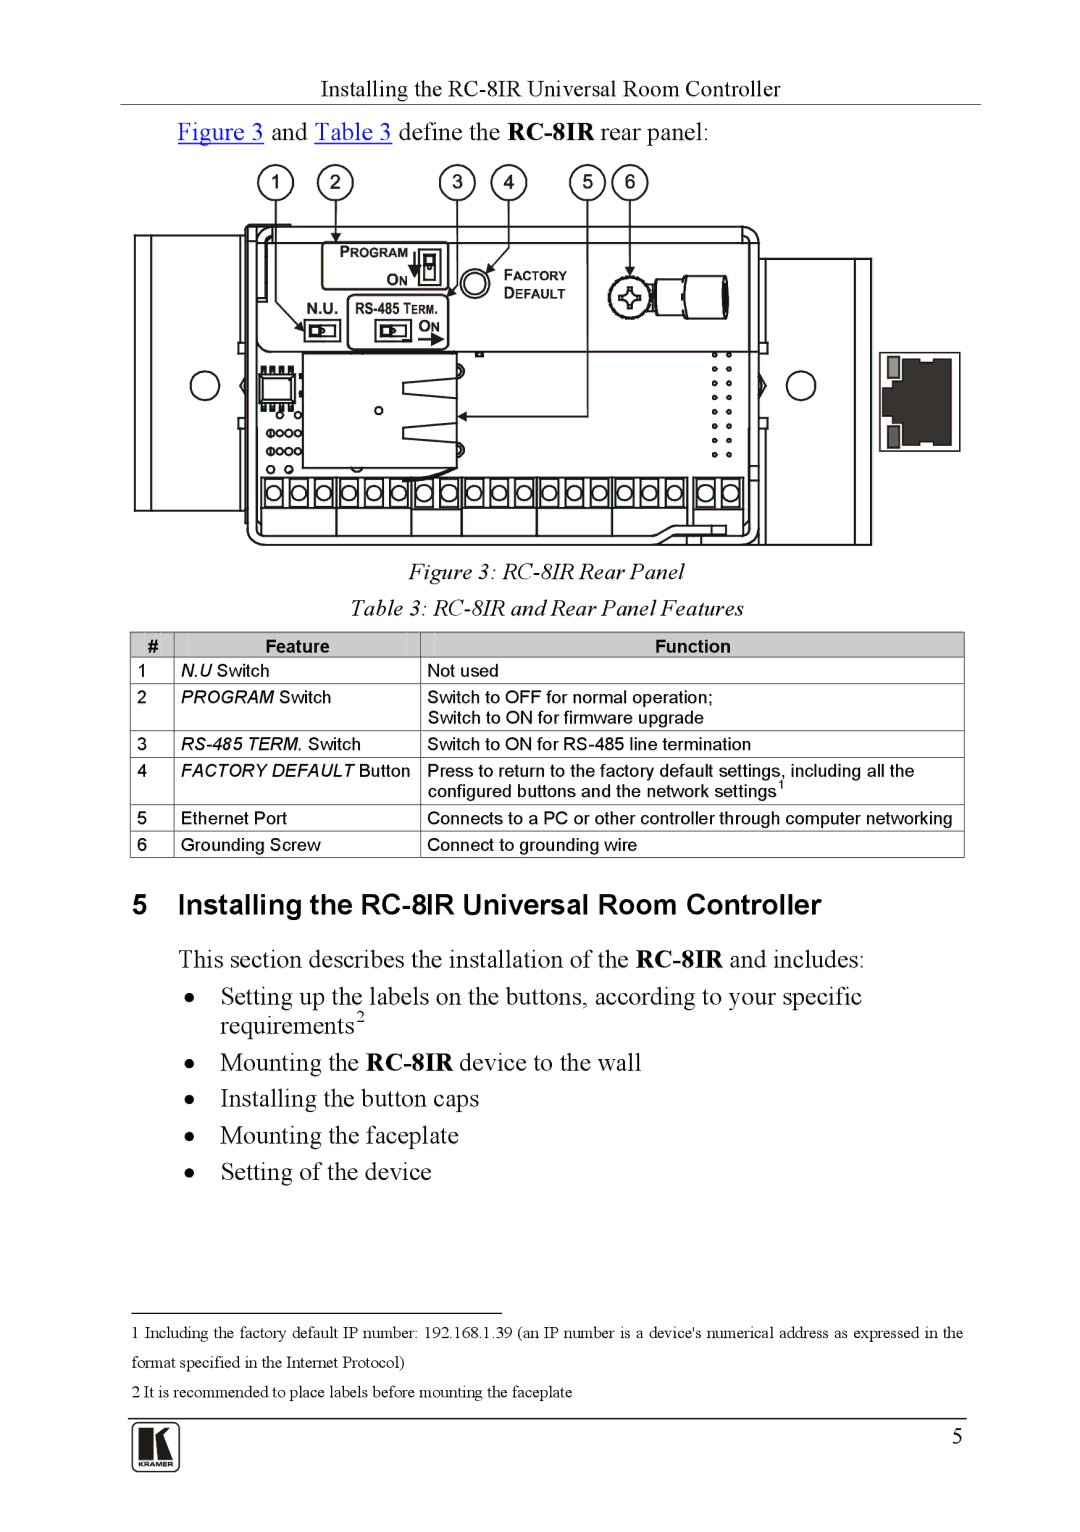
Figure 3 and Table 3 define the RC-8IR rear panel:
Figure 3: RC-8IR Rear Panel
Table 3: RC-8IR and Rear Panel Features
# | Feature | Function |
1 | N.U Switch | Not used |
2 | PROGRAM Switch | Switch to OFF for normal operation; |
|
| Switch to ON for firmware upgrade |
3 | Switch to ON for | |
4 | FACTORY DEFAULT Button | Press to return to the factory default settings, including all the |
|
| configured buttons and the network settings1 |
5 | Ethernet Port | Connects to a PC or other controller through computer networking |
6 | Grounding Screw | Connect to grounding wire |
5Installing the RC-8IR Universal Room Controller
This section describes the installation of the
•Setting up the labels on the buttons, according to your specific requirements2
•Mounting the
•Installing the button caps
•Mounting the faceplate
•Setting of the device
1 Including the factory default IP number: 192.168.1.39 (an IP number is a device's numerical address as expressed in the format specified in the Internet Protocol)
2 It is recommended to place labels before mounting the faceplate
5