LANIER – 1/3rd Scale Laser 200 ARF -INSTRUCTIONS
radio. Centertheservo by hooking itup to the properchannelofyourradio and centering the trim tabs.
9.Installyourservohornsothatitisprotrudingthe holeoftheplateandinstalltheservohornscrew .
10.Useapieceofm usicwireorwooden dowelto help feed theservo wiresthroughthewing.You willneed to add extensionsto theaileron servo wiresto reach into thefuselage.
11.Fastentheservoplatetothehardwoodplaterails in thewing with (4)#4 x”½ screws(dubro #382)
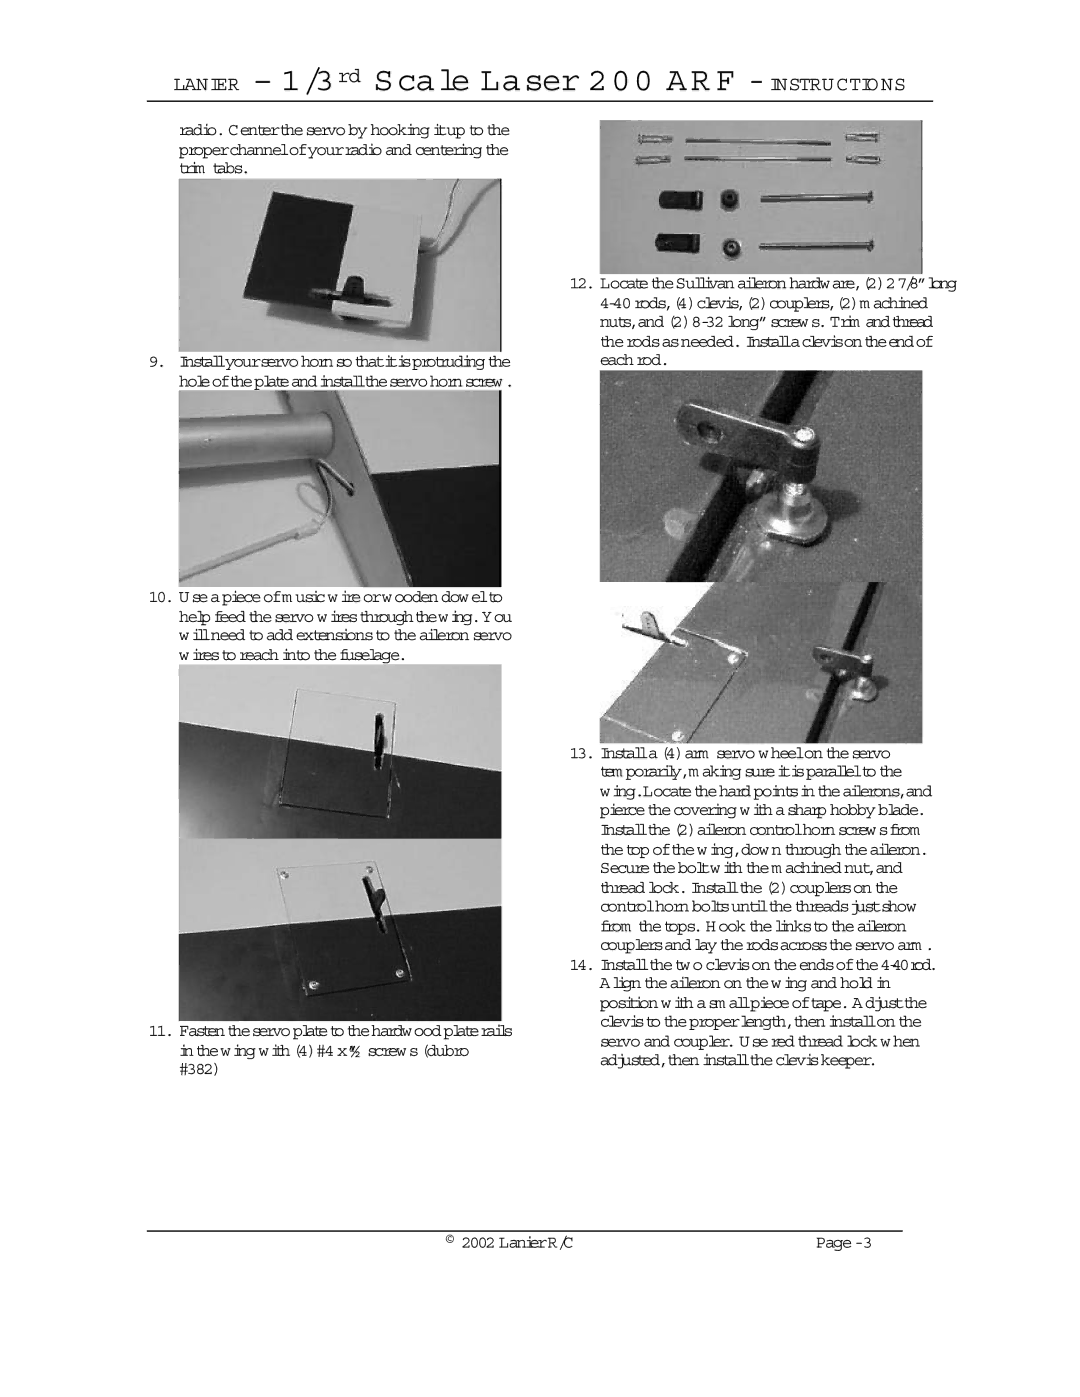
12.LocatetheSullivan aileron hardware,(2)27/8”long
13.Installa(4)arm servo wheelon theservo tem porarily,m aking sureitisparallelto the wing.Locatethehard pointsin theailerons,and piercethecovering with asharp hobby blade. Installthe(2)aileron controlhorn screwsfrom thetop ofthewing,down through theaileron. Securetheboltwith them achined nut,and thread lock. Installthe(2)couplerson the controlhorn boltsuntilthethreadsjustshow from thetops. Hook thelinksto the aileron couplersand lay therodsacrosstheservo arm .
14.Installthetwo clevison
© 2002 LanierR/C |
|