6. Startup
•Focus the direct image with the collector (46.6).
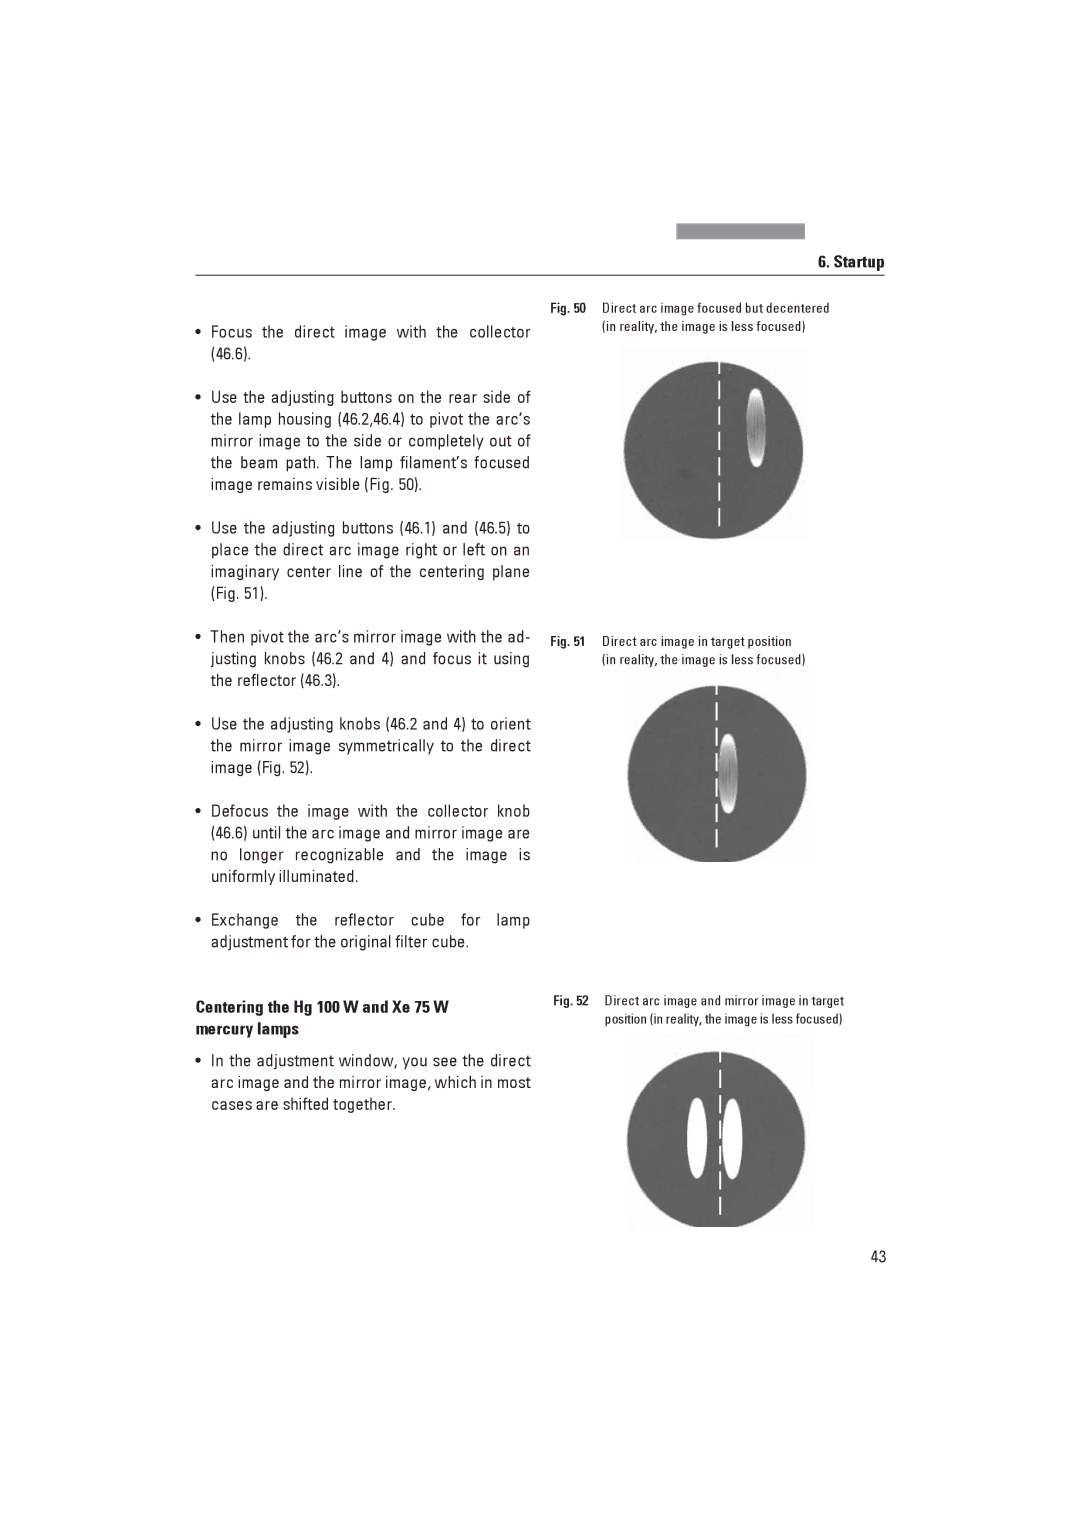
•Use the adjusting buttons on the rear side of the lamp housing (46.2,46.4) to pivot the arc’s mirror image to the side or completely out of the beam path. The lamp filament’s focused image remains visible (Fig. 50).
•Use the adjusting buttons (46.1) and (46.5) to place the direct arc image right or left on an imaginary center line of the centering plane (Fig. 51).
•Then pivot the arc’s mirror image with the ad- justing knobs (46.2 and 4) and focus it using the reflector (46.3).
•Use the adjusting knobs (46.2 and 4) to orient the mirror image symmetrically to the direct image (Fig. 52).
•Defocus the image with the collector knob (46.6) until the arc image and mirror image are no longer recognizable and the image is uniformly illuminated.
•Exchange the reflector cube for lamp adjustment for the original filter cube.
Fig. 50 Direct arc image focused but decentered (in reality, the image is less focused)
Fig. 51 Direct arc image in target position (in reality, the image is less focused)
Centering the Hg 100 W and Xe 75 W | Fig. 52 Direct arc image and mirror image in target | |
position (in reality, the image is less focused) | ||
mercury lamps | ||
|
•In the adjustment window, you see the direct arc image and the mirror image, which in most cases are shifted together.
43