
450dn specifications
The Lexmark 450dn is a robust monochrome laser printer designed to meet the needs of small to medium-sized businesses, offering high-quality printing along with efficient performance. This reliable printer stands out due to its combination of advanced features, speed, and cost-effective operation.One of the main characteristics of the Lexmark 450dn is its impressive print speed, capable of producing up to 40 pages per minute. This makes it an ideal option for busy work environments where time is of the essence. In addition, the printer has a first-page-out time of just 6.5 seconds, ensuring that users do not have to wait long for their documents.
The Lexmark 450dn employs advanced printing technologies, such as Lexmark’s Unison Toner. This technology ensures consistent and high-quality output from the first page to the last, with sharp text and detailed graphics. The printer also offers a print resolution of up to 1200 x 1200 dpi, ensuring clarity and precision in every document.
Another key feature of the 450dn is its duplex printing capability, which automatically prints on both sides of the paper. This function not only enhances productivity but also reduces paper usage, making it a more environmentally friendly choice for businesses looking to minimize their ecological footprint.
Connectivity is another area where the Lexmark 450dn excels. It offers multiple connectivity options, including USB, Ethernet, and built-in wireless capabilities. This flexibility allows multiple users within a network to easily access the printer, promoting collaborative work environments.
The printer is designed with a user-friendly interface, featuring a 2-line LCD display that provides essential information and makes operation simple. Furthermore, the Lexmark 450dn supports a variety of paper sizes and types, from standard letter-sized paper to envelopes and labels, accommodating diverse printing needs.
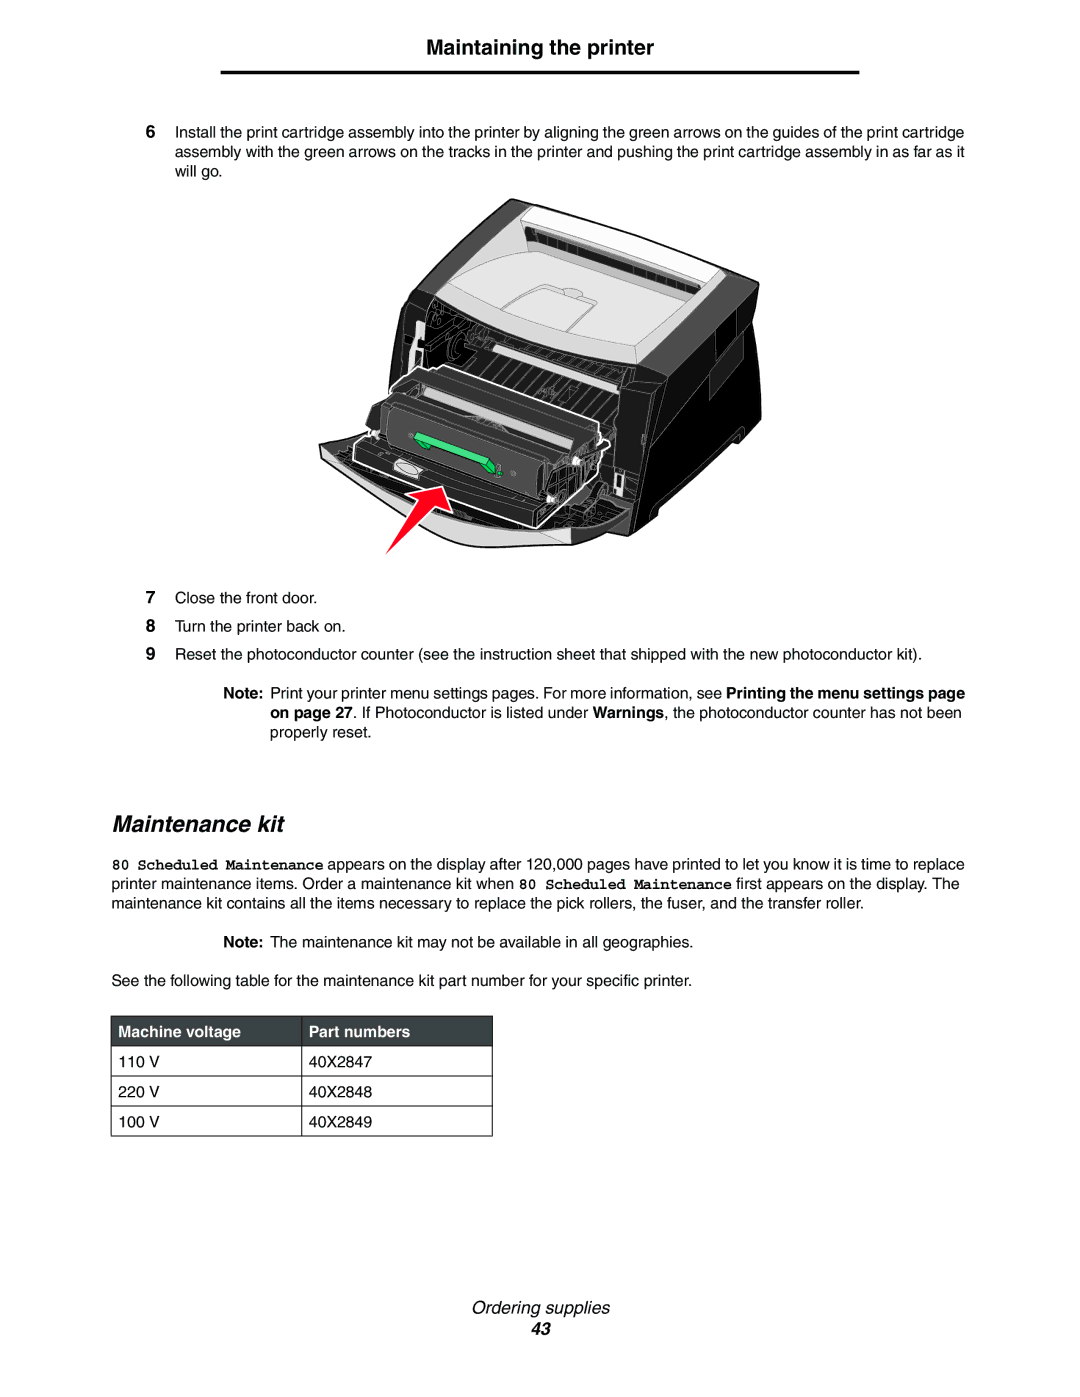
In terms of maintenance, the Lexmark 450dn is designed for easy access to consumables and parts, which promotes user convenience. Its long-lasting toner cartridges contribute to lower overall operating costs, making it an economical choice for higher-volume printing.
Overall, the Lexmark 450dn combines speed, efficiency, and versatility, making it a compelling choice for professionals seeking a dependable printing solution. With its advanced features and thoughtful design, it delivers outstanding performance for a wide range of business applications.