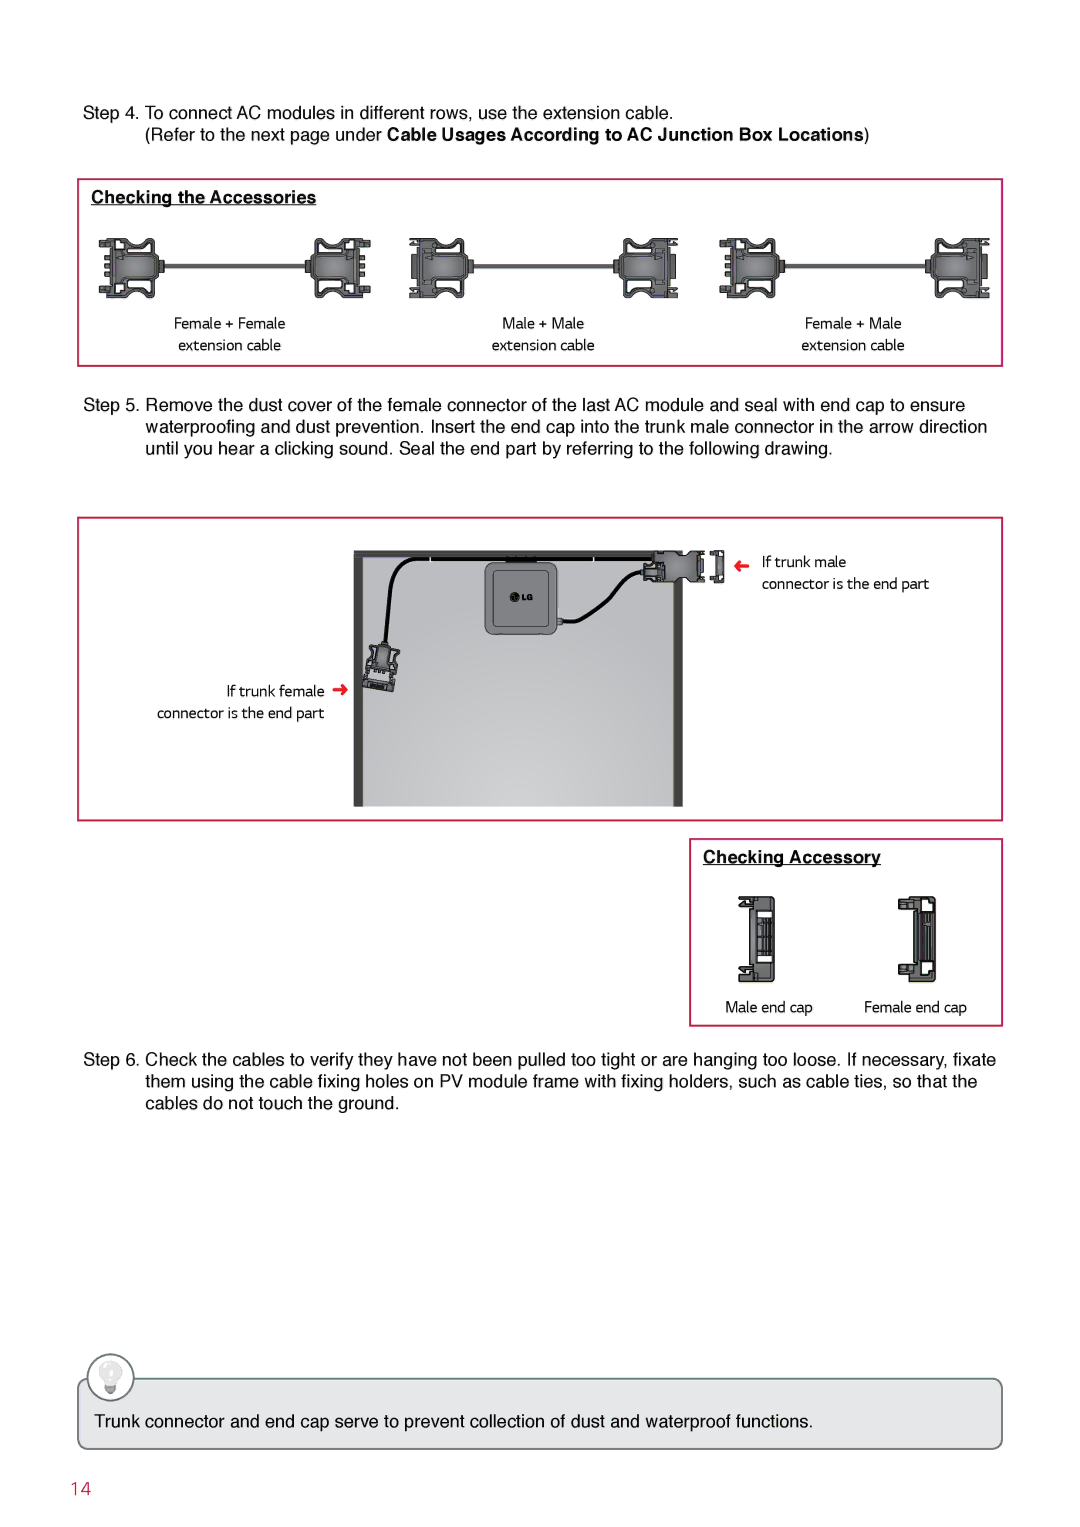
Step 4. To connect AC modules in different rows, use the extension cable.
(Refer to the next page under Cable Usages According to AC Junction Box Locations)
Checking the Accessories |
|
|
Female + Female | Male + Male | Female + Male |
extension cable | extension cable | extension cable |
Step 5. Remove the dust cover of the female connector of the last AC module and seal with end cap to ensure waterproofing and dust prevention. Insert the end cap into the trunk male connector in the arrow direction until you hear a clicking sound. Seal the end part by referring to the following drawing.
| ‹ | If trunk male |
| connector is the end part | |
|
| |
If trunk female | ‹ |
|
connector is the end part |
|
|
Checking Accessory
Male end cap | Female end cap |
Step 6. Check the cables to verify they have not been pulled too tight or are hanging too loose. If necessary, fixate them using the cable fixing holes on PV module frame with fixing holders, such as cable ties, so that the cables do not touch the ground.
Trunk connector and end cap serve to prevent collection of dust and waterproof functions.
14
