English Manual
1Disconnect all cables from the REMOTE module and take it to the computer.
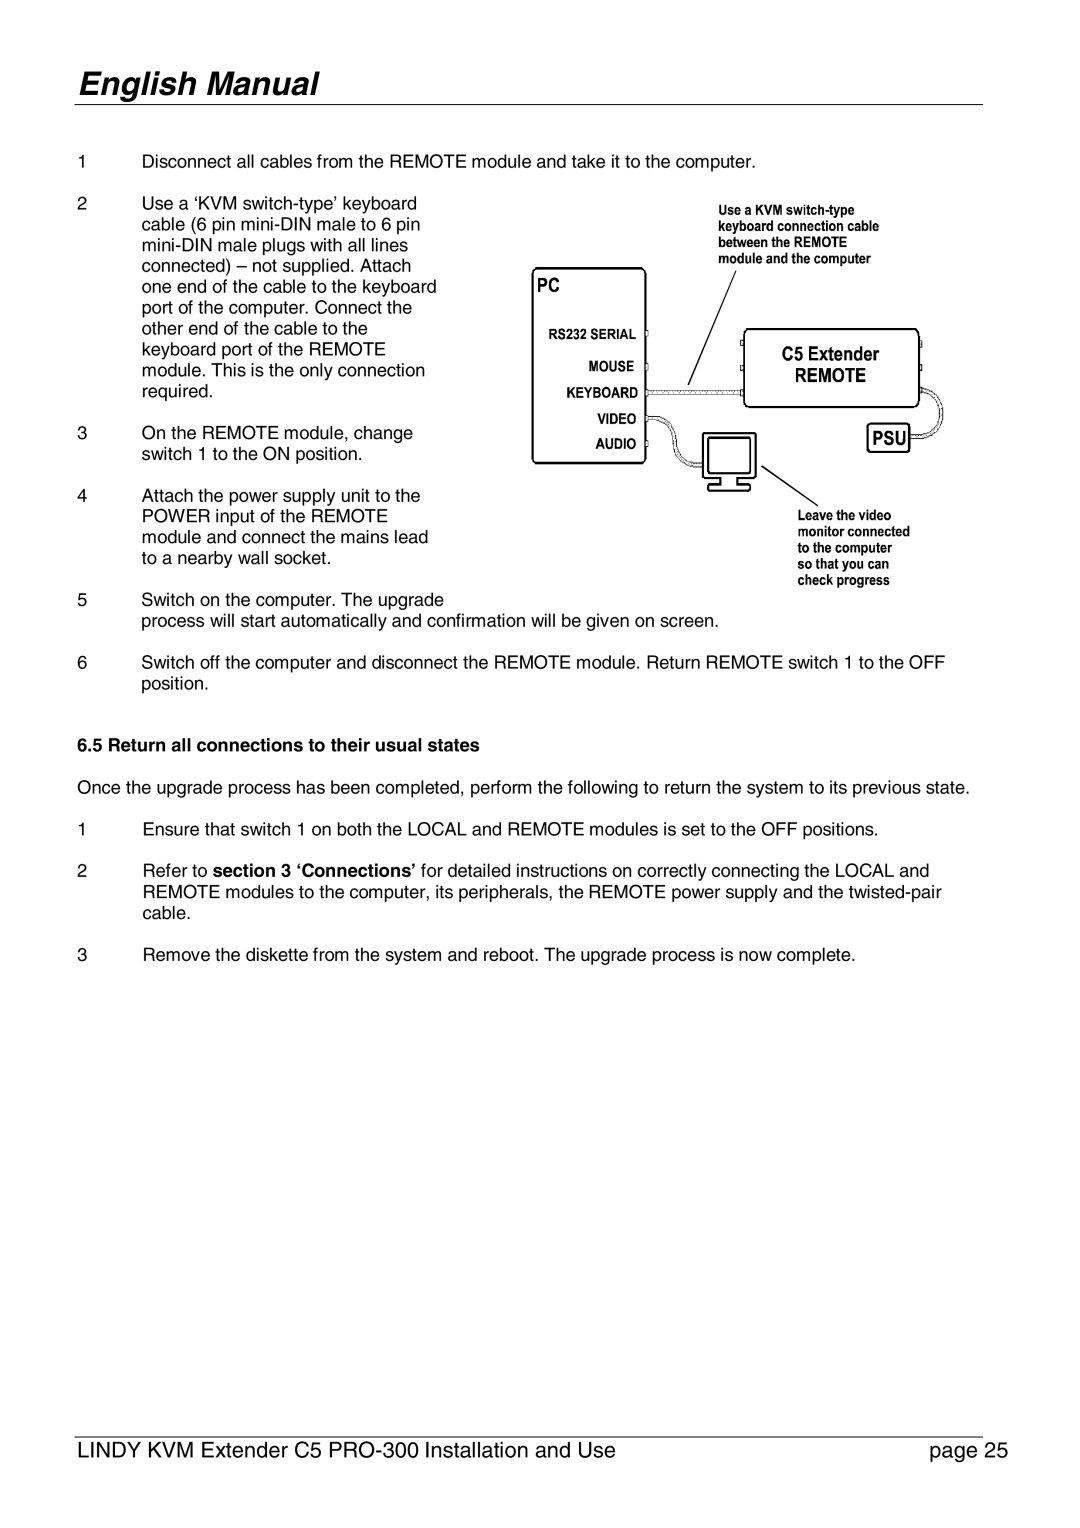
2Use a ‘KVM
cable (6 pin
3 On the REMOTE module, change switch 1 to the ON position.
4 Attach the power supply unit to the POWER input of the REMOTE module and connect the mains lead to a nearby wall socket.
5Switch on the computer. The upgrade
process will start automatically and confirmation will be given on screen.
6Switch off the computer and disconnect the REMOTE module. Return REMOTE switch 1 to the OFF position.
6.5 Return all connections to their usual states
Once the upgrade process has been completed, perform the following to return the system to its previous state.
1Ensure that switch 1 on both the LOCAL and REMOTE modules is set to the OFF positions.
2Refer to section 3 ‘Connections’ for detailed instructions on correctly connecting the LOCAL and REMOTE modules to the computer, its peripherals, the REMOTE power supply and the
3Remove the diskette from the system and reboot. The upgrade process is now complete.
LINDY KVM Extender C5 | page 25 |