English Manual
1Insert a formatted disk into the floppy disk drive.
2Select ‘Start’, then ‘Settings’ and then ‘Control Panel’.
3Double click on the ‘Add/Remove Programs’ icon.
4Select the ‘Startup Disk’ tab.
5Click ‘Create Disk’ and follow the instructions.
To create a startup disk in Windows 95/98 (alternative method)
1Insert a disk into the floppy disk drive.
2Right mouse click on the ‘3½ Floppy (A:)’ icon and select ‘Format’.
3Select the ‘Full format’ option and ensure that the ‘Copy system files’ box is checked.
4Select ‘Start’ to format the disk.
To create a startup disk from
1Insert a disk into the floppy disk drive and check that the drive is configured as drive A (it usually is).
2At the DOS prompt (C:\>) type:
FORMAT A: /S
and follow the instructions given by DOS.
Copy the downloaded files to the disk
Once the diskette has been formatted, using Windows Explorer or the My Computer option, copy the downloaded and decompressed files from your computer to the floppy diskette.
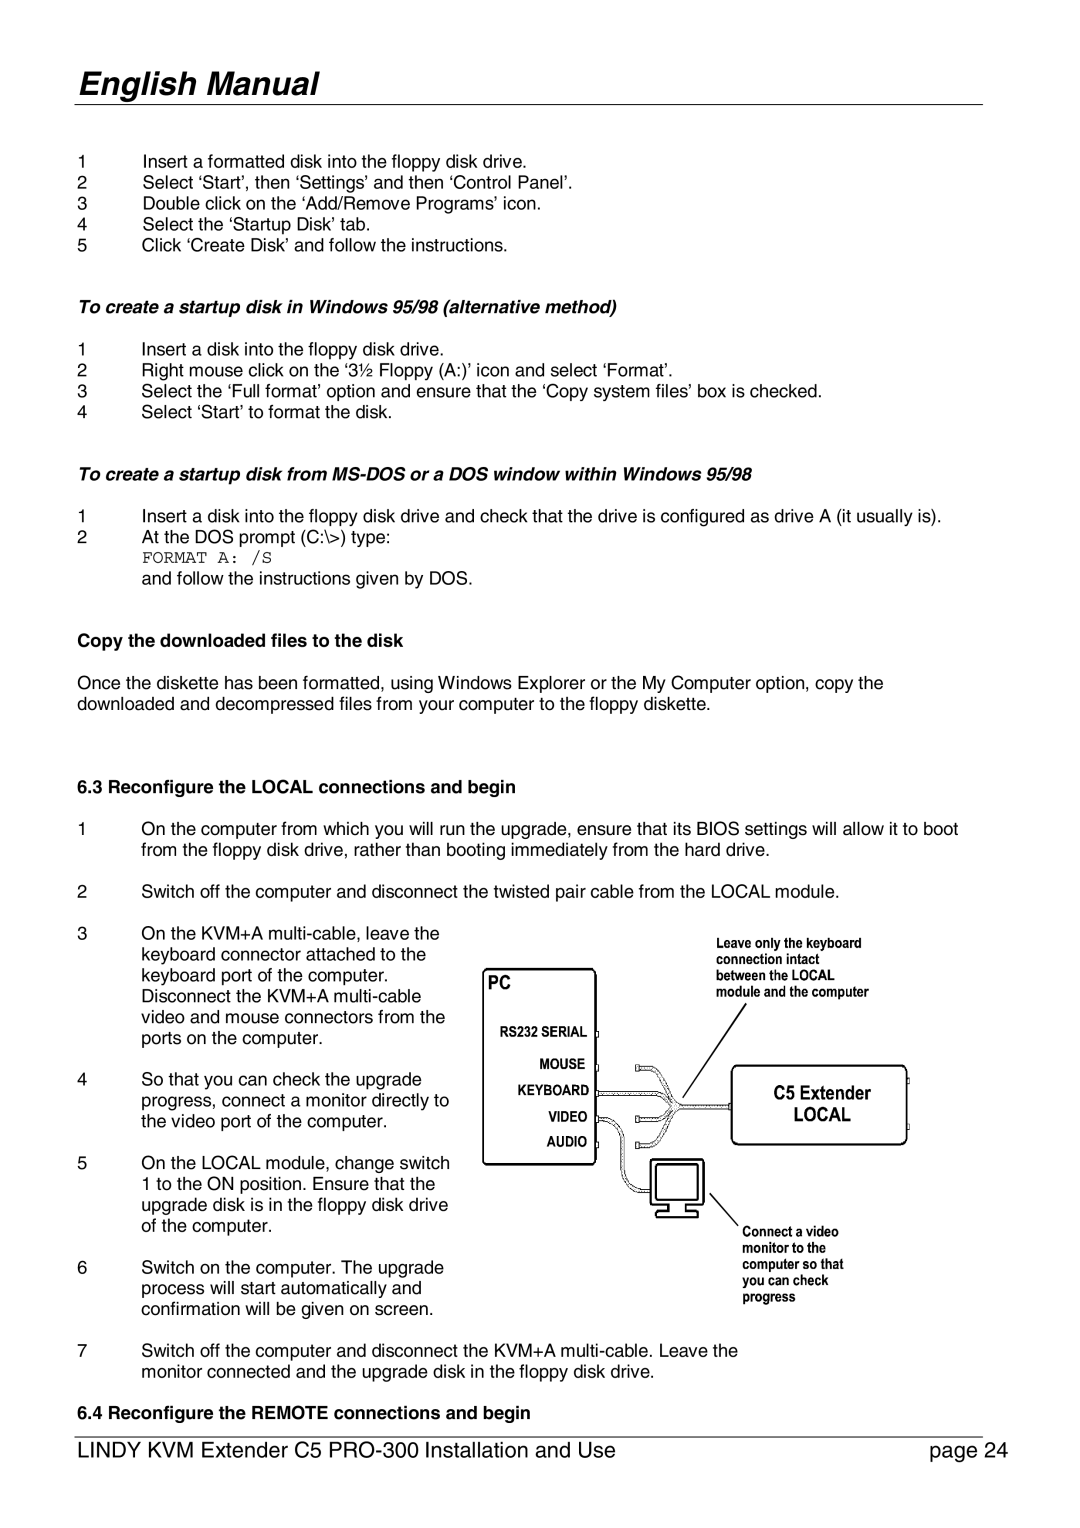
6.3 Reconfigure the LOCAL connections and begin
1On the computer from which you will run the upgrade, ensure that its BIOS settings will allow it to boot from the floppy disk drive, rather than booting immediately from the hard drive.
2Switch off the computer and disconnect the twisted pair cable from the LOCAL module.
3On the KVM+A
keyboard connector attached to the keyboard port of the computer. Disconnect the KVM+A
4 So that you can check the upgrade progress, connect a monitor directly to the video port of the computer.
5On the LOCAL module, change switch 1 to the ON position. Ensure that the upgrade disk is in the floppy disk drive
of the computer.
6 Switch on the computer. The upgrade process will start automatically and confirmation will be given on screen.
7Switch off the computer and disconnect the KVM+A
6.4 Reconfigure the REMOTE connections and begin
LINDY KVM Extender C5 | page 24 |