Instant Wireless™ Series
6.When the “Wireless Network Connection Properties” window appears, as in Figure
7.If the appropriate wire- less network, specified by the Router’s SSID, is displayed in the “Preferred networks” section, as shown in Figure
Otherwise, click on the |
| |||
appropriate | wireless |
| ||
network, specified | by | Figure | ||
the Router’s | SSID, | in | ||
| ||||
the “Available networks” section. Then, click the Configure button
Figure C-9
Wireless Access Point Router with 4-Port Switch
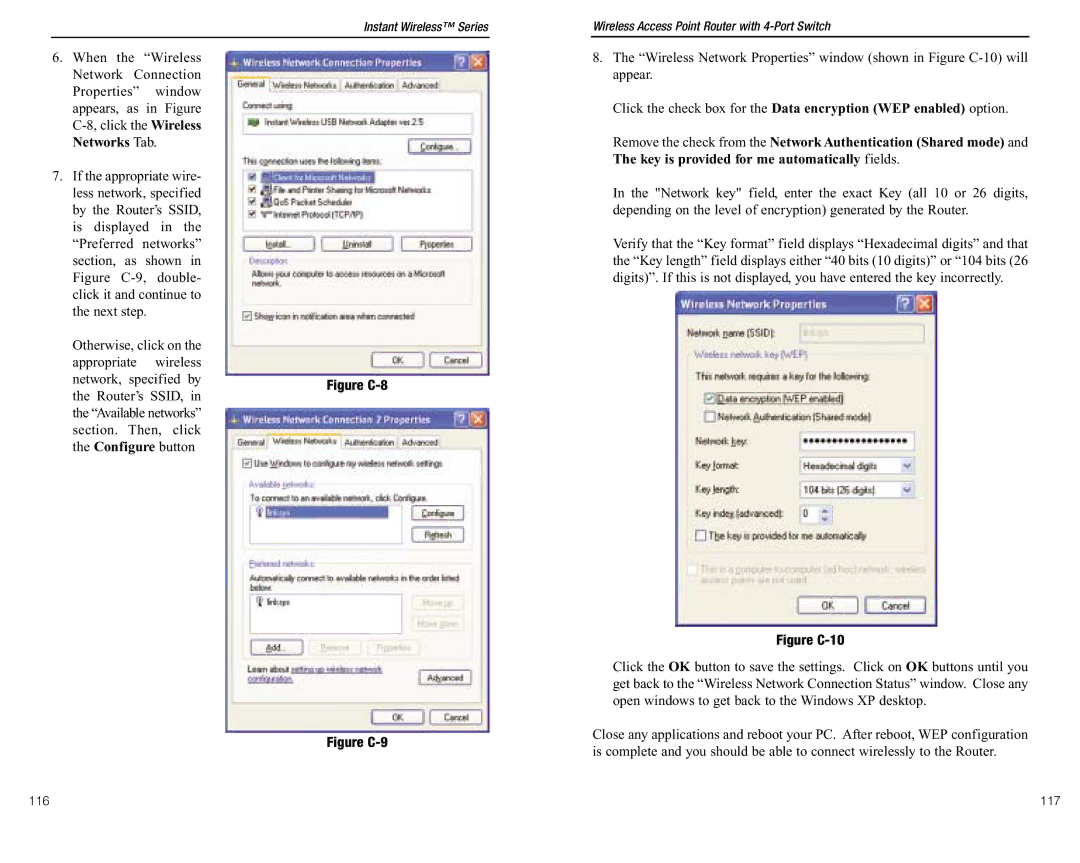
8.The “Wireless Network Properties” window (shown in Figure
Click the check box for the Data encryption (WEP enabled) option.
Remove the check from the Network Authentication (Shared mode) and The key is provided for me automatically fields.
In the "Network key" field, enter the exact Key (all 10 or 26 digits, depending on the level of encryption) generated by the Router.
Verify that the “Key format” field displays “Hexadecimal digits” and that the “Key length” field displays either “40 bits (10 digits)” or “104 bits (26 digits)”. If this is not displayed, you have entered the key incorrectly.
Figure C-10
Click the OK button to save the settings. Click on OK buttons until you get back to the “Wireless Network Connection Status” window. Close any open windows to get back to the Windows XP desktop.
Close any applications and reboot your PC. After reboot, WEP configuration is complete and you should be able to connect wirelessly to the Router.
116 | 117 |