Wireless-G Router for Mobile Broadband
Hardware Installation for Connection to Another Router
Broadband
Before you install the
instructions below to change the default IP address of the existing Router to 192.168.2.1.
NOTE: Steps
First, make sure the Router is NOT connected to your network. Then follow these instructions: | Router |
|
1.To access the other Router’s
2.A password request page will appear. Leave the User Name field blank. In the Password field, enter the password you have set (the default password is admin). Then click the OK button.
3. | The first screen that appears will display the Setup tab. In the Network Setup section, there is a setting | |
| called Local IP Address, which is set to 192.168.1.1. Change this to 192.168.2.1. | |
| for Mobile | |
|
| |
4. | Click the Save Settings button to save your change, and then exit the | Broadband |
| ||
5. | Power down your network devices. Now you will begin the hardware installation of Router. |
|
6. | Locate an optimum location for the Router. The best place for the Router is usually at the center of your | Multiple PCs |
| wireless network, with line of sight to all of your mobile stations. | |
|
|
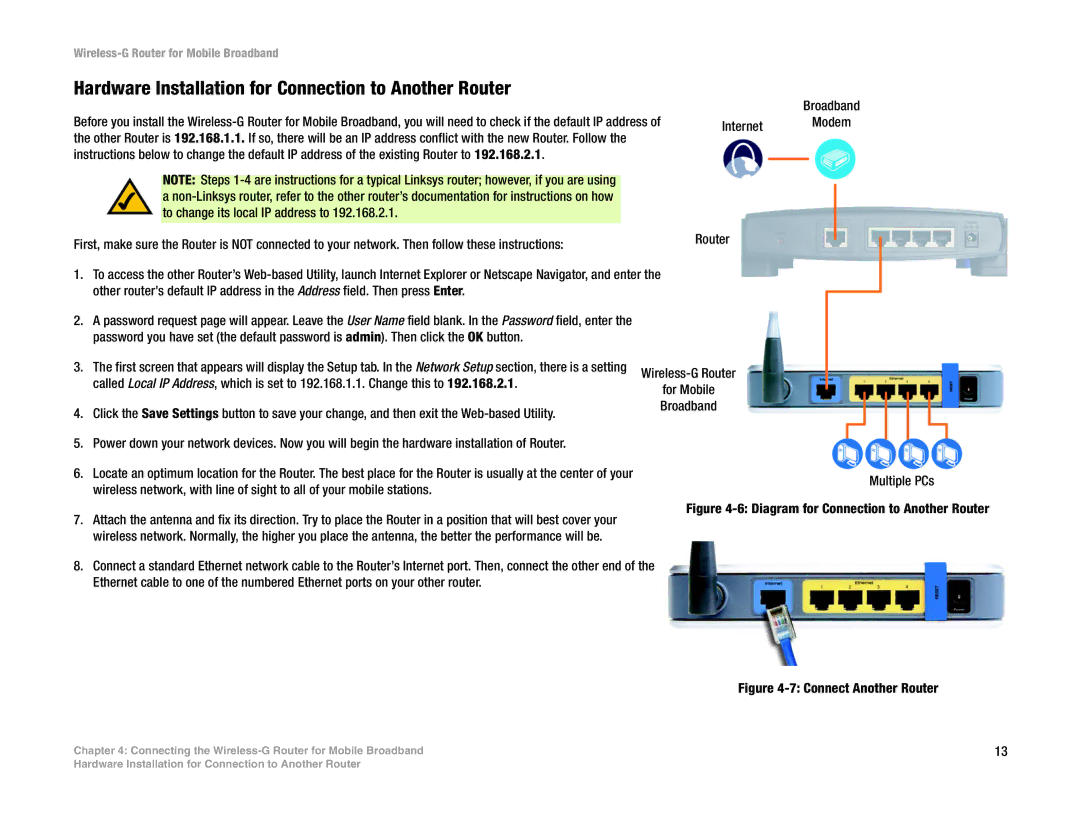
Figure 4-6: Diagram for Connection to Another Router
7.Attach the antenna and fix its direction. Try to place the Router in a position that will best cover your wireless network. Normally, the higher you place the antenna, the better the performance will be.
8.Connect a standard Ethernet network cable to the Router’s Internet port. Then, connect the other end of the Ethernet cable to one of the numbered Ethernet ports on your other router.
Figure 4-7: Connect Another Router
Chapter 4: Connecting the | 13 |
Hardware Installation for Connection to Another Router
