P 5/ 25
 Repair
[3] DISASSEMBLY/ASSEMBLY
[3] -1A. Bit holder section for BHR242
DISASSEMBLING for BHR242
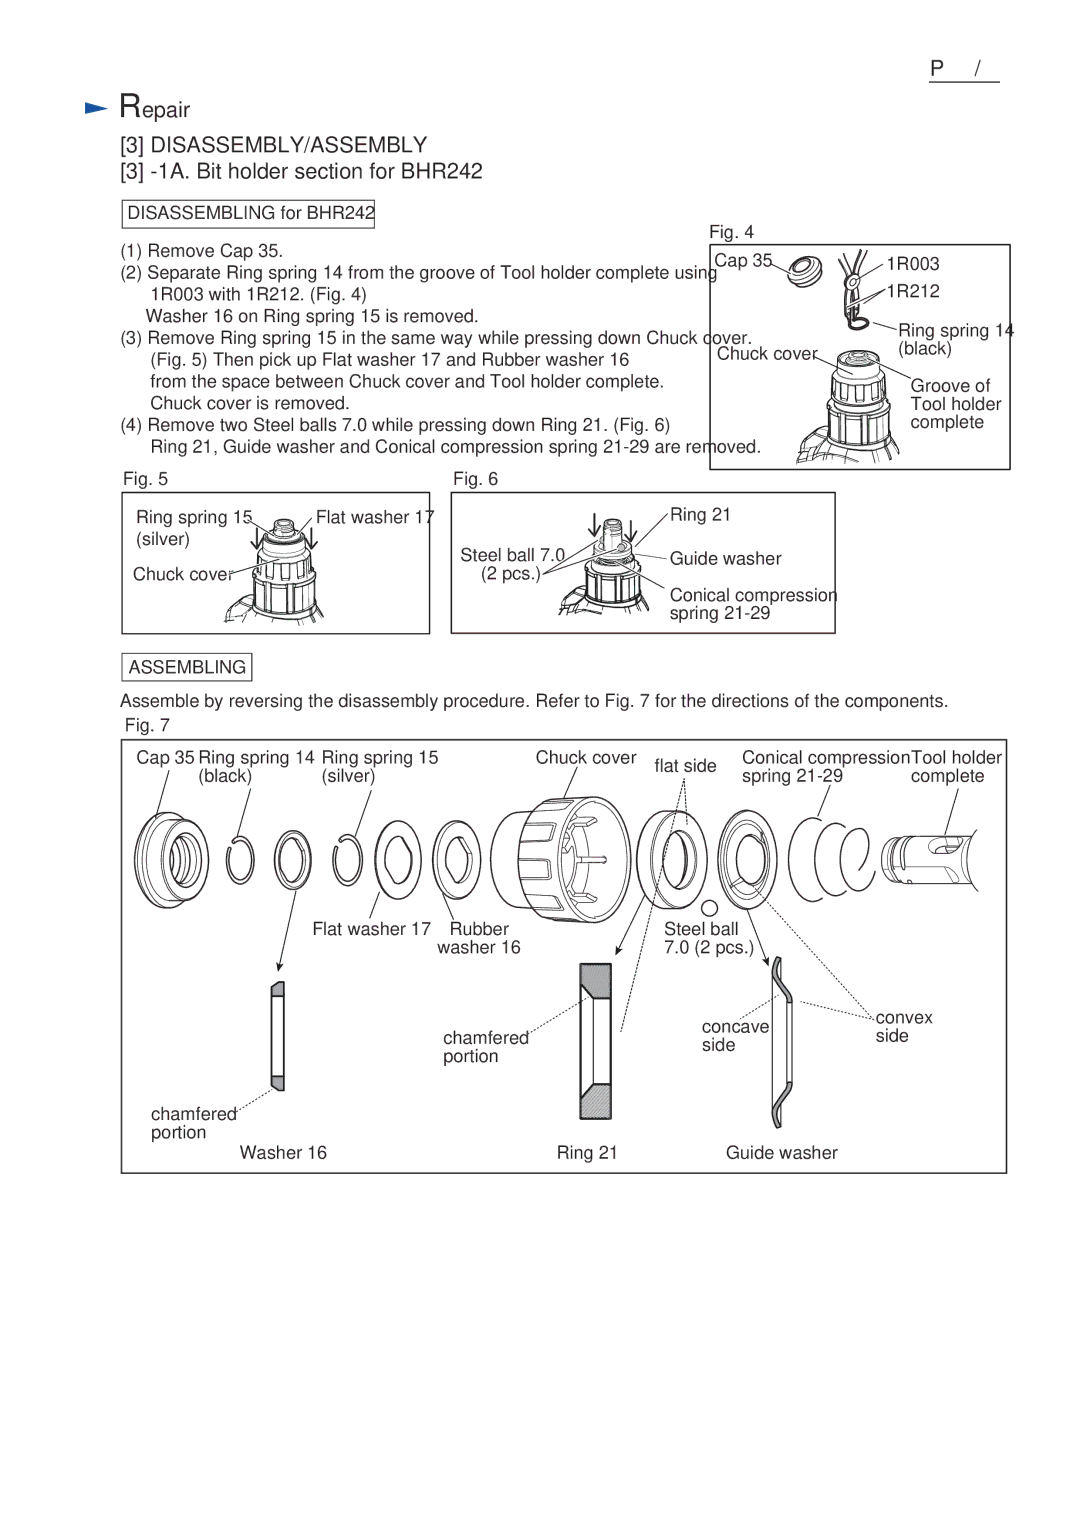
(1)Remove Cap 35.
(2)Separate Ring spring 14 from the groove of Tool holder complete using 1R003 with 1R212. (Fig. 4)
Washer 16 on Ring spring 15 is removed.
(3)Remove Ring spring 15 in the same way while pressing down Chuck cover. (Fig. 5) Then pick up Flat washer 17 and Rubber washer 16
from the space between Chuck cover and Tool holder complete. Chuck cover is removed.
(4)Remove two Steel balls 7.0 while pressing down Ring 21. (Fig. 6)
Ring 21, Guide washer and Conical compression spring
Fig. 5 | Fig. 6 |
Fig. 4
Cap 35 | 1R003 |
| 1R212 |
| Ring spring 14 |
Chuck cover | (black) |
| Groove of |
| Tool holder |
| complete |
Ring spring 15 Flat washer 17 (silver) ![]()
![]()
![]()
Chuck cover![]()
ASSEMBLING
| Ring 21 |
Steel ball 7.0 | Guide washer |
(2 pcs.) | Conical compression |
| |
| spring |
Assemble by reversing the disassembly procedure. Refer to Fig. 7 for the directions of the components.
Fig. 7
Cap 35 Ring spring 14 | Ring spring 15 | Chuck cover | flat side | Conical compression | Tool holder |
(black) | (silver) |
| spring | complete | |
|
|
Flat washer 17 Rubber | Steel ball |
| |
washer 16 | 7.0 (2 pcs.) |
| |
| concave | convex | |
chamfered | side | ||
side | |||
portion |
| ||
|
|
chamfered portion
Washer 16 | Ring 21 | Guide washer |
