Installing the Projector
Considerations for projector installation
Please read the following carefully before in- stalling this unit.
Installation Environment
This unit is a precision device. Do not install it in the following places. Doing so may cause fire or malfunction of the unit.
•Where there is water, humidity or dust
•Where the unit may be subjected to oily or ciga- rette smoke
•On a soft surface such as carpet or cushion
•Where the unit may be subjected to high tem- perature due to direct sunlight
•When temperature is high or low.
Allowable operation temperature range: +5 to +35 degrees Celsius.
Allowable relative humidity range: 20 % to 80 % (no condensation)
Allowable storage temperature range:
•Any room in which there is cigarette smoke or grease.
Even where smoke and grease levels are mini- mal, prolonged exposure will affect this unit. This unit produces significant amounts of heat, and the optical components are cooled by taking in a large amount of air. The optical path may be soiled by grease/dirt, thus causing images to become dark or colour projection to deteriorate. Where soiling of the optical compo- nents occurs, total removal of grease/dirt may not be possible.
Operating Precautions
This unit uses a light source that reaches high temperatures during projection.
Do not allow projection under the follow- ing conditions, as doing so may cause fire or failure of the unit:
•Projection with the unit laid on its sides
•Projection with the unit installed in an unrea- sonable angle
Avoid using this unit at an angle of more than
5 degrees horizontally and 25 degrees vertically. Doing so may cause unevenness in the colour and/or shorten the lamp life.
•Projection in a location that blocks the air inlets or exhaust vents
•Projection in a place exposed to air blasts from an air conditioner
•Projection without removing the lens cap
Mounting the projector
The projector can be operated in a
Precautions for Ceiling-mount
•To
•Do not mount in places that may be subjected to vibration and shock.
•The depth of the threaded holes is 30 mm. Use screws shorter than 30 mm but longer than 19 mm. Longer screws may damage internal parts of the projector and cause malfunction.
•Safety of the installation location should be considered in case this unit, or a part of it, falls. Note that if the
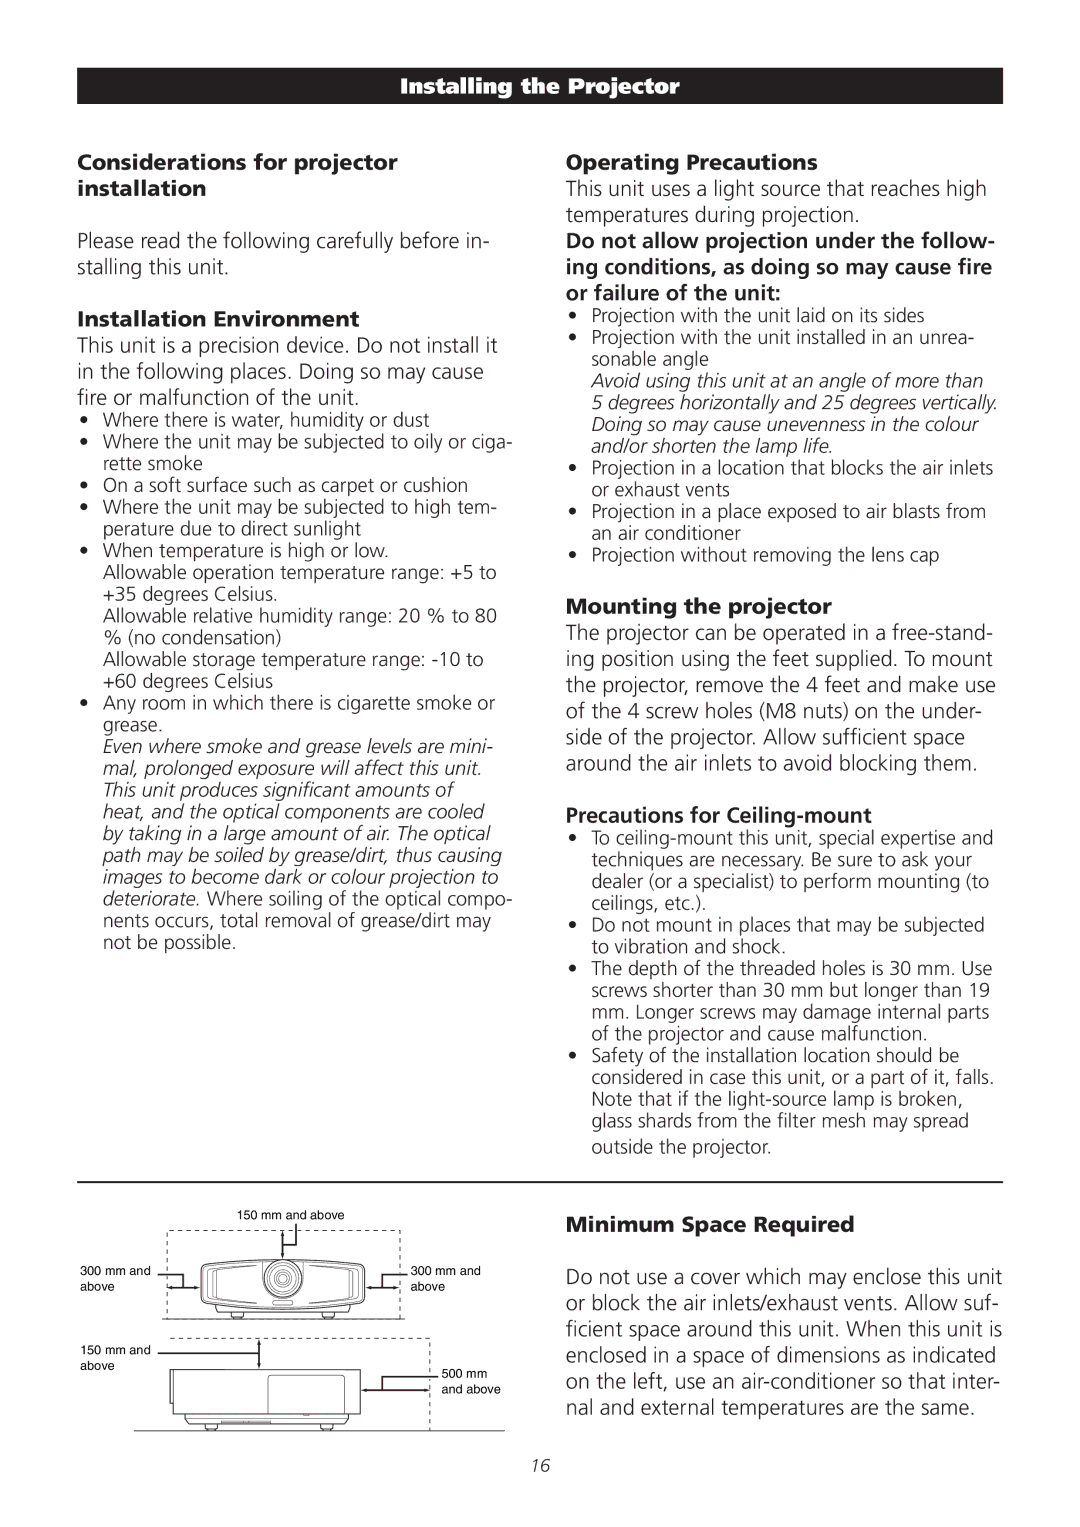
300 mm and above
150 mm and above
150 mm and above
![]() 300 mm and
300 mm and ![]()
![]() above
above
500 mm and above
Minimum Space Required
Do not use a cover which may enclose this unit or block the air inlets/exhaust vents. Allow suf- ficient space around this unit. When this unit is enclosed in a space of dimensions as indicated on the left, use an
16