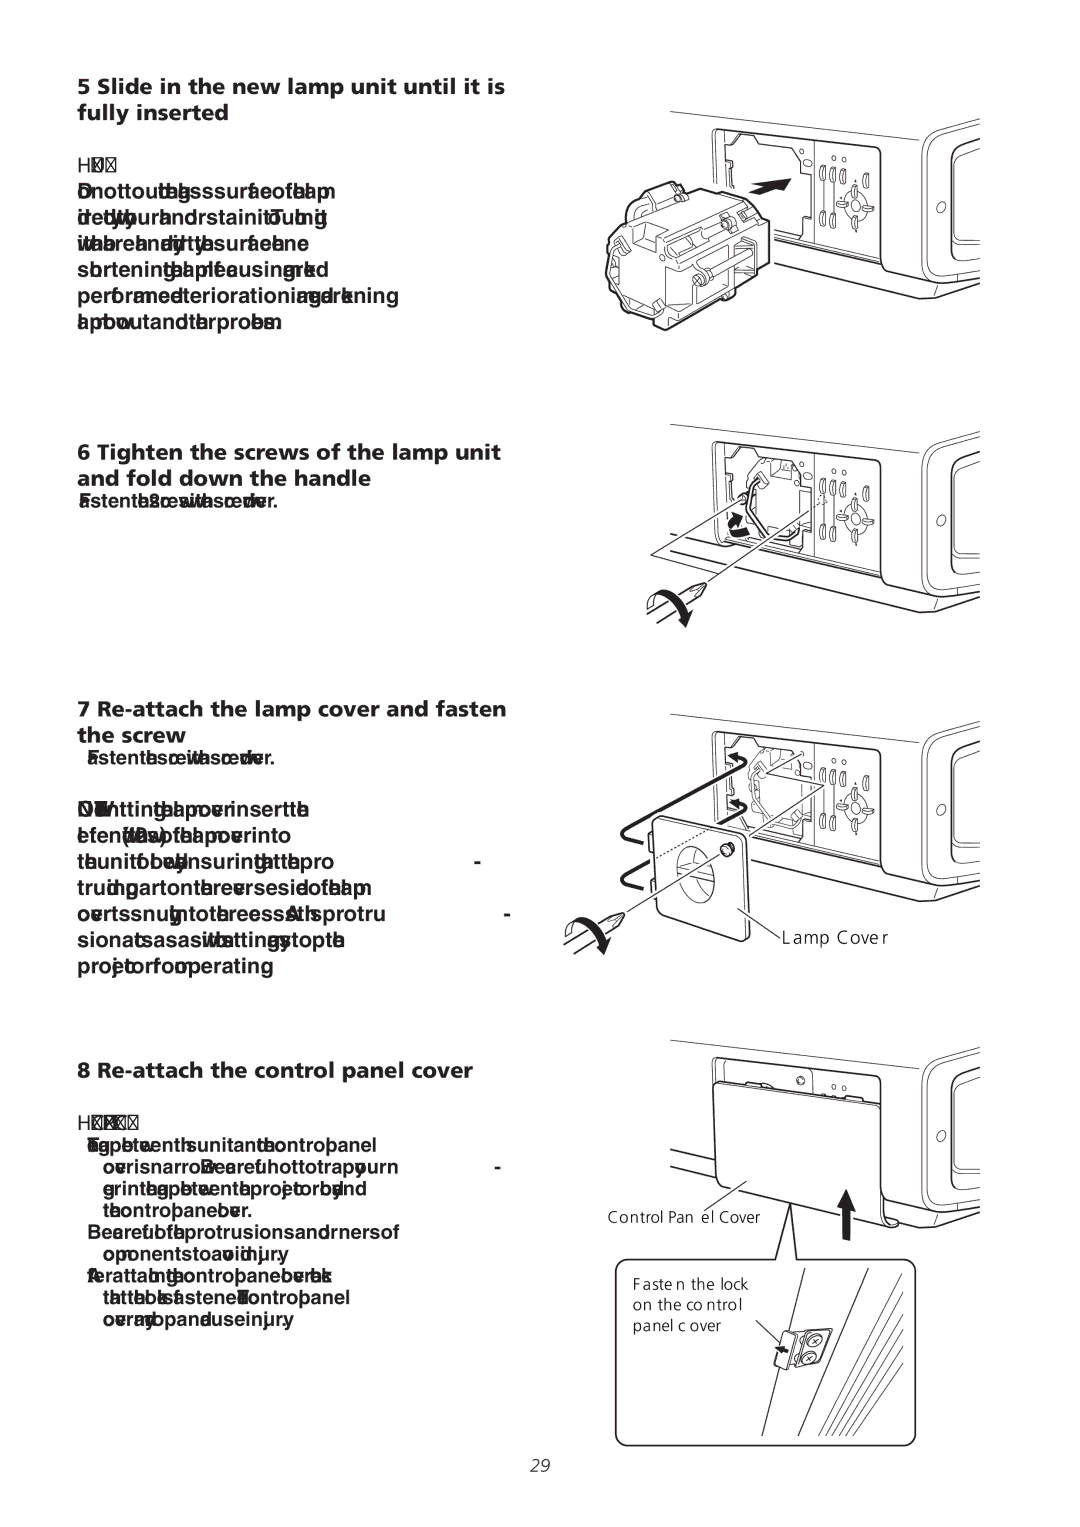
5 Slide in the new lamp unit until it is fully inserted
Handling the new Lamp Unit
Do not touch the glass surface of the lamp directly with your hand or stain it. Touching it with a bare hand may dirty the surface, hence shortening the lamp life, causing marked performance deterioration, image darkening, lamp blowout and other problems.
6 Tighten the screws of the lamp unit and fold down the handle
• Fasten the 2 screws with a ‘+’ screwdriver.
7 Re-attach the lamp cover and fasten the screw
• Fasten the screw with a ‘+’ screwdriver.
NOTE: When fitting the lamp cover, insert the left end (with 2 claws) of the lamp cover into the unit, followed by ensuring that the pro- truding part on the reverse side of the lamp cover fits snugly into the recess. As this protru- sion acts as a switch, misfitting may stop the projector from operating.
8
Handling the Control Panel Cover
•The gap between this unit and the control panel cover is narrow. Be careful not to trap your fin- ger in the gap between the projector body and the control panel cover.
•Be careful of the protrusions and corners of components to avoid injury.
•After attaching the control panel cover, check that the lock is fastened. The control panel cover may drop and cause injury.
![]() Lamp Cover
Lamp Cover
Control Panel Cover
Fasten the lock on the control panel cover ![]()
29