JNR & WNK Assembly Instructions
C. Ignitor Wire Connection (Fig. 21)
1.Tip the grill on its back (or upside down) and attach the control panel ignitor wire to the terminal stick- ing out from the bottom of the grill. Be careful not to crack the delicate porcelain insulator.
D. Orifice Engagement (Fig. 22)
At the top end of each valve there is a tiny gas open- ing known as the orifice. Gas exits the orifice and enters a venturi where it mixes with air coming in from the side air shutter. The proper mixture of air and gas produces a clean blue flame at the burner.
Make sure the valve orifice on the control panel aligns with the burner venturi tube correctly. The orifice should fit into the venturi tube ¼" to ½" inches as shown below.
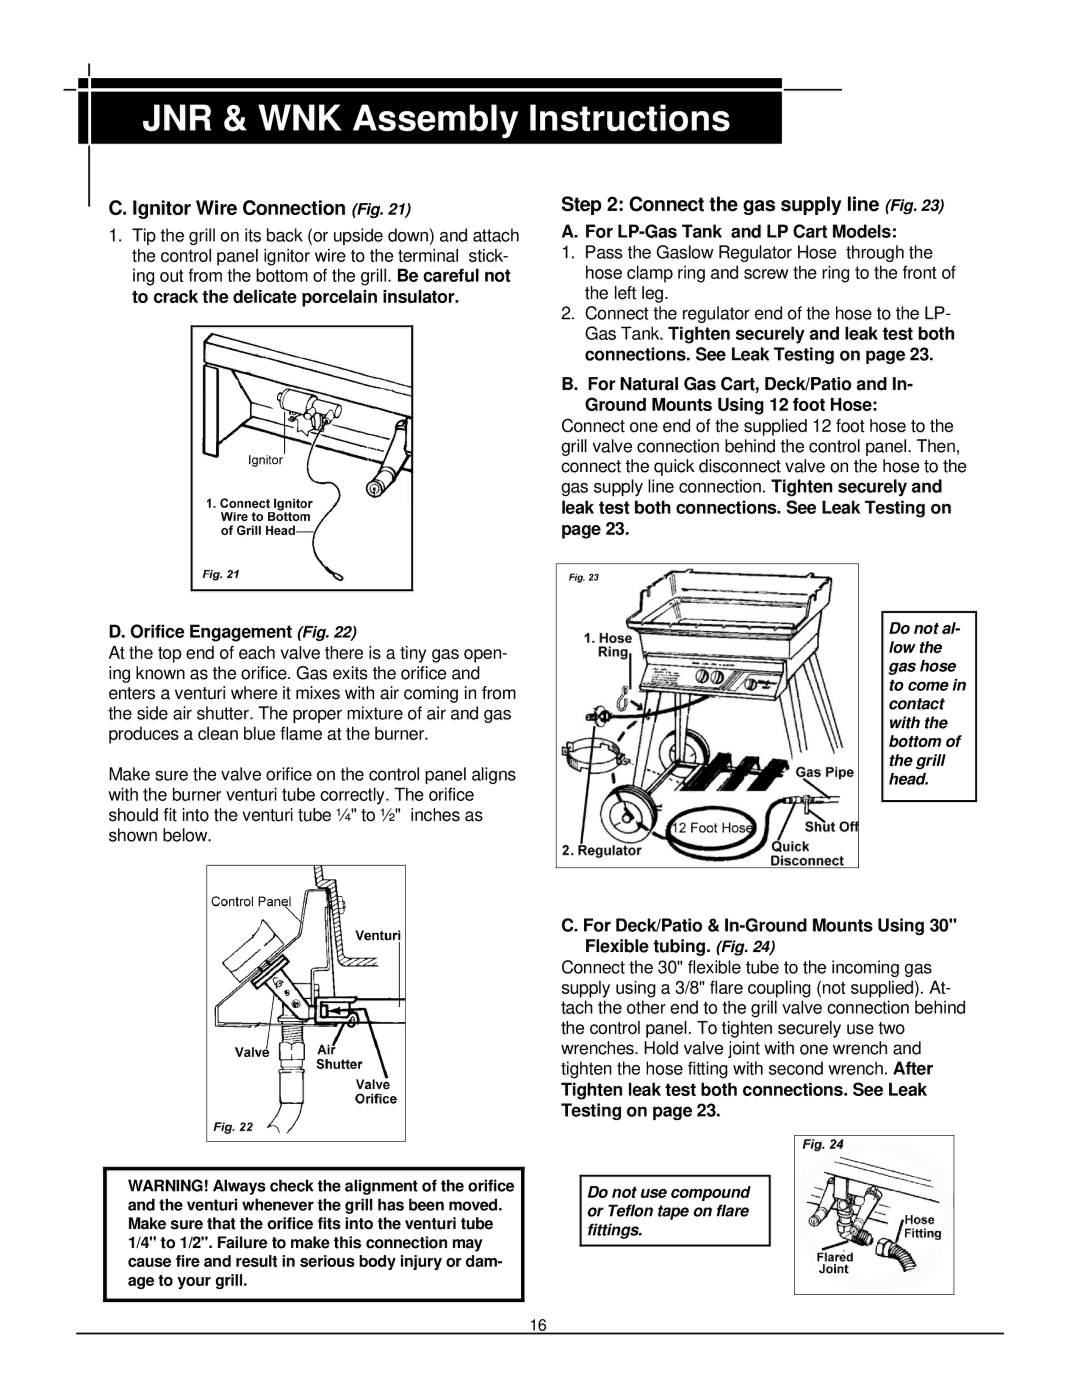
Step 2: Connect the gas supply line (Fig. 23)
A. For LP-Gas Tank and LP Cart Models:
1.Pass the Gaslow Regulator Hose through the hose clamp ring and screw the ring to the front of the left leg.
2.Connect the regulator end of the hose to the LP- Gas Tank. Tighten securely and leak test both connections. See Leak Testing on page 23.
B. For Natural Gas Cart, Deck/Patio and In- Ground Mounts Using 12 foot Hose:
Connect one end of the supplied 12 foot hose to the grill valve connection behind the control panel. Then, connect the quick disconnect valve on the hose to the gas supply line connection. Tighten securely and leak test both connections. See Leak Testing on page 23.
Do not al- low the gas hose to come in contact with the bottom of the grill head.
C. For Deck/Patio &
Connect the 30" flexible tube to the incoming gas supply using a 3/8" flare coupling (not supplied). At- tach the other end to the grill valve connection behind the control panel. To tighten securely use two wrenches. Hold valve joint with one wrench and tighten the hose fitting with second wrench. After
Tighten leak test both connections. See Leak Testing on page 23.
WARNING! Always check the alignment of the orifice and the venturi whenever the grill has been moved. Make sure that the orifice fits into the venturi tube 1/4" to 1/2". Failure to make this connection may cause fire and result in serious body injury or dam- age to your grill.
Do not use compound or Teflon tape on flare fittings.
16