Mountings
OPTION: For OPTIMUM Cart Only: (Fig. 12)
1.Attach the wheels by slipping the axle through the base, slide the wheels on and secure with the axle clips. Finish by snapping the hub caps on before standing unit upright.
Step 3: Connect the Grill Head Bottom (Fig. 13)
1. Attach the grill head bottom to the pedestal column top with four ¼ - 20 x1 ½" Hex bolts, washers under the bolt head and Kep nuts. Peel the remaining protective coating off the pedestal column.
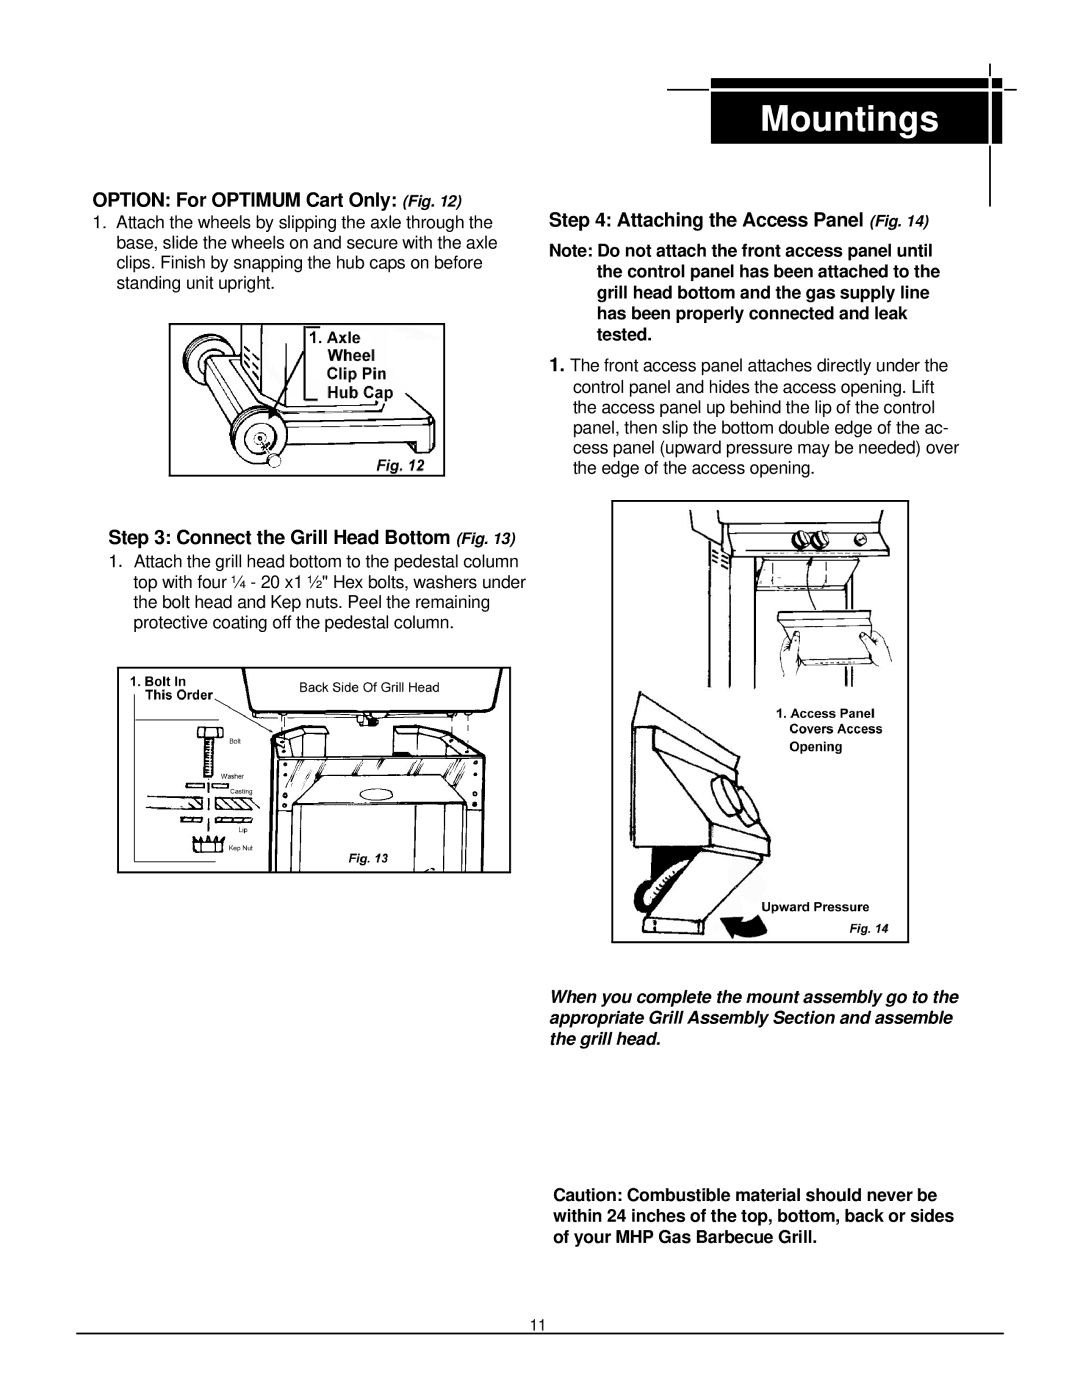
Step 4: Attaching the Access Panel (Fig. 14)
Note: Do not attach the front access panel until the control panel has been attached to the grill head bottom and the gas supply line has been properly connected and leak tested.
1.The front access panel attaches directly under the control panel and hides the access opening. Lift the access panel up behind the lip of the control panel, then slip the bottom double edge of the ac- cess panel (upward pressure may be needed) over the edge of the access opening.
When you complete the mount assembly go to the appropriate Grill Assembly Section and assemble the grill head.
Caution: Combustible material should never be within 24 inches of the top, bottom, back or sides of your MHP Gas Barbecue Grill.
11