JNR & WNK Assembly Instructions
Step 2: Continued
D. Optimum Console Mount Gas Connections
All Optimum Console mounts:
The supply line connection pass beneath the heat shield and through the
front slot with the pro- tected edge and at- taches to the valve. Don’t forget to attach the front Access Panel to the Optimum Console. (Fig. 25)
LP Propane for Optimum cart and pedestal mounts:
The hose connection from the Gaslow/ Regulator passes out the front access opening; resting on the protected slot edge beneath the control panel. The LP tank locking bar will press against the tank as it is lowered into place to prevent tank movement. (Fig. 26)
Natural gas for Optimum pedestal mount:
The gas line enters at the rear of the base curving up through the base opening.
The stainless steel flexible tubing line must be con- nected to the incoming gas line using a 3/8" flare cou- pling (not supplied by MHP). The flexible tubing then passes beneath the heat shield and through the front access opening and attaches to the control valve. (Fig. 27)
See page 26 for tubing bending instructions.
Tighten all gas connections securely and leak test both ends. See Leak Testing on page 23.
Natural gas hose for Optimum cart mount:
The natural gas cart uses a 12 foot hose with a quick disconnect (supplied). The hose passes beneath the heat shield through the front access opening and connects directly to the control valve. The quick disconnect end attaches to the gas supply line at the
(Fig. 28)
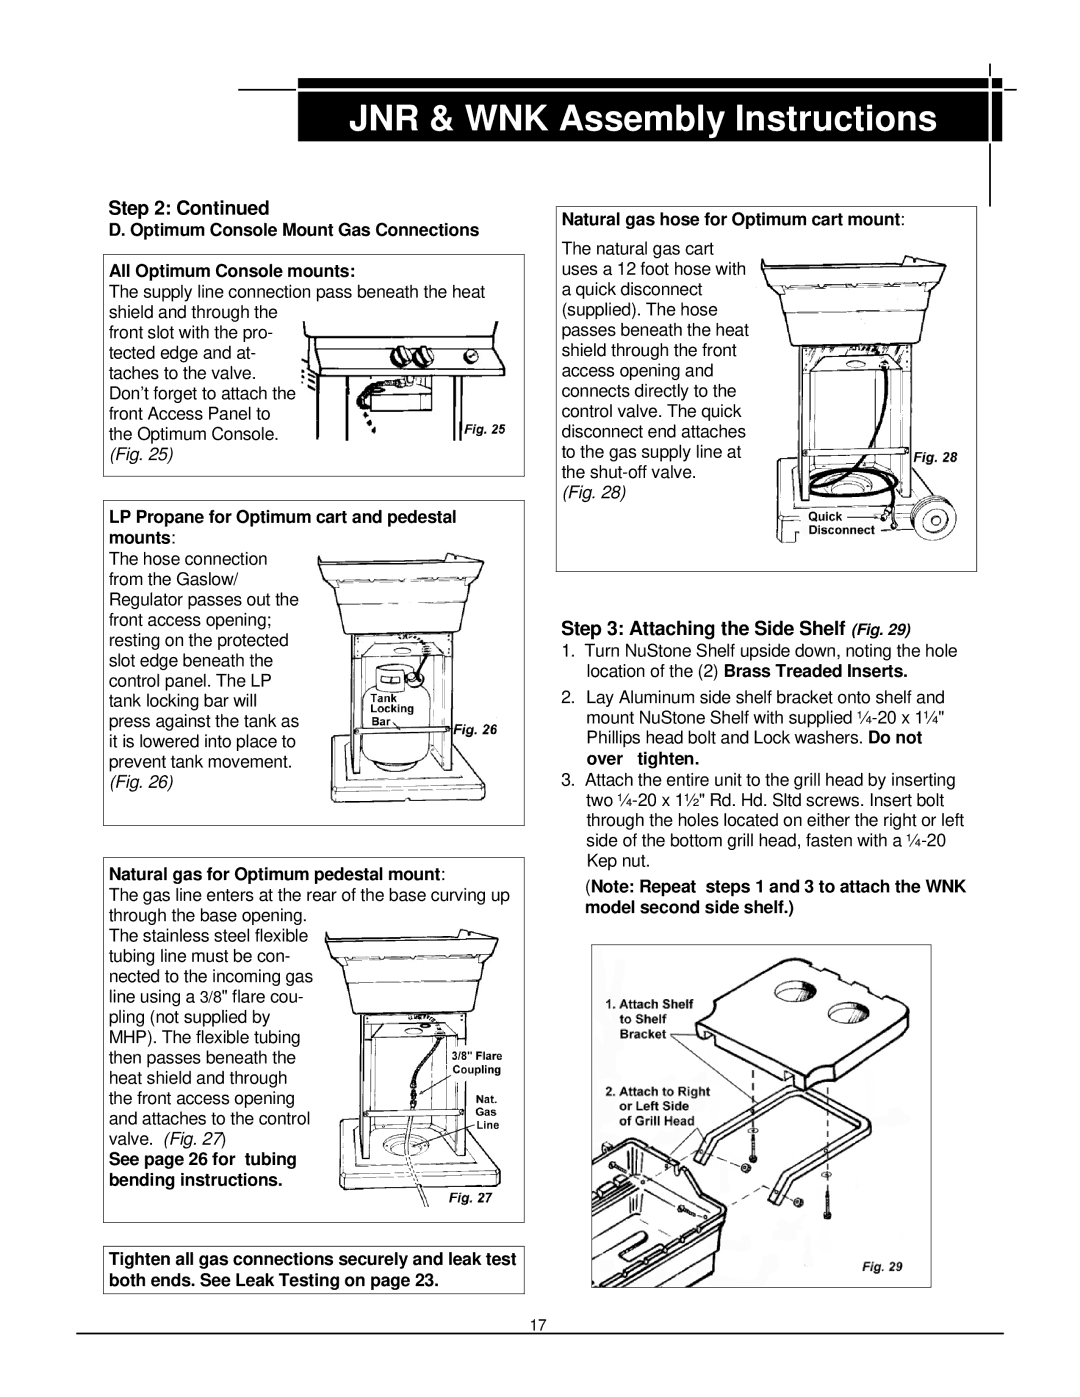
Step 3: Attaching the Side Shelf (Fig. 29)
1.Turn NuStone Shelf upside down, noting the hole location of the (2) Brass Treaded Inserts.
2.Lay Aluminum side shelf bracket onto shelf and mount NuStone Shelf with supplied
3.Attach the entire unit to the grill head by inserting two
(Note: Repeat steps 1 and 3 to attach the WNK model second side shelf.)
17