Mountings
Stainless Steel Optimum Console
Assembly Instructions
•The JNR, WNK or TJK model grills may be mounted on the Optimum Console.
•The gas supply may be either LP or Natural.
•The grill head should not be attached to the Optimum Console until the console is completely assembled
•The Optimum Console comes in two car-
Please check to be sure that all parts are included before proceeding. Contact your dealer if any parts are missing.
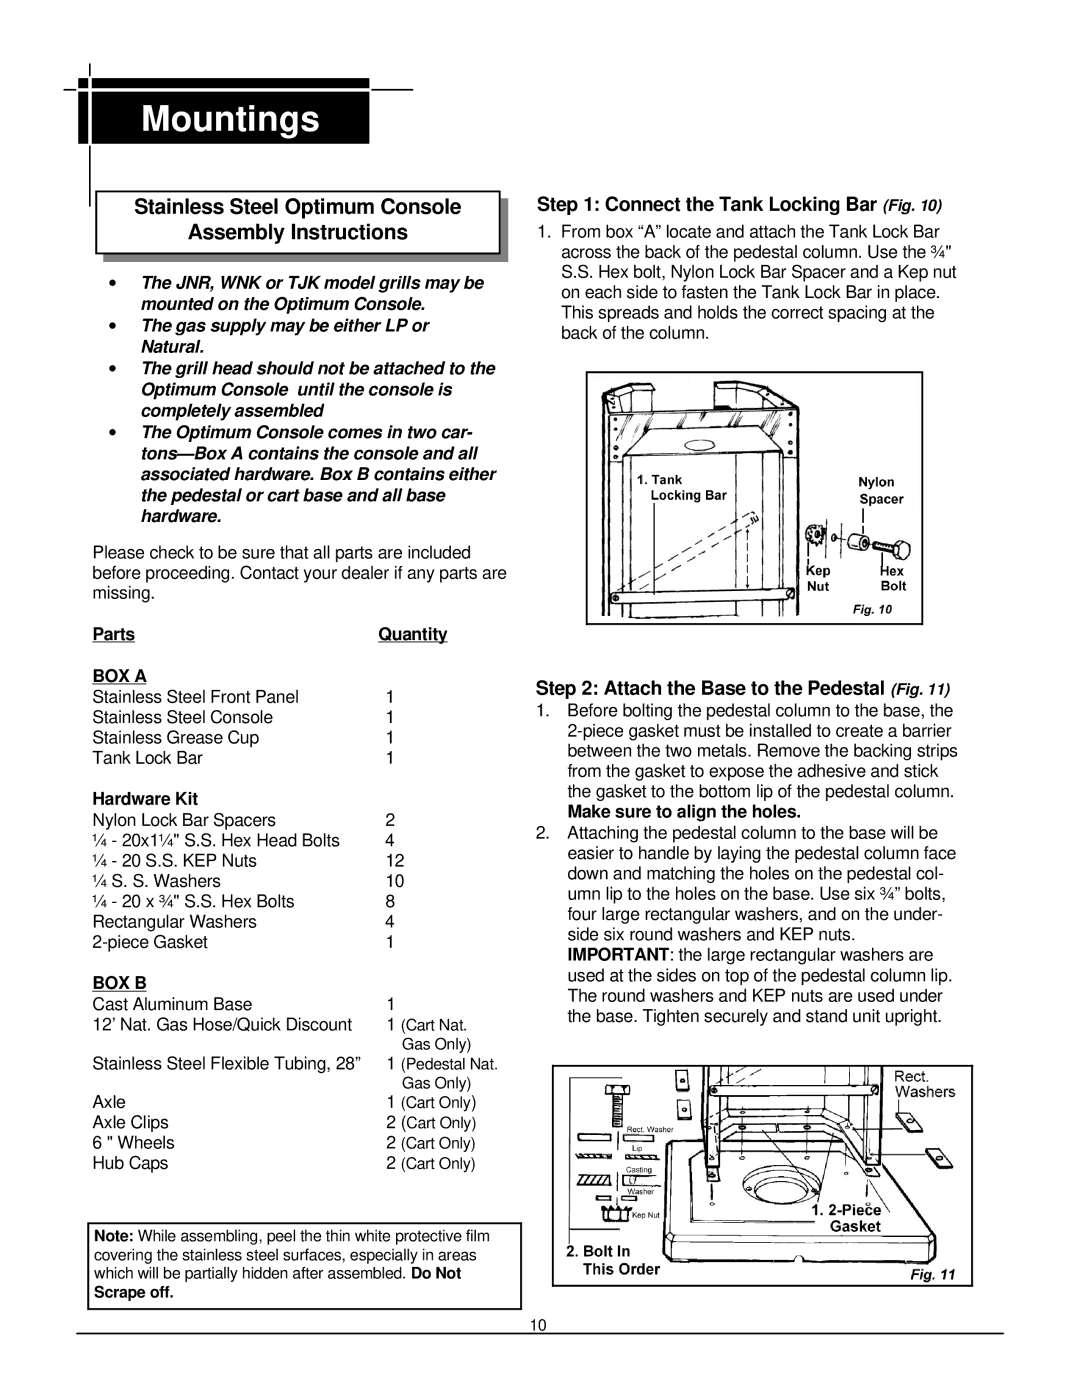
Step 1: Connect the Tank Locking Bar (Fig. 10)
1.From box “A” locate and attach the Tank Lock Bar across the back of the pedestal column. Use the ¾" S.S. Hex bolt, Nylon Lock Bar Spacer and a Kep nut on each side to fasten the Tank Lock Bar in place. This spreads and holds the correct spacing at the back of the column.
Parts | Quantity |
BOX A |
|
Stainless Steel Front Panel | 1 |
Stainless Steel Console | 1 |
Stainless Grease Cup | 1 |
Tank Lock Bar | 1 |
Hardware Kit |
|
Nylon Lock Bar Spacers | 2 |
¼ - 20x1¼" S.S. Hex Head Bolts | 4 |
¼ - 20 S.S. KEP Nuts | 12 |
¼ S. S. Washers | 10 |
¼ - 20 x ¾" S.S. Hex Bolts | 8 |
Rectangular Washers | 4 |
1 | |
BOX B |
|
Cast Aluminum Base | 1 |
12’ Nat. Gas Hose/Quick Discount | 1 (Cart Nat. |
| Gas Only) |
Stainless Steel Flexible Tubing, 28” | 1 (Pedestal Nat. |
| Gas Only) |
Axle | 1 (Cart Only) |
Axle Clips | 2 (Cart Only) |
6 " Wheels | 2 (Cart Only) |
Hub Caps | 2 (Cart Only) |
Note: While assembling, peel the thin white protective film covering the stainless steel surfaces, especially in areas which will be partially hidden after assembled. Do Not
Scrape off.
Step 2: Attach the Base to the Pedestal (Fig. 11)
1.Before bolting the pedestal column to the base, the
Make sure to align the holes.
2.Attaching the pedestal column to the base will be easier to handle by laying the pedestal column face down and matching the holes on the pedestal col- umn lip to the holes on the base. Use six ¾” bolts, four large rectangular washers, and on the under- side six round washers and KEP nuts. IMPORTANT: the large rectangular washers are used at the sides on top of the pedestal column lip. The round washers and KEP nuts are used under the base. Tighten securely and stand unit upright.
10