Step 3: Connect the Base Station
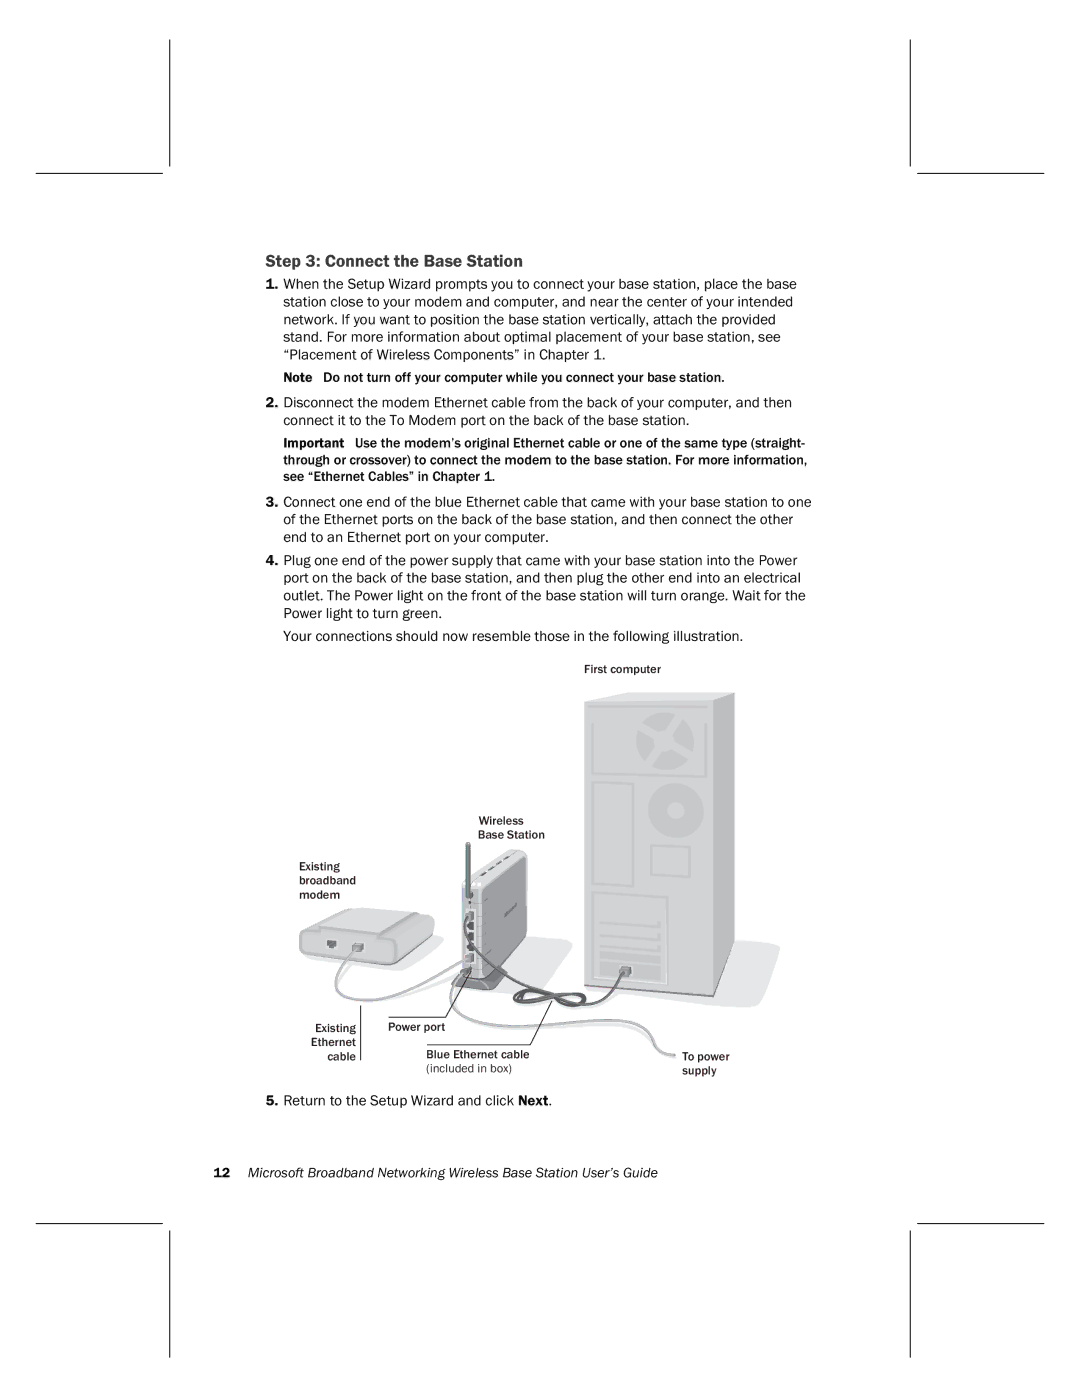
1.When the Setup Wizard prompts you to connect your base station, place the base station close to your modem and computer, and near the center of your intended network. If you want to position the base station vertically, attach the provided stand. For more information about optimal placement of your base station, see “Placement of Wireless Components” in Chapter 1.
Note Do not turn off your computer while you connect your base station.
2.Disconnect the modem Ethernet cable from the back of your computer, and then connect it to the To Modem port on the back of the base station.
Important Use the modem’s original Ethernet cable or one of the same type (straight- through or crossover) to connect the modem to the base station. For more information, see “Ethernet Cables” in Chapter 1.
3.Connect one end of the blue Ethernet cable that came with your base station to one of the Ethernet ports on the back of the base station, and then connect the other end to an Ethernet port on your computer.
4.Plug one end of the power supply that came with your base station into the Power port on the back of the base station, and then plug the other end into an electrical outlet. The Power light on the front of the base station will turn orange. Wait for the Power light to turn green.
Your connections should now resemble those in the following illustration.
First computer
Wireless
Base Station
Existing broadband modem
Existing
Ethernet
cable
Power port
Blue Ethernet cable | To power |
(included in box) | supply |
5.Return to the Setup Wizard and click Next.
12Microsoft Broadband Networking Wireless Base Station User’s Guide