8-3. Holding And Positioning Welding Gun
NOTE
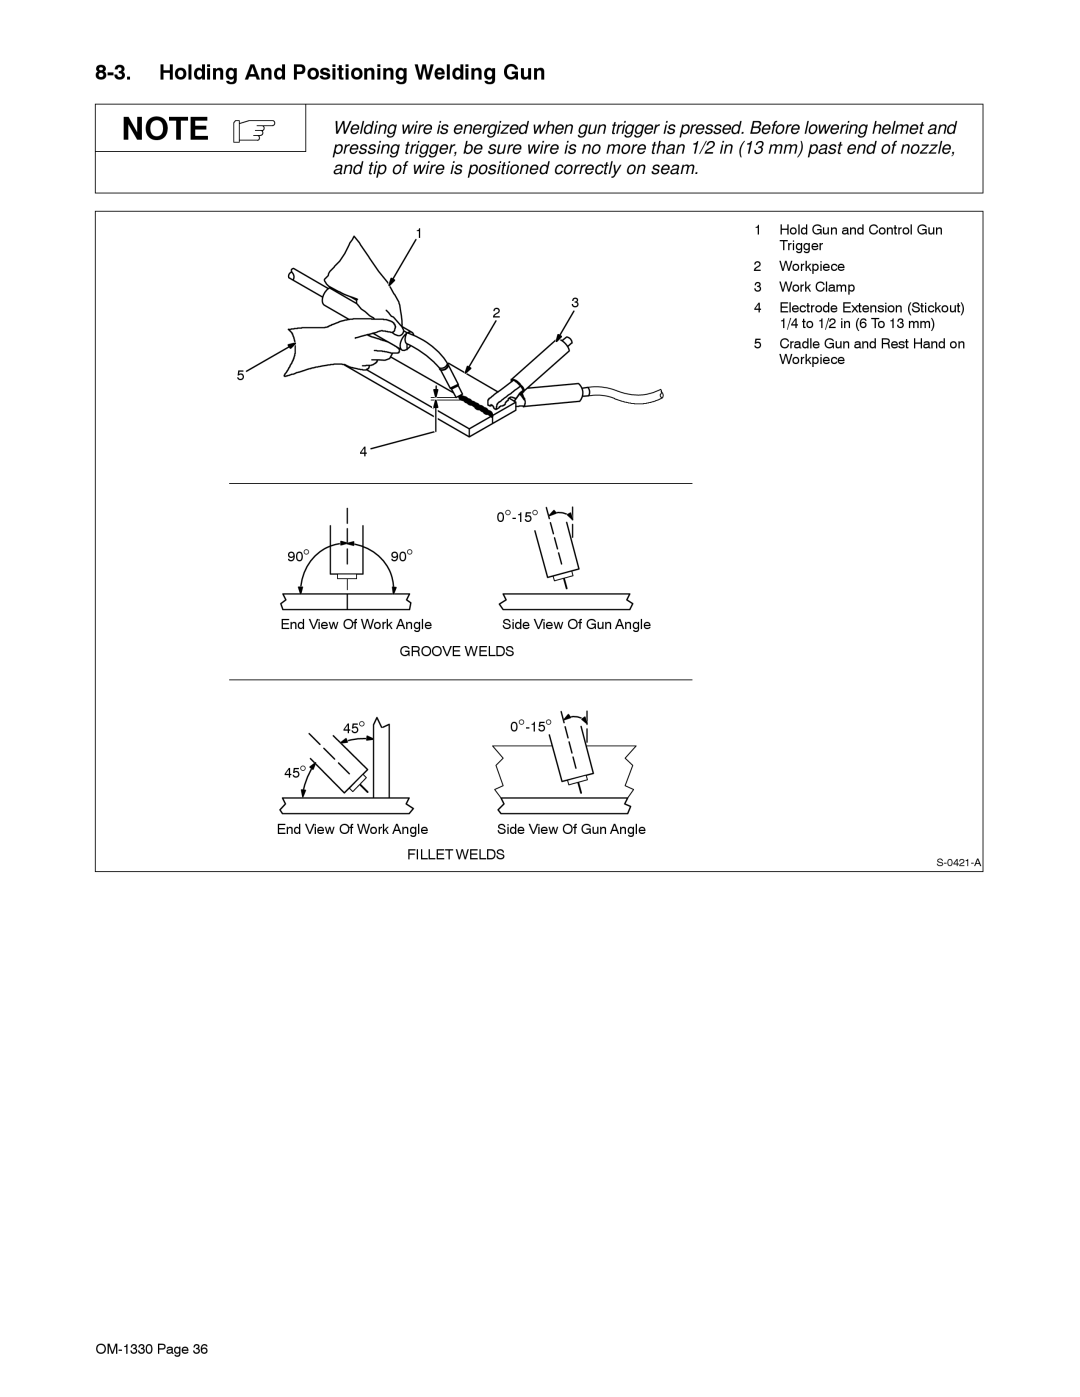
Welding wire is energized when gun trigger is pressed. Before lowering helmet and pressing trigger, be sure wire is no more than 1/2 in (13 mm) past end of nozzle, and tip of wire is positioned correctly on seam.
| 1 |
|
| 1 | Hold Gun and Control Gun |
|
|
|
|
| Trigger |
|
|
|
| 2 | Workpiece |
|
|
| 3 | 3 | Work Clamp |
|
| 2 | 4 | Electrode Extension (Stickout) | |
|
|
| |||
|
|
|
| 1/4 to 1/2 in (6 To 13 mm) | |
|
|
|
|
| |
|
|
|
| 5 Cradle Gun and Rest Hand on | |
5 |
|
|
|
| Workpiece |
|
|
|
|
| |
| 4 |
|
|
|
|
|
|
|
|
| |
90° | 90° |
|
|
|
|
End View Of Work Angle | Side View Of Gun Angle |
|
| ||
| GROOVE WELDS |
|
|
| |
| 45° |
|
|
| |
45° |
|
|
|
|
|
End View Of Work Angle | Side View Of Gun Angle |
|
| ||
| FILLET WELDS |
|
| ||
|
|
|
|
| |