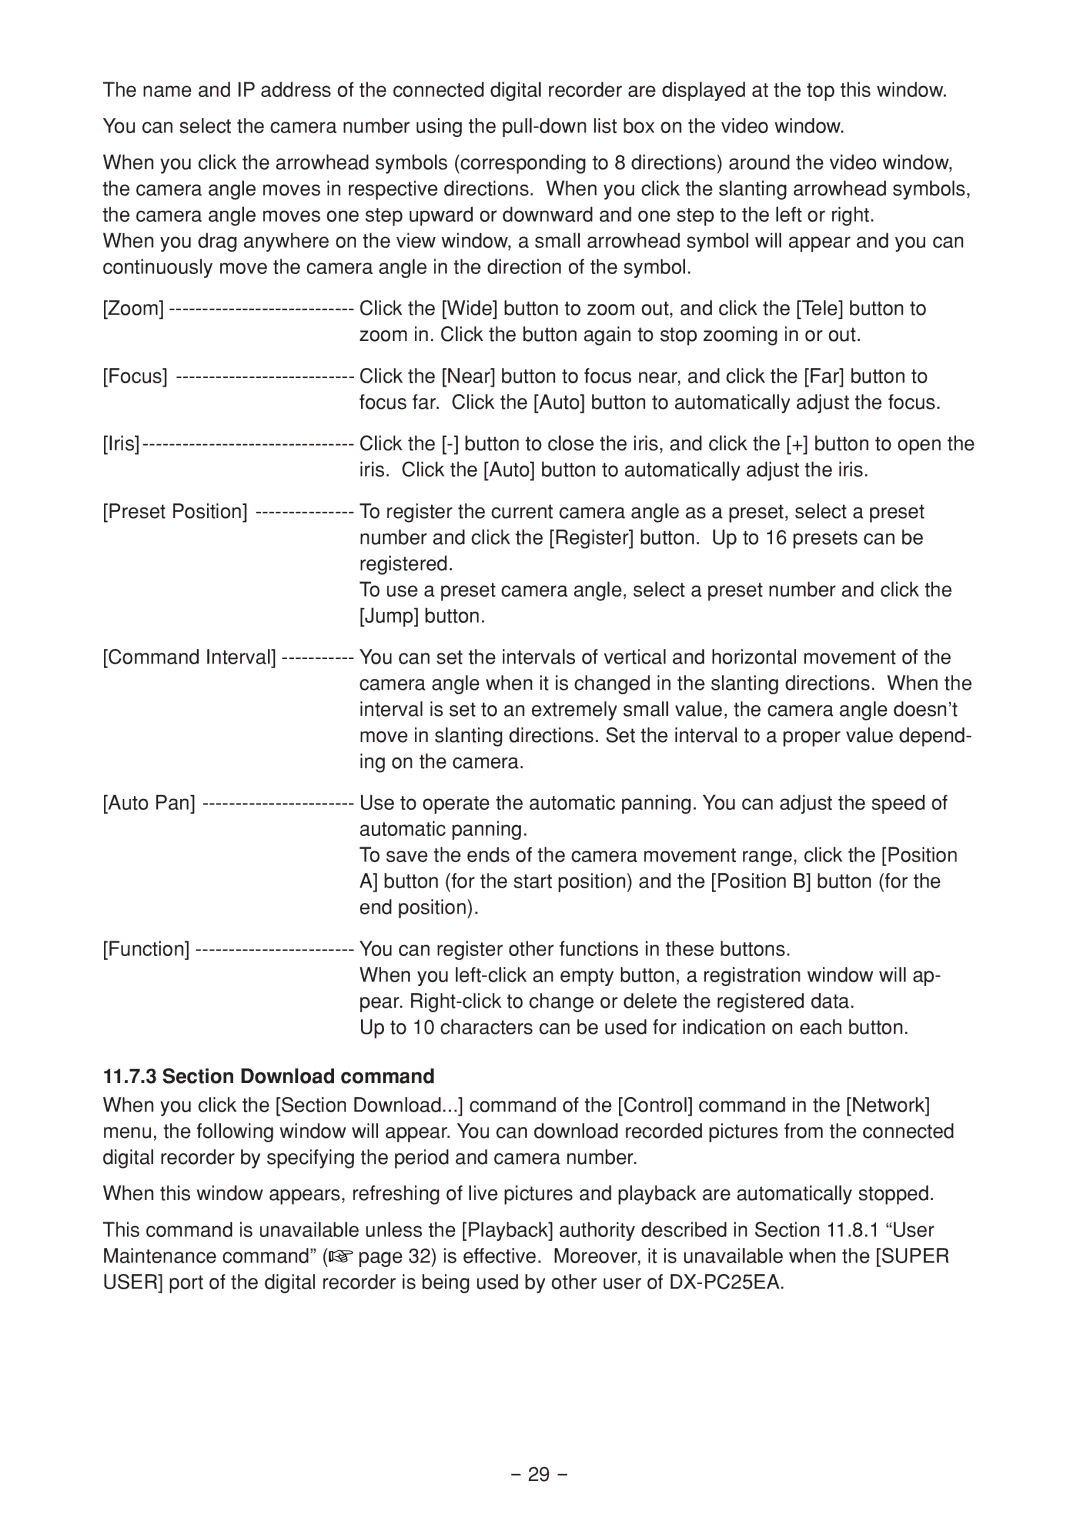
The name and IP address of the connected digital recorder are displayed at the top this window.
You can select the camera number using the
When you click the arrowhead symbols (corresponding to 8 directions) around the video window, the camera angle moves in respective directions. When you click the slanting arrowhead symbols, the camera angle moves one step upward or downward and one step to the left or right.
When you drag anywhere on the view window, a small arrowhead symbol will appear and you can continuously move the camera angle in the direction of the symbol.
[Zoom] | Click the [Wide] button to zoom out, and click the [Tele] button to |
| zoom in. Click the button again to stop zooming in or out. |
[Focus] | Click the [Near] button to focus near, and click the [Far] button to |
| focus far. Click the [Auto] button to automatically adjust the focus. |
[Iris] | Click the |
| iris. Click the [Auto] button to automatically adjust the iris. |
[Preset Position] | To register the current camera angle as a preset, select a preset |
| number and click the [Register] button. Up to 16 presets can be |
| registered. |
| To use a preset camera angle, select a preset number and click the |
| [Jump] button. |
[Command Interval] | You can set the intervals of vertical and horizontal movement of the |
| camera angle when it is changed in the slanting directions. When the |
| interval is set to an extremely small value, the camera angle doesn’t |
| move in slanting directions. Set the interval to a proper value depend- |
| ing on the camera. |
[Auto Pan] | Use to operate the automatic panning. You can adjust the speed of |
| automatic panning. |
| To save the ends of the camera movement range, click the [Position |
| A] button (for the start position) and the [Position B] button (for the |
| end position). |
[Function] | You can register other functions in these buttons. |
| When you |
| pear. |
| Up to 10 characters can be used for indication on each button. |
11.7.3 Section Download command
When you click the [Section Download...] command of the [Control] command in the [Network] menu, the following window will appear. You can download recorded pictures from the connected digital recorder by specifying the period and camera number.
When this window appears, refreshing of live pictures and playback are automatically stopped.
This command is unavailable unless the [Playback] authority described in Section 11.8.1 “User Maintenance command” (![]() page 32) is effective. Moreover, it is unavailable when the [SUPER USER] port of the digital recorder is being used by other user of
page 32) is effective. Moreover, it is unavailable when the [SUPER USER] port of the digital recorder is being used by other user of
- 29 -