Note
-Major setting items are described on the following pages.
-Before you register the menu settings in the digital recorder by clicking the [Regist] button (DVR), make the digital recorder ready for
-While a menu screen of the digital recorder is being displayed and any of the setting items is blinking, you can’t register the changes you have made using
-When you transmit a menu setting file (*****.mnu) saved in the personal computer to the digital recorder, be careful not to transmit a file for other model by mistake. If a wrong file is transmit- ted, incorrect settings may be registered as a result.
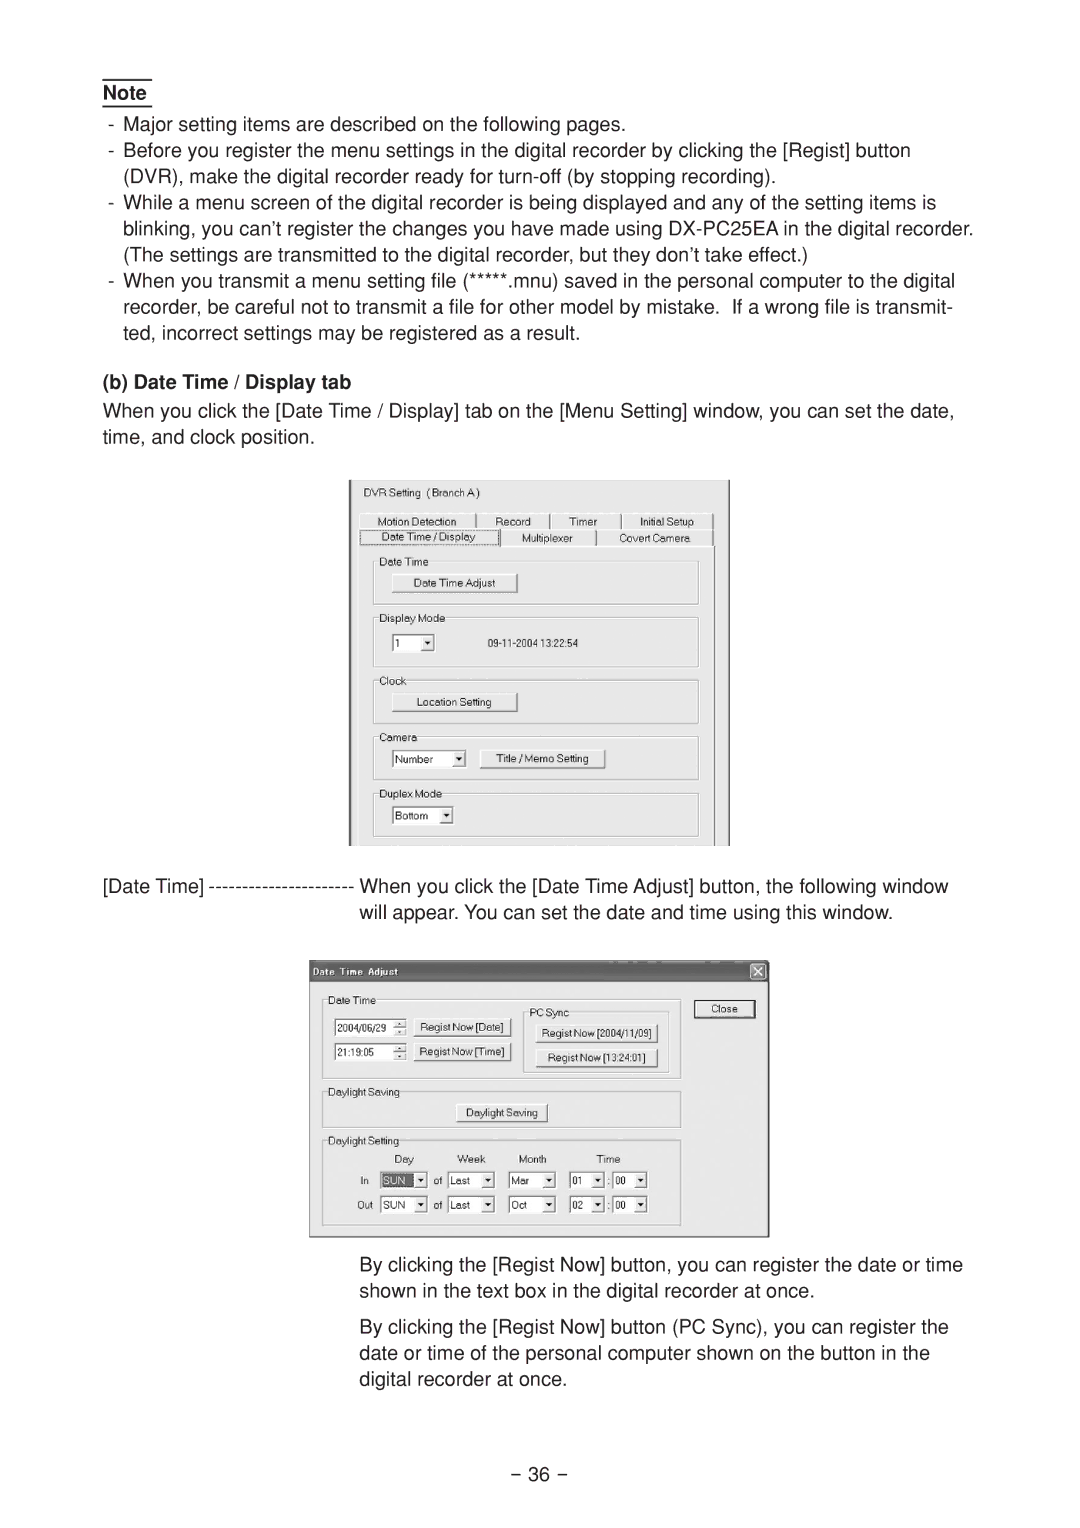
(b) Date Time / Display tab
When you click the [Date Time / Display] tab on the [Menu Setting] window, you can set the date, time, and clock position.
[Date Time] | When you click the [Date Time Adjust] button, the following window |
| will appear. You can set the date and time using this window. |
By clicking the [Regist Now] button, you can register the date or time shown in the text box in the digital recorder at once.
By clicking the [Regist Now] button (PC Sync), you can register the date or time of the personal computer shown on the button in the digital recorder at once.
- 36 -