Replacing the lamp (continued)
To replace the lamp:
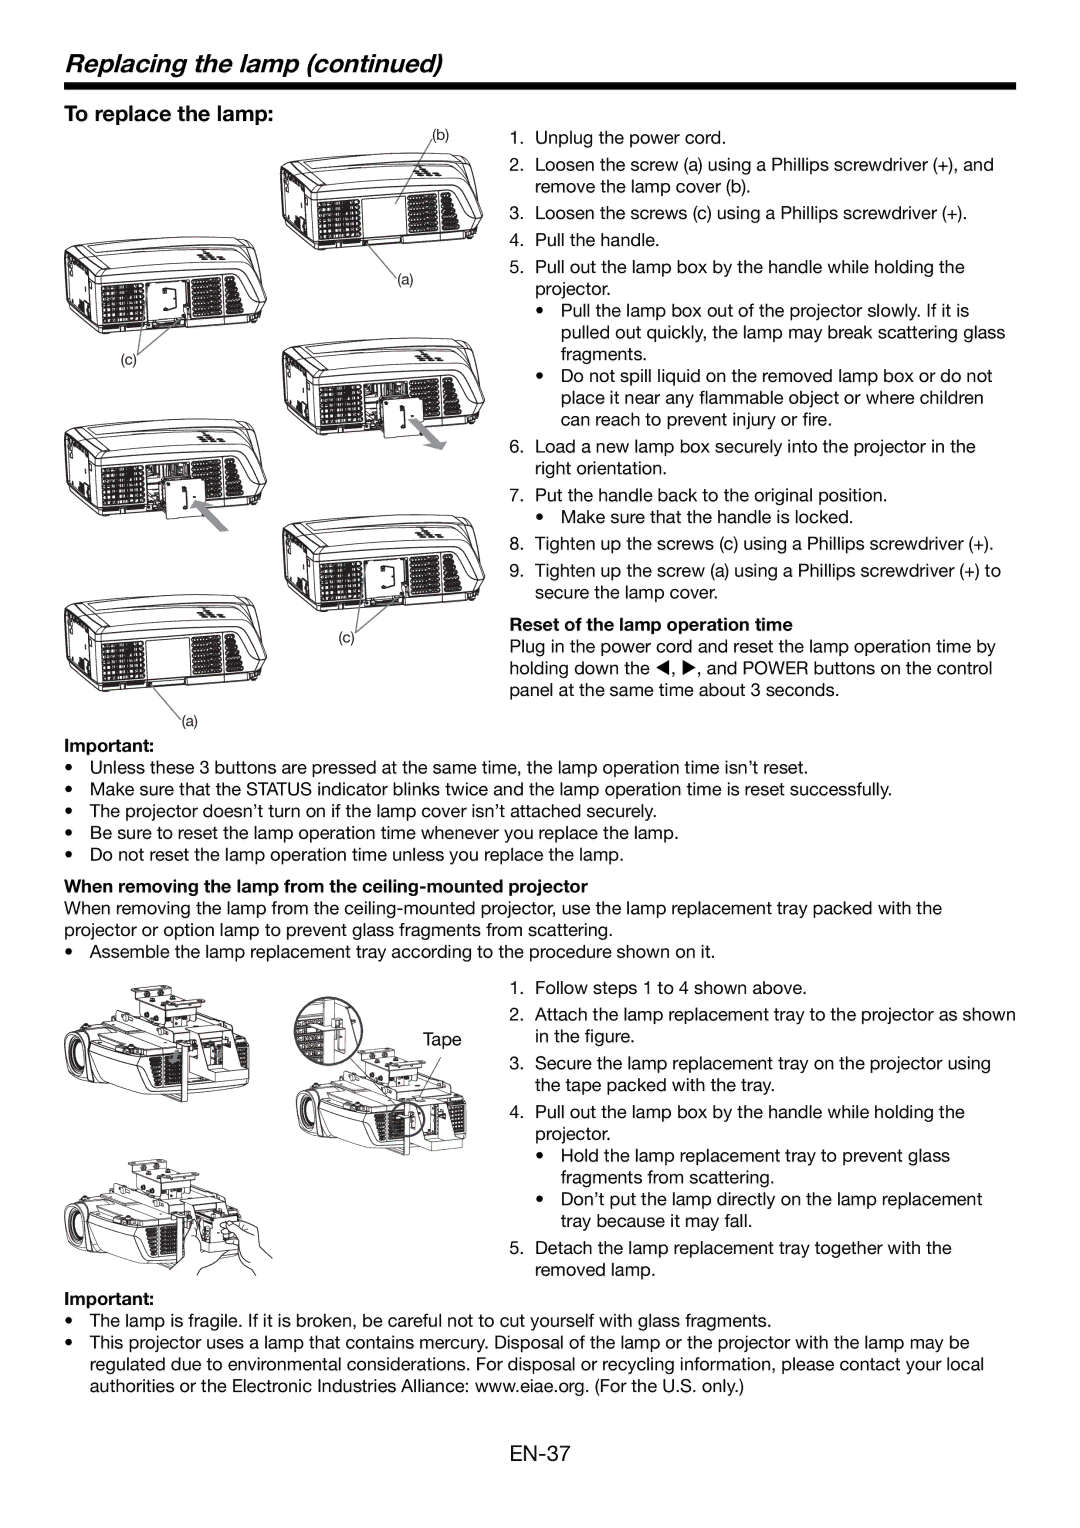
(b)1. Unplug the power cord.
2.Loosen the screw (a) using a Phillips screwdriver (+), and remove the lamp cover (b).
3.Loosen the screws (c) using a Phillips screwdriver (+).
4.Pull the handle.
5.Pull out the lamp box by the handle while holding the
(a)
projector.
•Pull the lamp box out of the projector slowly. If it is pulled out quickly, the lamp may break scattering glass
(c) | fragments. |
(c)
(a)
Important:
•Do not spill liquid on the removed lamp box or do not place it near any flammable object or where children can reach to prevent injury or fire.
6.Load a new lamp box securely into the projector in the right orientation.
7.Put the handle back to the original position.
•Make sure that the handle is locked.
8.Tighten up the screws (c) using a Phillips screwdriver (+).
9.Tighten up the screw (a) using a Phillips screwdriver (+) to secure the lamp cover.
Reset of the lamp operation time
Plug in the power cord and reset the lamp operation time by holding down the W, X, and POWER buttons on the control panel at the same time about 3 seconds.
•Unless these 3 buttons are pressed at the same time, the lamp operation time isn’t reset.
•Make sure that the STATUS indicator blinks twice and the lamp operation time is reset successfully.
•The projector doesn’t turn on if the lamp cover isn’t attached securely.
•Be sure to reset the lamp operation time whenever you replace the lamp.
•Do not reset the lamp operation time unless you replace the lamp.
When removing the lamp from the ceiling-mounted projector
When removing the lamp from the
•Assemble the lamp replacement tray according to the procedure shown on it.
1.Follow steps 1 to 4 shown above.
2.Attach the lamp replacement tray to the projector as shown
Tape | in the figure. |
3. Secure the lamp replacement tray on the projector using the tape packed with the tray.
4.Pull out the lamp box by the handle while holding the projector.
•Hold the lamp replacement tray to prevent glass fragments from scattering.
•Don’t put the lamp directly on the lamp replacement
tray because it may fall.
5. Detach the lamp replacement tray together with the removed lamp.
Important:
•The lamp is fragile. If it is broken, be careful not to cut yourself with glass fragments.
•This projector uses a lamp that contains mercury. Disposal of the lamp or the projector with the lamp may be regulated due to environmental considerations. For disposal or recycling information, please contact your local authorities or the Electronic Industries Alliance: www.eiae.org. (For the U.S. only.)