Stand Alone Configuration Setup
CAUTION
•Do not remove the stand.
•The Display is heavy. Move it with two or more people.
1.Place the 42" LCD Display on a sturdy surface.
2.Remove the HD-6000 Receiver/Controller from its carton.
3.Place the HD-6000 Receiver/Controller on a sturdy surface.

 When the HD-6000 is connected to the 42" LCD, the HD-6000 front control buttons are inactive. To control the HD-6000 (and 42" LCD), set the remote control to the CABLE/DBS/DTV Layer or use control buttons located on the side of the LCD Display.
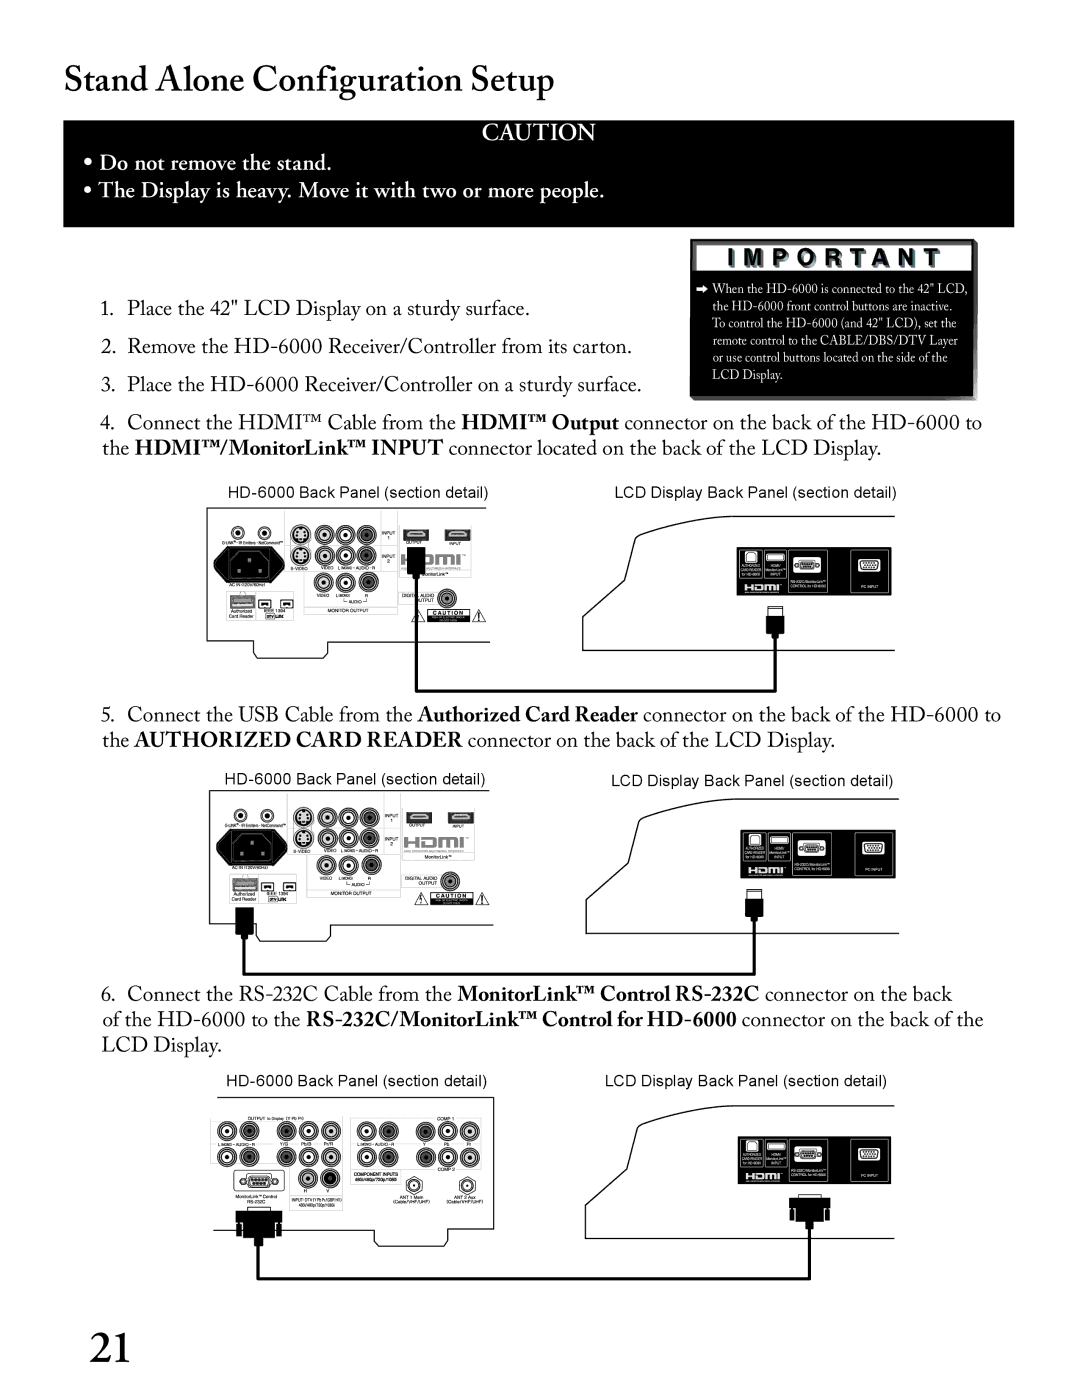
4.Connect the HDMI™ Cable from the HDMI™ Output connector on the back of the HD-6000 to the HDMI™/MonitorLink™ INPUT connector located on the back of the LCD Display.
HD-6000 Back Panel (section detail) | LCD Display Back Panel (section detail) |
| | | | | | | | | | | | | |
| | | | | | | | | | | | | |
| | | | | | | | | | | | | |
| | | | | | | | | | | | | |
| | | | | | | | | | | | | |
| | | | | | | | | | | | | |
5.Connect the USB Cable from the Authorized Card Reader connector on the back of the HD-6000 to the AUTHORIZED CARD READER connector on the back of the LCD Display.
HD-6000 Back Panel (section detail)
LCD Display Back Panel (section detail)
6. Connect the RS-232C Cable from the MonitorLink™ Control RS-232Cconnector on the back
of the HD-6000 to the RS-232C/MonitorLink™ Control for HD-6000connector on the back of the LCD Display.
HD-6000 Back Panel (section detail) | LCD Display Back Panel (section detail) |
| | | | | | | | | | | | | | | | | |
| | | | | | | | | | | | | | | | | |
| | | | | | | | | | | | | | | | | |
| | | | | | | | | | | | | | | | | |
| | | | | | | | | | | | | | | | | |
| | | | | | | | | | | | | | | | | |
| | | | | | | | | | | | | | | | | |
| | | | | | | | | | | | | | | | | |
| | | | | | | | | | | | | | | | | |
| | | | | | | | | | | | | | | | | |
| | | | | | | | | | | | | | | | | |
| | | | | | | | | | | | | | | | | |
| | | | | | | | | | | | | | | | | |
| | | | | | | | | | | | | | | | | |