Wall Mount Configuration Setup (continued)
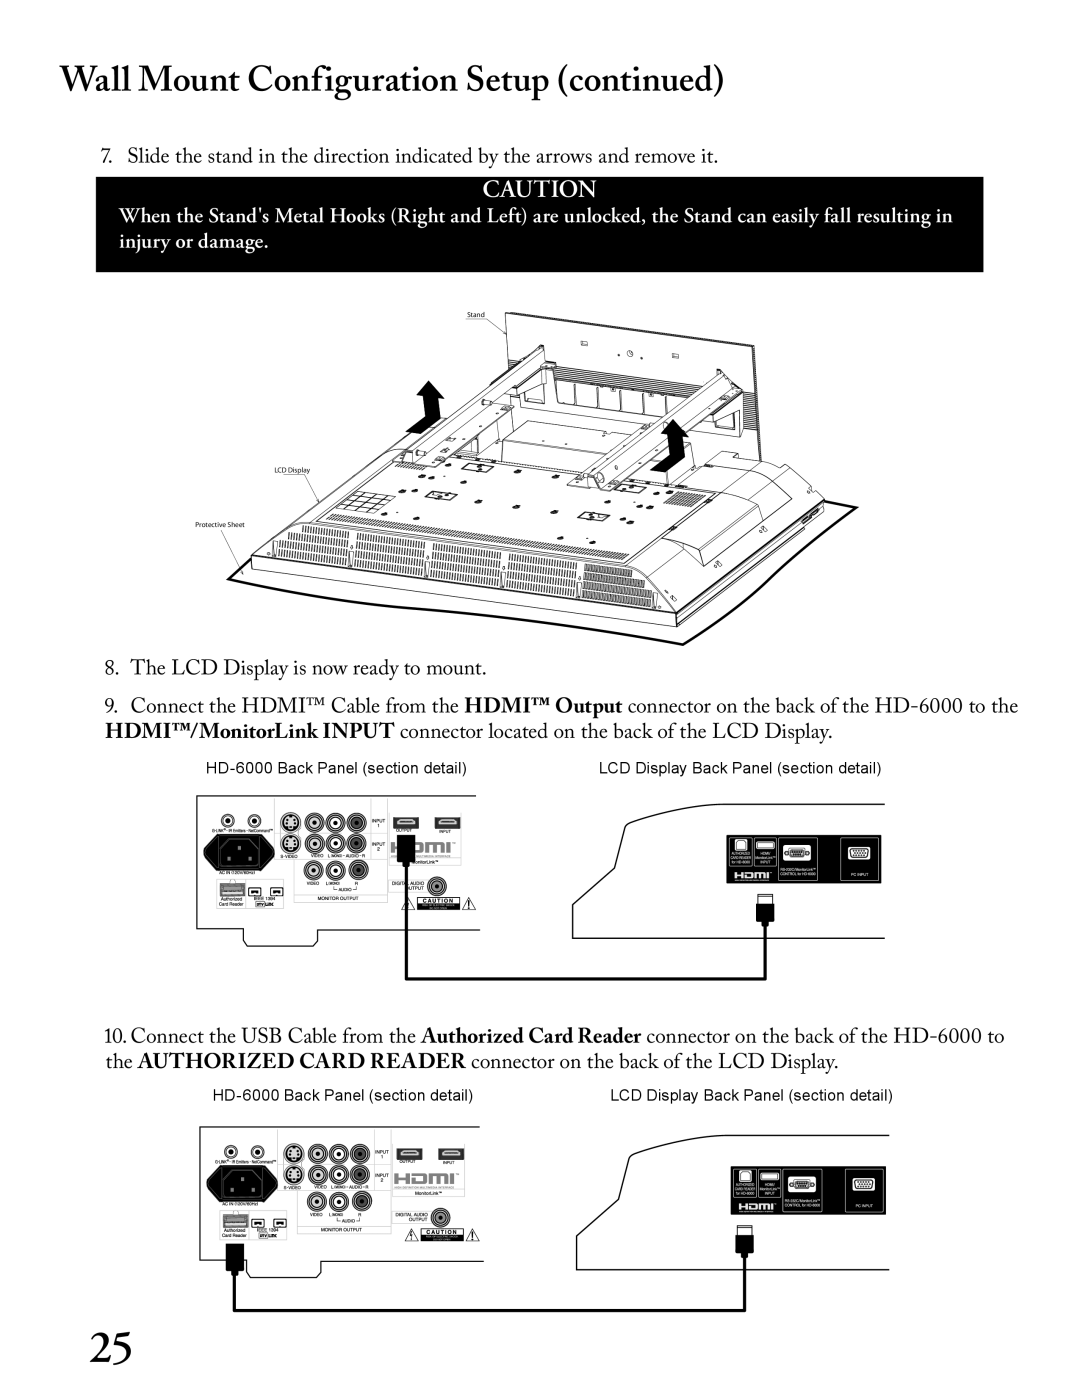
7. Slide the stand in the direction indicated by the arrows and remove it.
CAUTION
When the Stand's Metal Hooks (Right and Left) are unlocked, the Stand can easily fall resulting in injury or damage.
�����
�����������
����������������
8.The LCD Display is now ready to mount.
9.Connect the HDMI™ Cable from the HDMI™ Output connector on the back of the
| LCD Display Back Panel (section detail) | ||||||||||||
|
|
|
|
|
|
|
|
|
|
|
|
|
|
|
|
|
|
|
|
|
|
|
|
|
|
|
|
|
|
|
|
|
|
|
|
|
|
|
|
|
|
|
|
|
|
|
|
|
|
|
|
|
|
|
|
|
|
|
|
|
|
|
|
|
|
|
|
|
|
|
|
|
|
|
|
|
|
|
|
|
|
|
|
10.Connect the USB Cable from the Authorized Card Reader connector on the back of the
| LCD Display Back Panel (section detail) | ||||||||||||
|
|
|
|
|
|
|
|
|
|
|
|
|
|
|
|
|
|
|
|
|
|
|
|
|
|
|
|
|
|
|
|
|
|
|
|
|
|
|
|
|
|
|
|
|
|
|
|
|
|
|
|
|
|
|
|
|
|
|
|
|
|
|
|
|
|
|
|
|
|
|
|
|
|
|
|
|
|
|
|
|
|
|
|
25
