1. Television Overview | 7 |
NetCommand with IR Learning
736 or 835 Series TV. Your Mitsubishi HDTV offers a new level of networking that seamlessly integrates selected older A/V products with new and future digital products. NetCommand® supports IR (infrared) control of products such as VCRs, DVD players, cable boxes, and satellite receivers. NetCommand can “learn” remote control signals directly from many devices, allowing you to create a customized NetCommand- controlled
TV Front Panel
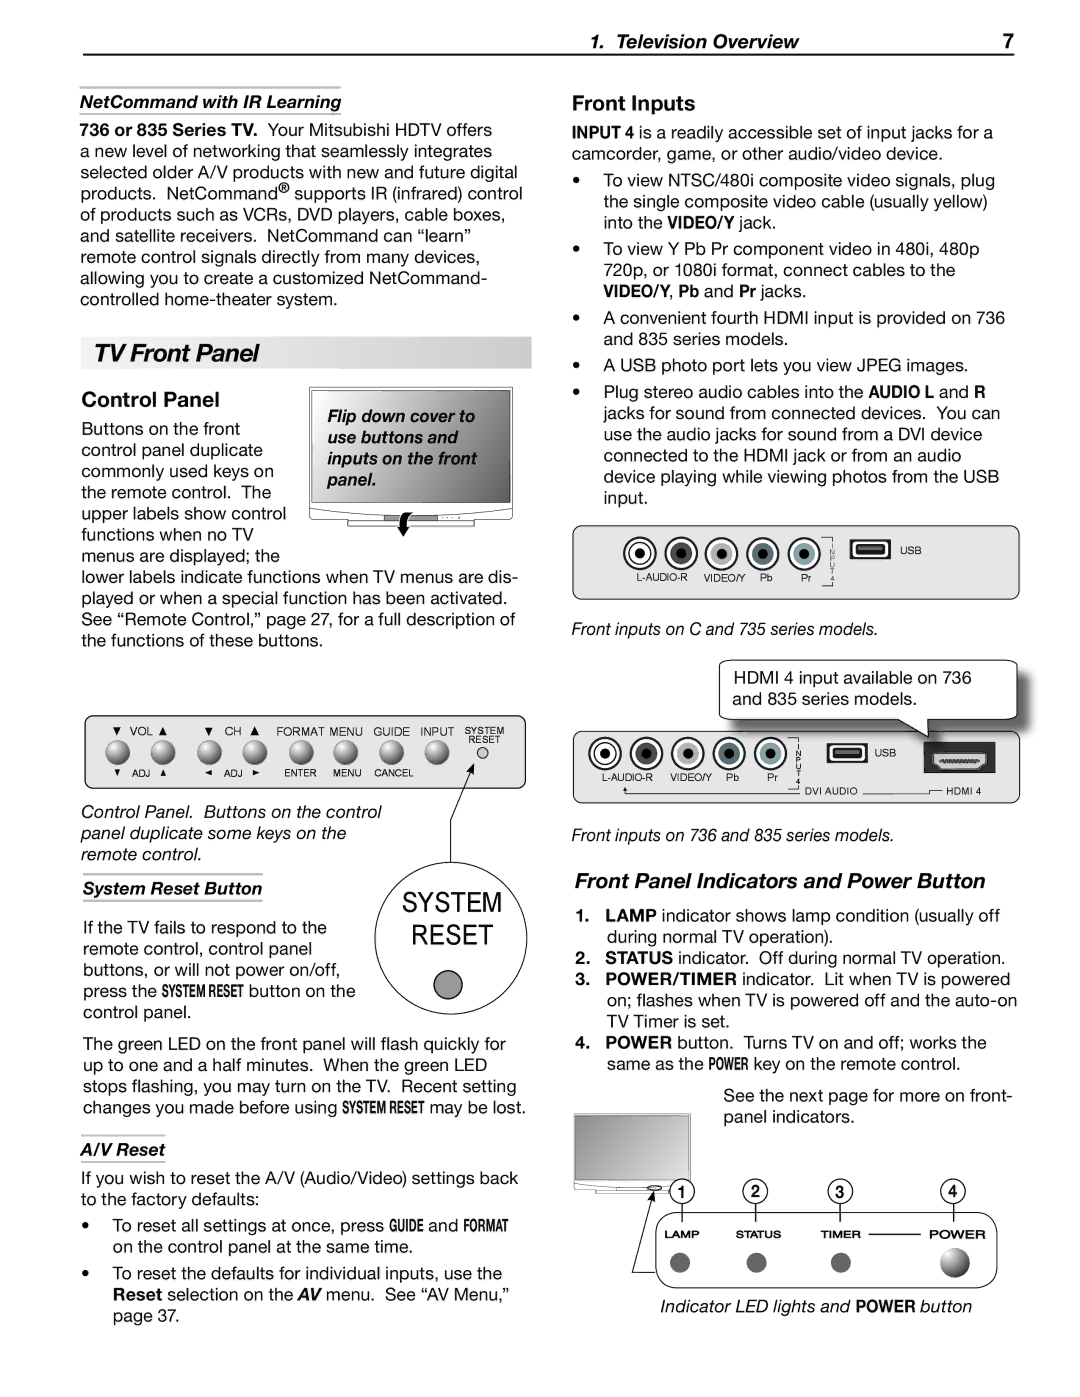
Control Panel
Buttons on the front control panel duplicate commonly used keys on the remote control. The
upper labels show control functions when no TV
menus are displayed; the
lower labels indicate functions when TV menus are dis- played or when a special function has been activated. See “Remote Control,” page 27, for a full description of the functions of these buttons.
VOL | CH | FORMAT MENU | GUIDE INPUT | SYSTEM | |
|
|
|
| RESET | |
ADJ | ADJ | ENTER MENU | CANCEL |
| |
Control Panel. Buttons on the control |
| ||||
panel duplicate some keys on the |
|
| |||
remote control. |
|
|
|
| |
System Reset Button |
| SYSTEM | |||
If the TV fails to respond to the | |||||
RESET | |||||
remote control, control panel | |||||
buttons, or will not power on/off, press the SYSTEM RESET button on the control panel.
The green LED on the front panel will flash quickly for up to one and a half minutes. When the green LED stops flashing, you may turn on the TV. Recent setting changes you made before using SYSTEM RESET may be lost.
A/V Reset
If you wish to reset the A/V (Audio/Video) settings back to the factory defaults:
•To reset all settings at once, press GUIDE and FORMAT on the control panel at the same time.
•To reset the defaults for individual inputs, use the
Reset selection on the AV menu. See “AV Menu,” page 37.
Front Inputs
INPUT 4 is a readily accessible set of input jacks for a camcorder, game, or other audio/video device.
•To view NTSC/480i composite video signals, plug the single composite video cable (usually yellow) into the VIDEO/Y jack.
•To view Y Pb Pr component video in 480i, 480p 720p, or 1080i format, connect cables to the VIDEO/Y, Pb and Pr jacks.
•A convenient fourth HDMI input is provided on 736 and 835 series models.
•A USB photo port lets you view JPEG images.
•Plug stereo audio cables into the AUDIO L and R jacks for sound from connected devices. You can use the audio jacks for sound from a DVI device connected to the HDMI jack or from an audio device playing while viewing photos from the USB input.
|
| I | USB |
|
| N | |
|
| P |
|
|
| U |
|
Pr | T |
| |
4 |
|
Front inputs on C and 735 series models.
HDMI 4 input available on 736 and 835 series models.
|
| I | USB |
|
| N | |
|
| P |
|
|
| U |
|
Pr | T |
| |
4 | HDMI 4 | ||
|
| DVI AUDIO |
Front inputs on 736 and 835 series models.
Front Panel Indicators and Power Button
1.LAMP indicator shows lamp condition (usually off during normal TV operation).
2.STATUS indicator. Off during normal TV operation.
3.POWER/TIMER indicator. Lit when TV is powered on; flashes when TV is powered off and the
4.POWER button. Turns TV on and off; works the same as the POWER key on the remote control.
| See the next page for more on front- | ||
| panel indicators. |
| |
1 | 2 | 3 | 4 |
Indicator LED lights and POWER button