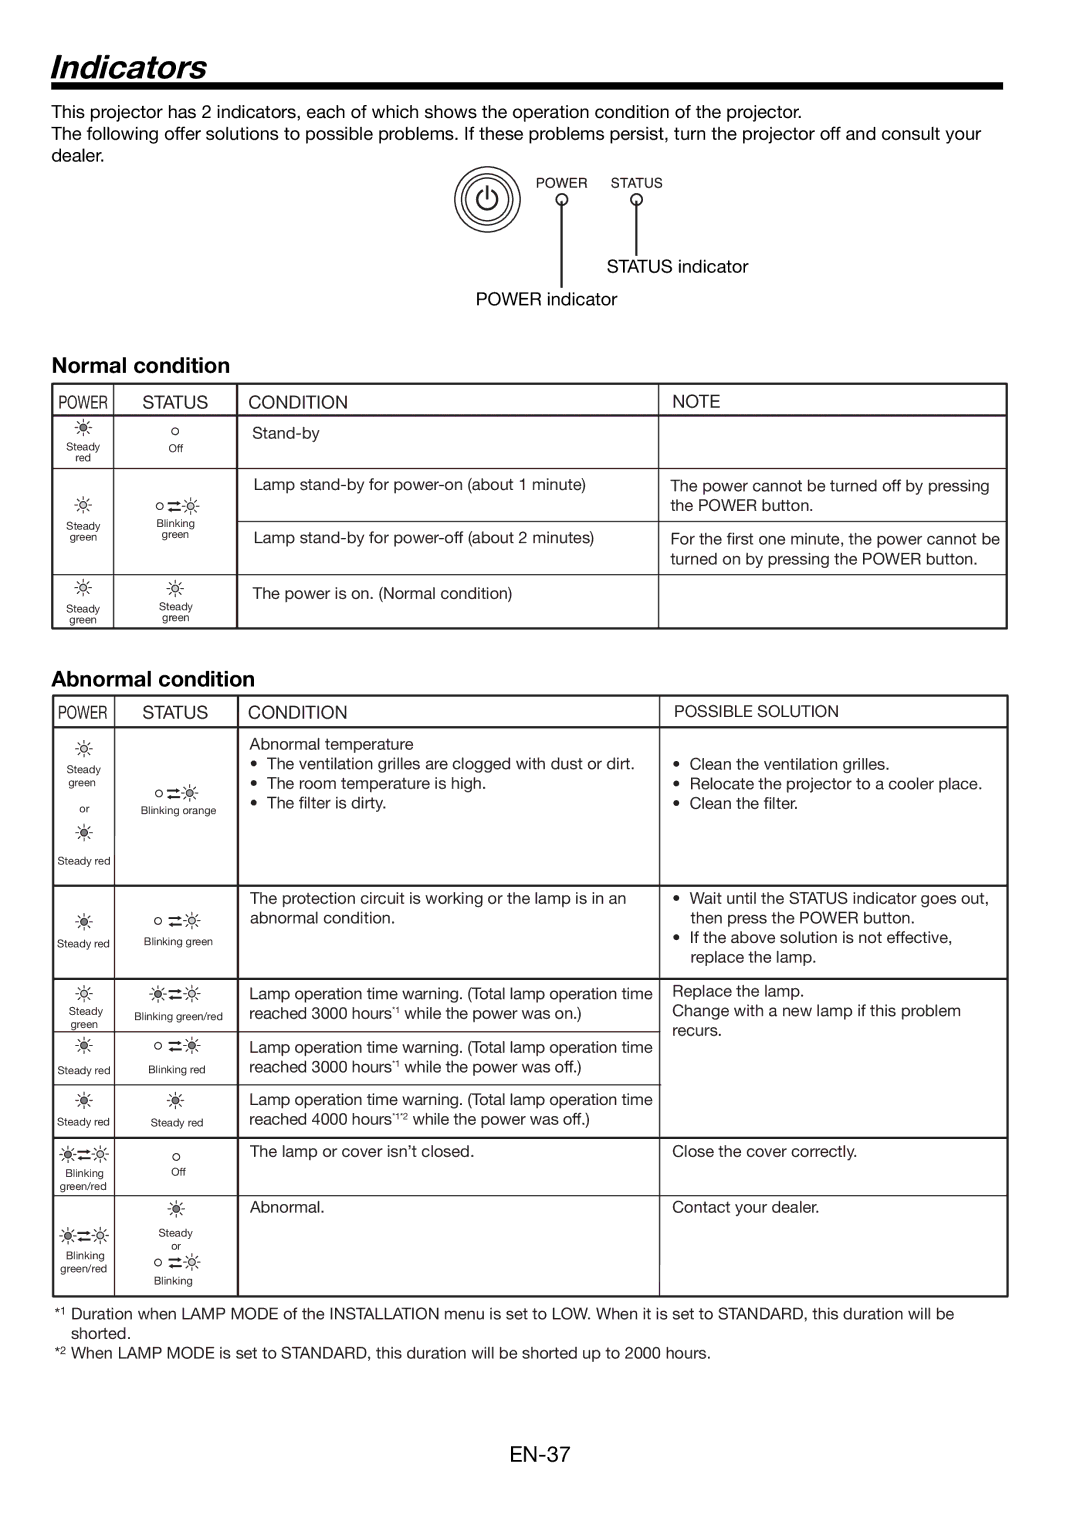
Indicators
This projector has 2 indicators, each of which shows the operation condition of the projector.
The following offer solutions to possible problems. If these problems persist, turn the projector off and consult your dealer.
|
|
|
|
|
|
|
|
|
|
|
|
|
|
|
|
|
|
|
|
|
| STATUS indicator | |||
|
|
|
|
|
|
|
|
|
|
|
|
|
|
|
|
|
|
|
|
| POWER indicator |
|
| ||
Normal condition |
|
|
|
|
|
| ||||||
|
|
|
|
|
|
|
|
|
| |||
| POWER | STATUS | CONDITION | NOTE | ||||||||
|
|
|
|
|
|
|
|
|
|
| ||
| Steady |
| Off |
|
| |||||||
|
|
|
|
|
|
|
| |||||
| red |
|
|
|
|
|
|
|
|
|
|
|
|
|
|
|
|
|
|
|
|
| |||
|
|
|
|
|
|
| Lamp | The power cannot be turned off by pressing | ||||
|
|
|
|
|
|
|
|
|
|
| the POWER button. | |
|
|
|
|
|
|
|
|
|
|
| ||
| Steady | Blinking |
|
|
|
| ||||||
|
|
|
|
|
|
| ||||||
| Lamp |
|
| |||||||||
| green | green | For the first one minute, the power cannot be | |||||||||
|
|
|
|
|
| |||||||
|
|
|
|
|
|
|
|
|
|
| turned on by pressing the POWER button. | |
|
|
|
|
|
|
|
|
|
|
| ||
| Steady | Steady | The power is on. (Normal condition) |
|
| |||||||
|
|
|
|
|
|
| ||||||
| green | green |
|
|
|
|
|
| ||||
Abnormal condition |
|
|
|
|
| |||||||
| POWER | STATUS | CONDITION | POSSIBLE SOLUTION | ||||||||
|
|
|
|
|
|
|
|
|
|
| ||
|
|
|
|
|
|
| Abnormal temperature |
|
| |||
| Steady |
|
|
|
|
| • | The ventilation grilles are clogged with dust or dirt. | • | Clean the ventilation grilles. | ||
| green |
|
|
|
|
| • | The room temperature is high. | • | Relocate the projector to a cooler place. | ||
| or |
|
|
|
|
| • | The filter is dirty. | • | Clean the filter. | ||
| Blinking orange | |||||||||||
|
|
|
|
|
|
| ||||||
| Steady red |
|
|
|
|
|
|
|
|
|
|
|
The protection circuit is working or the lamp is in an abnormal condition.
Steady red | Blinking green |
•Wait until the STATUS indicator goes out, then press the POWER button.
•If the above solution is not effective, replace the lamp.
|
|
|
|
|
|
|
|
|
| Lamp operation time warning. (Total lamp operation time | Replace the lamp. |
|
|
|
|
|
|
|
|
|
| ||
|
|
|
|
|
|
|
|
|
| ||
Steady | Blinking green/red | reached 3000 hours*1 while the power was on.) | Change with a new lamp if this problem | ||||||||
green |
|
|
|
|
|
| recurs. | ||||
|
|
|
|
|
|
|
|
|
| Lamp operation time warning. (Total lamp operation time | |
|
|
|
|
|
|
|
|
|
|
| |
|
|
|
|
|
|
|
|
|
|
| |
|
|
|
|
|
|
|
|
|
|
| |
Steady red | Blinking red | reached 3000 hours*1 while the power was off.) |
| ||||||||
|
|
|
|
|
|
|
|
|
| Lamp operation time warning. (Total lamp operation time |
|
Steady red | Steady red | reached 4000 hours*1*2 while the power was off.) |
| ||||||||
|
|
|
|
|
|
|
|
|
|
|
|
|
|
|
|
|
| Off | The lamp or cover isn’t closed. | Close the cover correctly. | |||
|
|
|
|
|
| ||||||
Blinking |
|
|
| ||||||||
green/red |
|
|
|
|
|
|
| ||||
|
|
|
|
|
|
|
|
|
|
|
|
|
|
|
|
|
|
|
|
|
| Abnormal. | Contact your dealer. |
Steady
or
Blinking
green/red![]() Blinking
Blinking
*1 Duration when LAMP MODE of the INSTALLATION menu is set to LOW. When it is set to STANDARD, this duration will be shorted.
*2 When LAMP MODE is set to STANDARD, this duration will be shorted up to 2000 hours.