Accessory air-filter unit
An accessory
•When using the accessory
mmbetween the filter and the floor using boards or the like as spacers.
•When using the accessory
away as to provide a clearance of at least 10 mm between the filter and the ceiling mount. (Use the accessory spacers and screws, if necessary.)
Attaching the accessory air-filter unit
Before installing this accessory
• Remove the
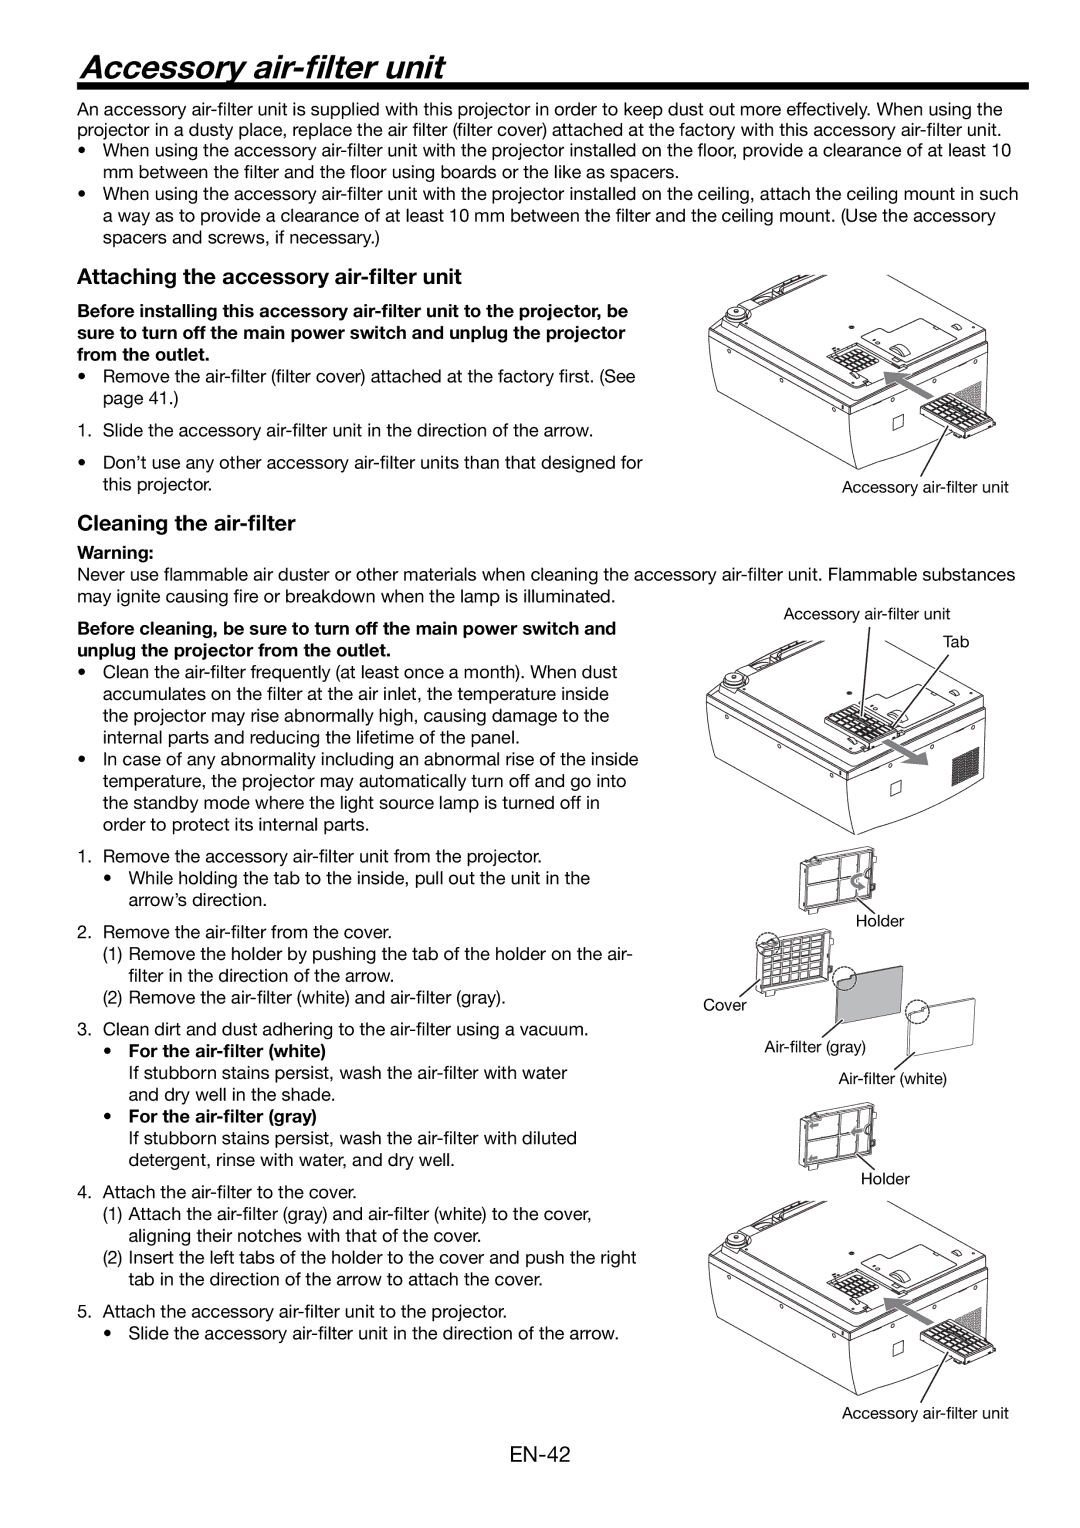
1. | Slide the accessory |
|
• | Don’t use any other accessory |
|
| this projector. | Accessory |
Cleaning the air-filter
Warning:
Never use flammable air duster or other materials when cleaning the accessory
Before cleaning, be sure to turn off the main power switch and unplug the projector from the outlet.
•Clean the
•In case of any abnormality including an abnormal rise of the inside temperature, the projector may automatically turn off and go into the standby mode where the light source lamp is turned off in order to protect its internal parts.
1.Remove the accessory
•While holding the tab to the inside, pull out the unit in the arrow’s direction.
Accessory
Tab
2. Remove the | Holder | |
| ||
(1) | Remove the holder by pushing the tab of the holder on the air- |
|
| filter in the direction of the arrow. |
|
(2) | Remove the | Cover |
|
| |
3. Clean dirt and dust adhering to the
•For the air-filter (white)
If stubborn stains persist, wash the
•For the air-filter (gray)
If stubborn stains persist, wash the
4.Attach the
(1) Attach the
(2) Insert the left tabs of the holder to the cover and push the right tab in the direction of the arrow to attach the cover.
5.Attach the accessory
•Slide the accessory
Holder
Accessory
