Maintenance
Warning:
•Never use flammable air duster or other materials when cleaning the
•Do not use flammable solvents (benzene, thinner, etc.) and flammable aerosols when cleaning the projector body and lens. Flammable substances may ignite causing fire or breakdown while the lamp is illuminating.
Caution:
Be sure to turn off the lamp and unplug the power cord from the wall outlet before you perform any maintenance on the projector.
Cleaning of the air-filter
Clean the
•When the temperature inside the projector rises, the STATUS indicator will blink orange and the lamp will be turned off.
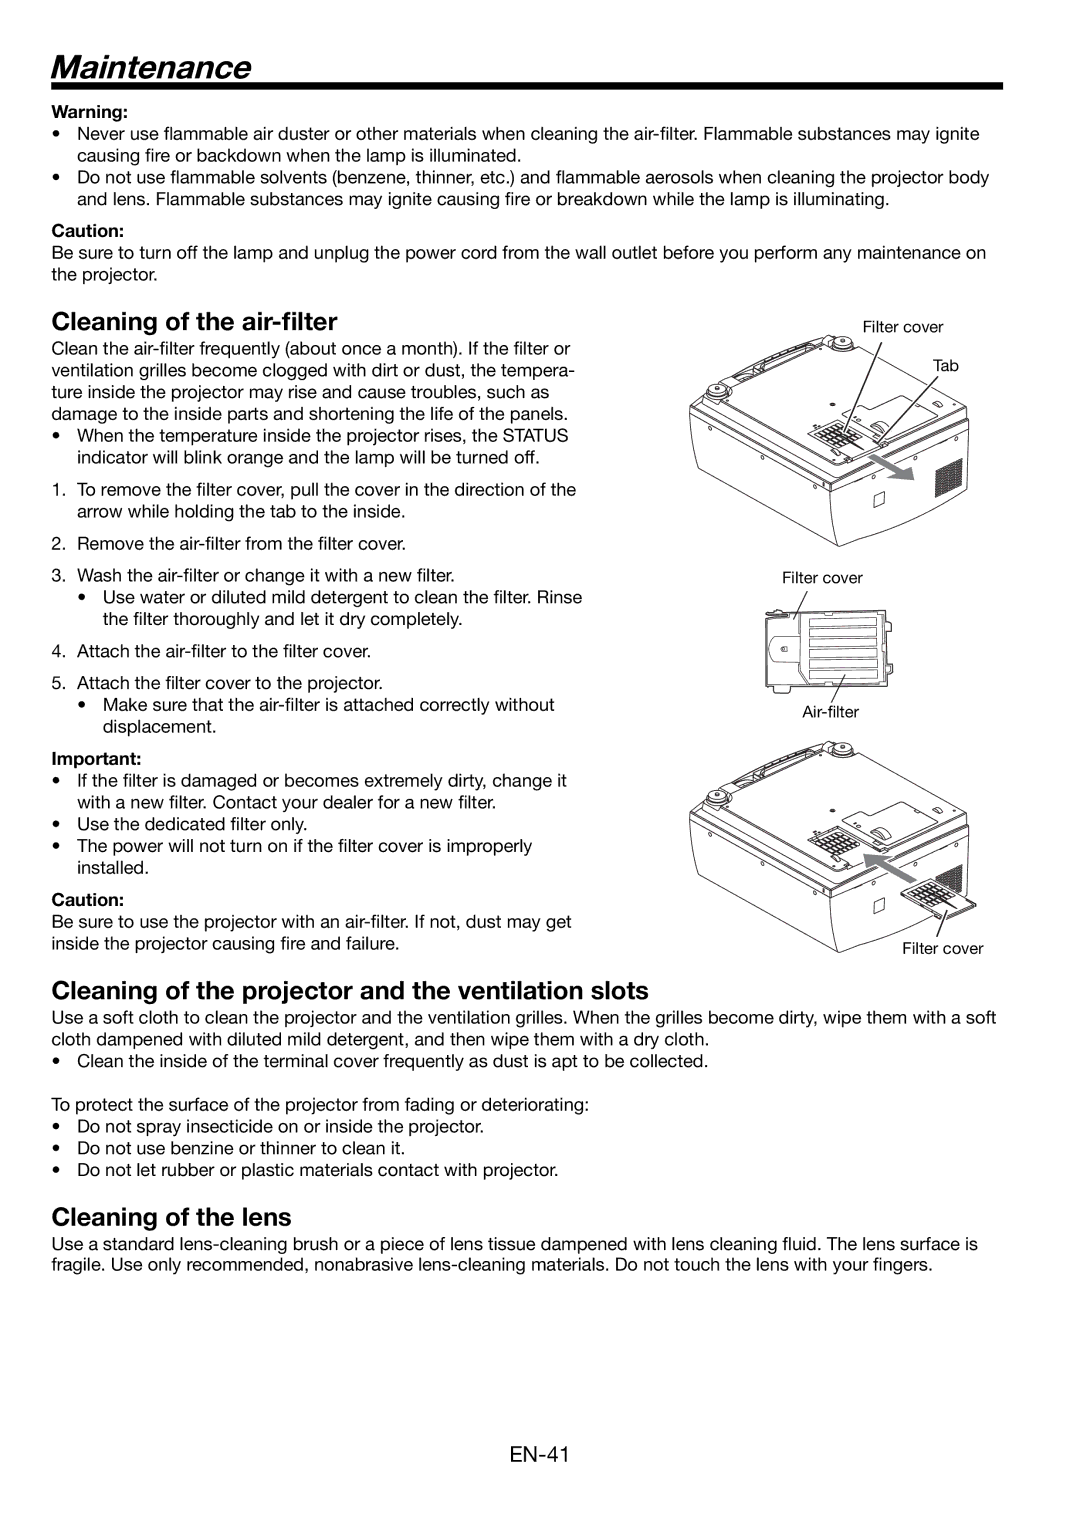
1.To remove the filter cover, pull the cover in the direction of the arrow while holding the tab to the inside.
2.Remove the
3.Wash the
•Use water or diluted mild detergent to clean the filter. Rinse the filter thoroughly and let it dry completely.
4.Attach the
5.Attach the filter cover to the projector.
•Make sure that the
Important:
•If the filter is damaged or becomes extremely dirty, change it with a new filter. Contact your dealer for a new filter.
•Use the dedicated filter only.
•The power will not turn on if the filter cover is improperly installed.
Caution:
Be sure to use the projector with an
Filter cover
Tab
Filter cover
Filter cover
Cleaning of the projector and the ventilation slots
Use a soft cloth to clean the projector and the ventilation grilles. When the grilles become dirty, wipe them with a soft cloth dampened with diluted mild detergent, and then wipe them with a dry cloth.
• Clean the inside of the terminal cover frequently as dust is apt to be collected.
To protect the surface of the projector from fading or deteriorating:
•Do not spray insecticide on or inside the projector.
•Do not use benzine or thinner to clean it.
•Do not let rubber or plastic materials contact with projector.
Cleaning of the lens
Use a standard