Advanced features (continued)
Supervising and controlling by computer
You can supervise and control the projector’s operation using a personal computer via a LAN network.
•To supervise and control the projector, install the software
*) Functions
•Setting of the projector’s IP address
•Setting of password, display language, and LAN control
•PJLink™ certification setting (telnet function)
•Startup of the controlling /supervising tool (ProjectorView) using the Web browser
Major functions
ProjectorView
The controlling /supervising tool using the Web browser
PJLink™
This projector supports standard protocol PJLink™ for projector control and you can control and monitor projector’s operations using the same application among projectors of different models and different manufacturers.
About PJLink™
•To use PJLink™ function, the PJLink™ application software is required.
•For the specifications of PJLink™, access to the Web site of Japan Business Machine and Information System Industries Association (JBMIA). (http://pjlink.jbmia.or.jp/english)
•This projector is fully compliant to the specifications of JBMIA PJLink™ Class 1. It supports all the commands defined by PJLink™ Class 1, and the compliance has been verified with the PJLink™ standard specifications Version 1.0.
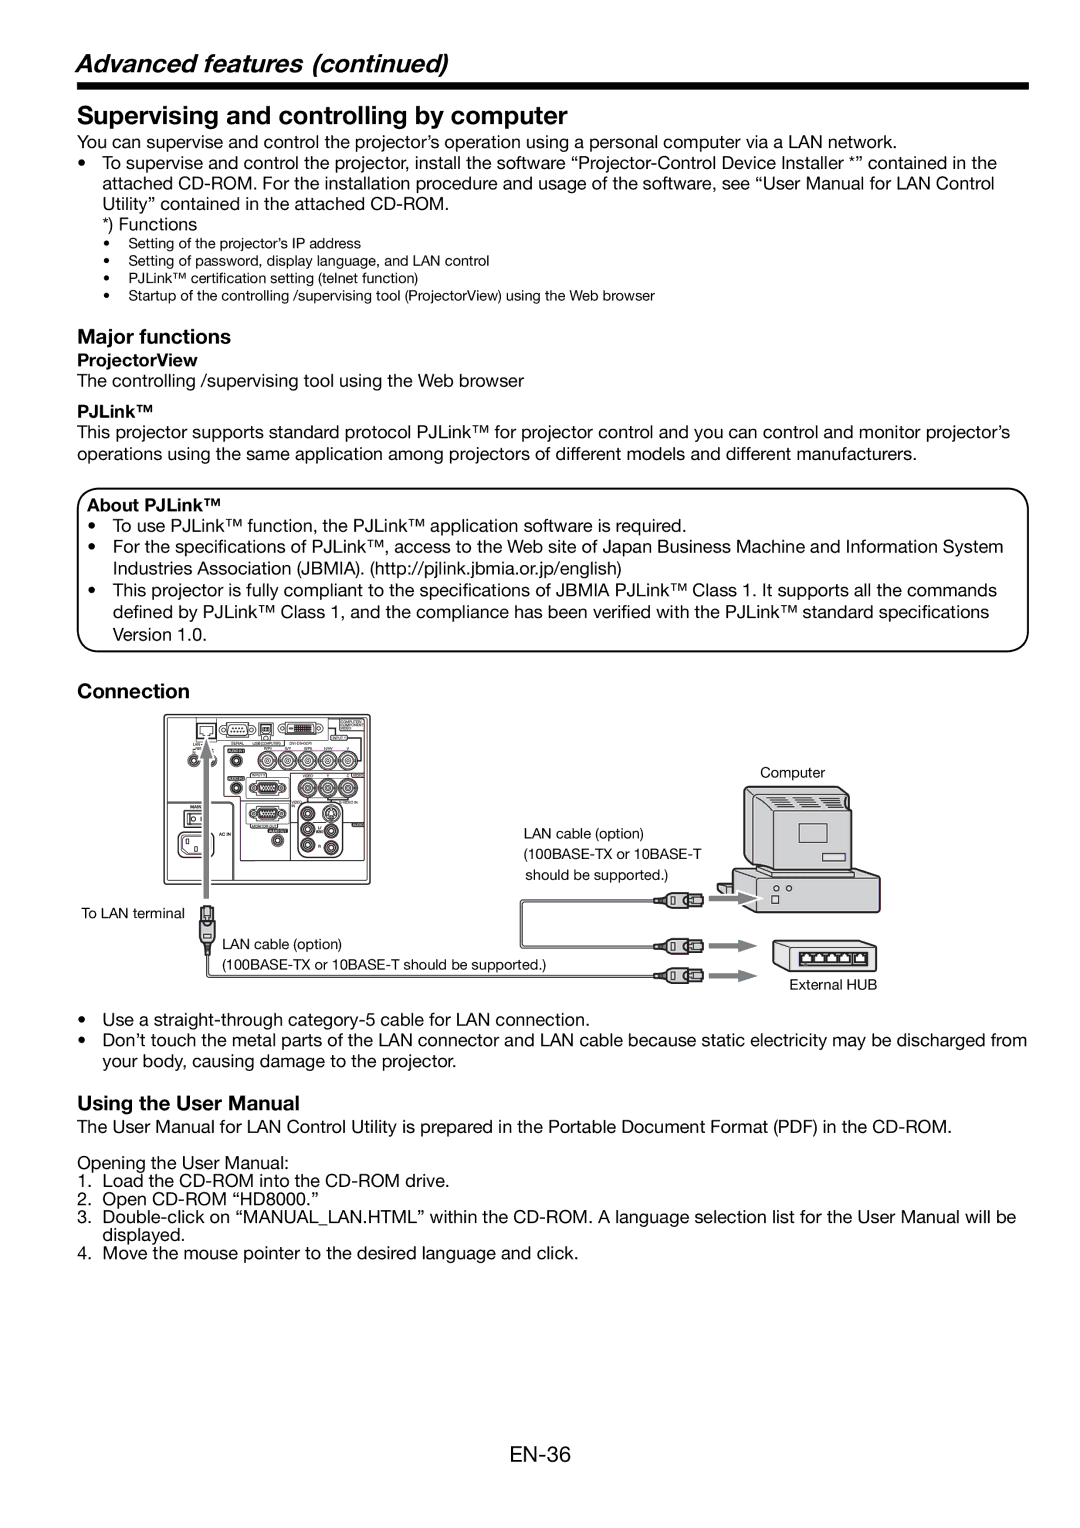
Connection
To LAN terminal
Computer
LAN cable (option)
![]() LAN cable (option)
LAN cable (option)
External HUB
•Use a
•Don’t touch the metal parts of the LAN connector and LAN cable because static electricity may be discharged from your body, causing damage to the projector.
Using the User Manual
The User Manual for LAN Control Utility is prepared in the Portable Document Format (PDF) in the
Opening the User Manual:
1.Load the
2.Open
3.
4.Move the mouse pointer to the desired language and click.