VENT INSTALLATION
REAR WALL VENT INSTALLATION (continued)
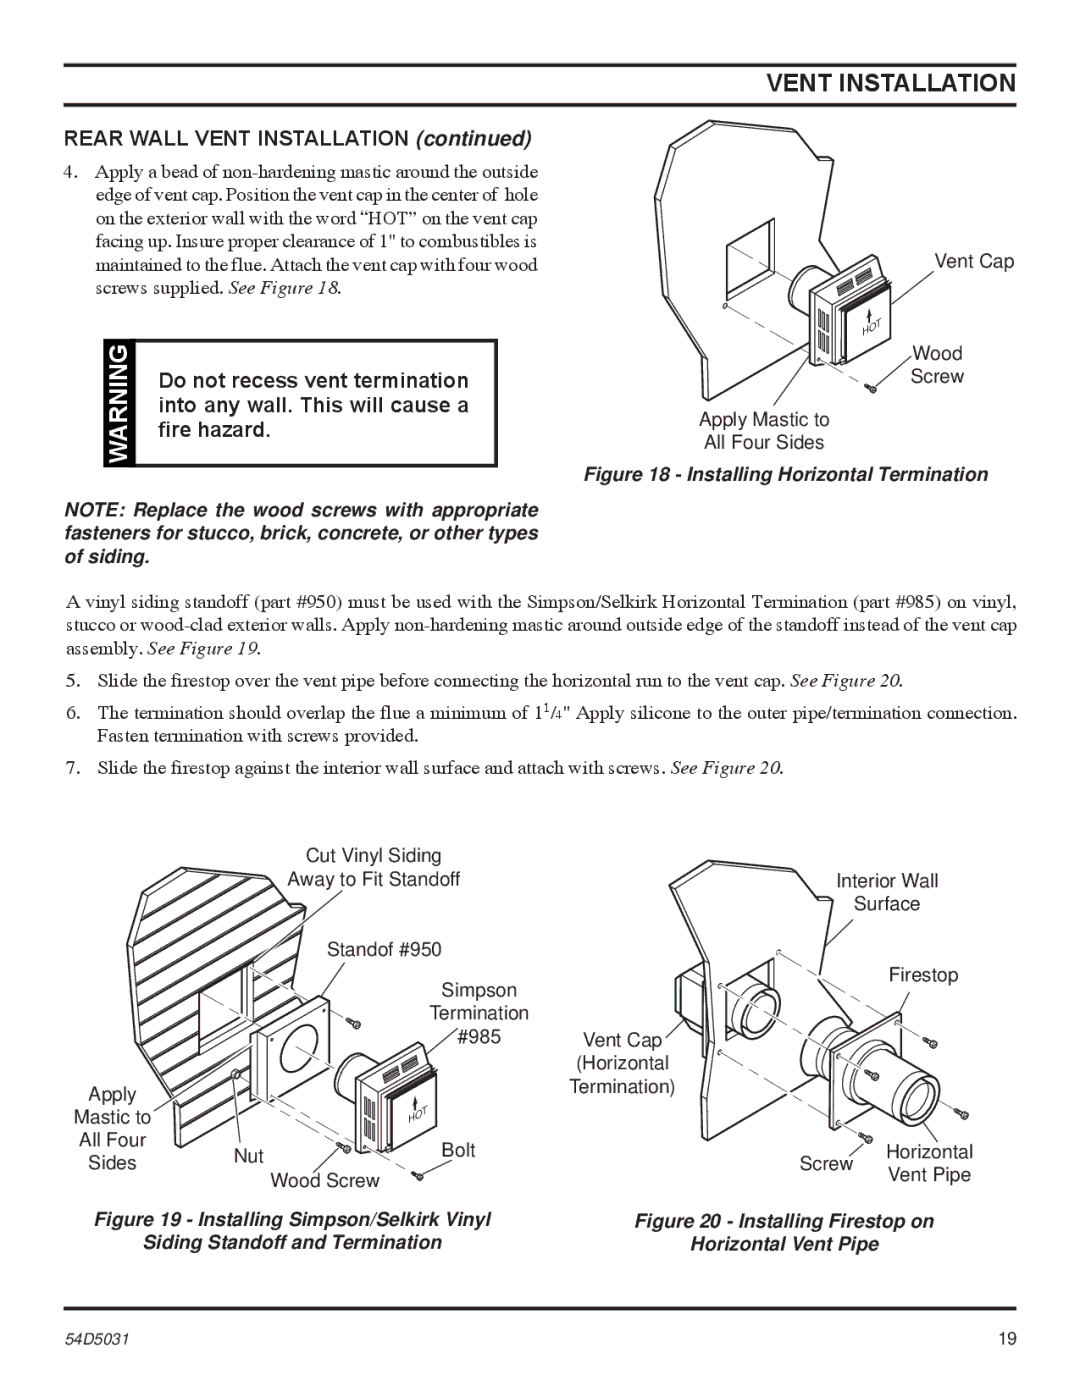
4.Apply a bead of
WARNING | Do not recess vent termination |
| |
| into any wall. This will cause a |
| fire hazard. |
|
|
NOTE: Replace the wood screws with appropriate fasteners for stucco, brick, concrete, or other types of siding.
Vent Cap
HOT
Wood
Screw
Apply Mastic to
All Four Sides
Figure 18 - Installing Horizontal Termination
A vinyl siding standoff (part #950) must be used with the Simpson/Selkirk Horizontal Termination (part #985) on vinyl, stucco or
5.Slide the firestop over the vent pipe before connecting the horizontal run to the vent cap. See Figure 20.
6.The termination should overlap the flue a minimum of 11/4" Apply silicone to the outer pipe/termination connection. Fasten termination with screws provided.
7.Slide the firestop against the interior wall surface and attach with screws. See Figure 20.
|
| Cut Vinyl Siding |
|
| |
|
| Away to Fit Standoff | Interior Wall | ||
|
|
|
| Surface | |
|
| Standof #950 |
|
| |
|
| Simpson |
| Firestop | |
|
|
|
| ||
|
| Termination |
|
| |
|
| #985 | Vent Cap |
| |
|
|
| (Horizontal |
| |
Apply |
|
| Termination) |
| |
|
|
|
| ||
Mastic to |
| HOT |
|
| |
All Four | Nut | Bolt |
| Horizontal | |
Sides | Screw | ||||
| Wood Screw | Vent Pipe | |||
|
|
| |||
Figure 19 - Installing Simpson/Selkirk Vinyl | Figure 20 - Installing Firestop on | ||||
Siding Standoff and Termination | Horizontal Vent Pipe | ||||
54D5031 | 19 |
