
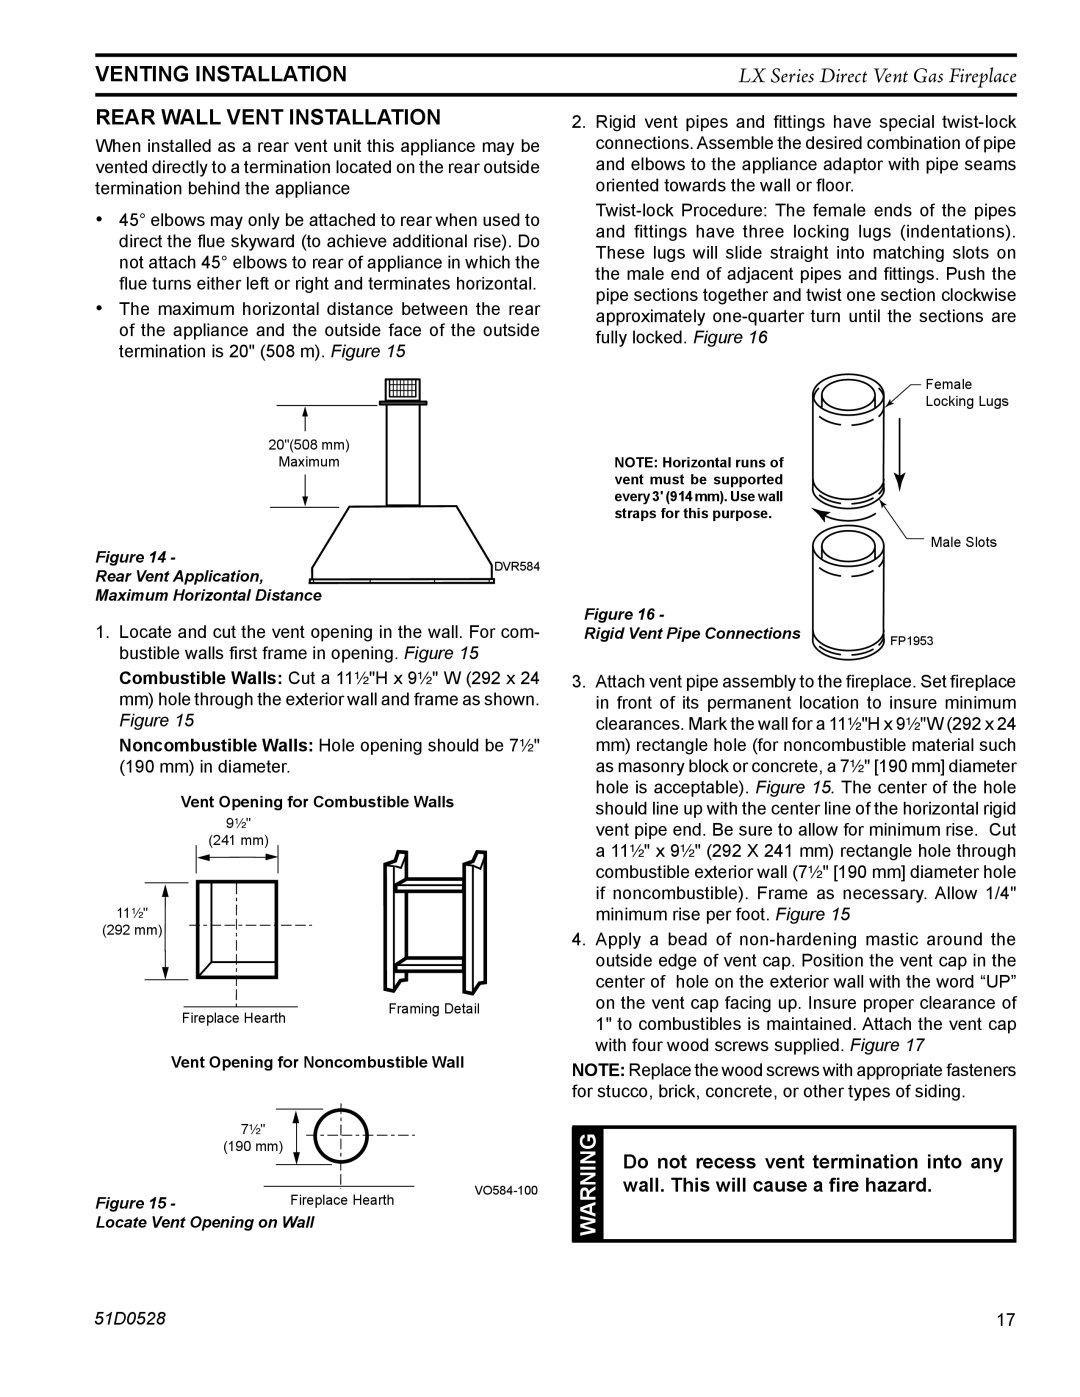
LX36DV, LX32DV specifications
The Monessen Hearth LX36DV and LX32DV are premium direct vent gas fireplaces designed to provide warmth and ambiance in any living space. Both models showcase innovative engineering and elegant designs, making them a popular choice for homeowners seeking efficient heating solutions.One of the main features of the LX36DV and LX32DV is their versatile design. Both units are available in various configurations, allowing them to seamlessly integrate into a range of architectural styles, from contemporary to traditional. Their clean face design and beveled edges contribute to a sleek, attractive appearance that enhances any room's aesthetic.
Efficiency is another standout characteristic of these fireplaces. Equipped with advanced gas burner technology, the LX36DV and LX32DV deliver an impressive heat output while maintaining a high efficiency rating. The direct vent system ensures that combustion gases are safely expelled outside, making it a safe alternative to traditional wood-burning fireplaces. This feature not only improves indoor air quality but also contributes to overall energy conservation.
The LX36DV and LX32DV also offer customizable options to enhance user experience. Customers can choose from various front styles, finishes, and media options, allowing for personalization that matches individual tastes. The addition of decorative glass or colorful crushed fireglass can transform the look of the fireplace, creating a unique focal point in the room.
In terms of technology, both models are equipped with remote control capabilities, allowing users to adjust flame height and heat settings from anywhere in the room. This convenience ensures optimal comfort while eliminating the need for manual adjustments. Additionally, these fireplaces come with innovative electronic ignition systems that provide reliable startup every time.
Safety features are prioritized in the design of the LX36DV and LX32DV. Each unit comes with safety screen options and can be modified to include childproof doors, making them a practical choice for families. The advanced flame sensing technology provides peace of mind as it automatically adjusts in response to room conditions.
In conclusion, the Monessen Hearth LX36DV and LX32DV are exemplary gas fireplaces that combine style, efficiency, and safety. With their customizable design, advanced technologies, and user-friendly features, these models stand out in the market, offering unrivaled warmth and elegance to any home. Whether you are heating a cozy family room or making a statement in a grand living area, these fireplaces provide both functionality and charm.