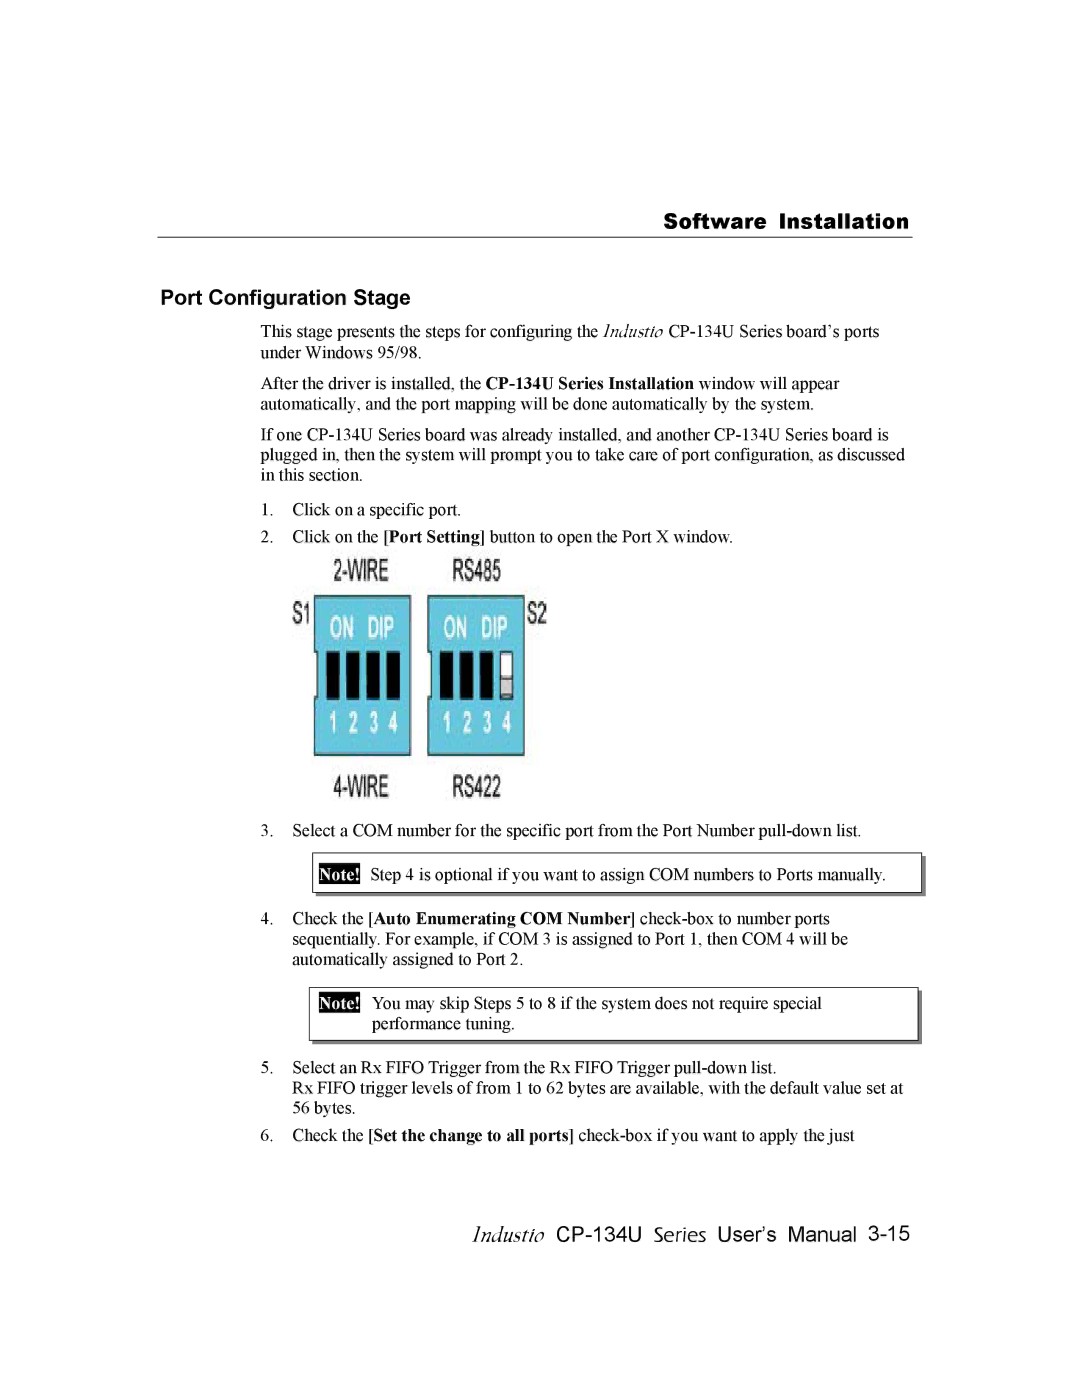
CP-134U specifications
Moxa Technologies CP-134U is a robust and versatile serial communication device designed to facilitate the connection between serial devices and modern computer systems. This product serves as a reliable solution for industries that require seamless integration of legacy serial equipment with newer digital architectures.One of the key features of the CP-134U is its ability to provide four serial ports, allowing users to connect multiple devices simultaneously. This capability is particularly beneficial in environments where monitoring and control of various equipment need to happen in real-time, such as in industrial automation, telecommunications, and infrastructure management. Each port supports standard RS-232/422/485 communication protocols, making the CP-134U compatible with a wide range of devices.
The device utilizes high-performance USB technology, enabling quick and easy installation without the need for additional power supply. This plug-and-play feature translates into reduced setup time and a simplified user experience. The CP-134U is compatible with various operating systems, including Windows and Linux, allowing for versatile applications across different platforms.
Another noteworthy characteristic of the CP-134U is its durability and industrial-grade design. Constructed with robust materials, this device is engineered to withstand harsh environmental conditions, ensuring reliable operation in challenging settings. The built-in isolation protection enhances the safety of connected devices by protecting them from voltage spikes and current surges.
Moxa Technologies has incorporated advanced technologies into the CP-134U to enhance communication reliability. It features data flow control mechanisms to ensure error-free data transmission, reducing the chances of data loss during critical operations. Furthermore, the device supports various communication baud rates, providing flexibility and adaptability based on user needs.
In addition to its technical attributes, the CP-134U comes with comprehensive documentation and support services provided by Moxa, ensuring that users can maximize their investment in the technology.
In conclusion, Moxa Technologies CP-134U is an effective solution for organizations looking to bridge the gap between legacy serial devices and modern systems. Its multi-port capability, compatibility with various protocols, industrial robustness, and excellent support make it a top choice for many sectors seeking reliable and efficient communication solutions.