Software Installation
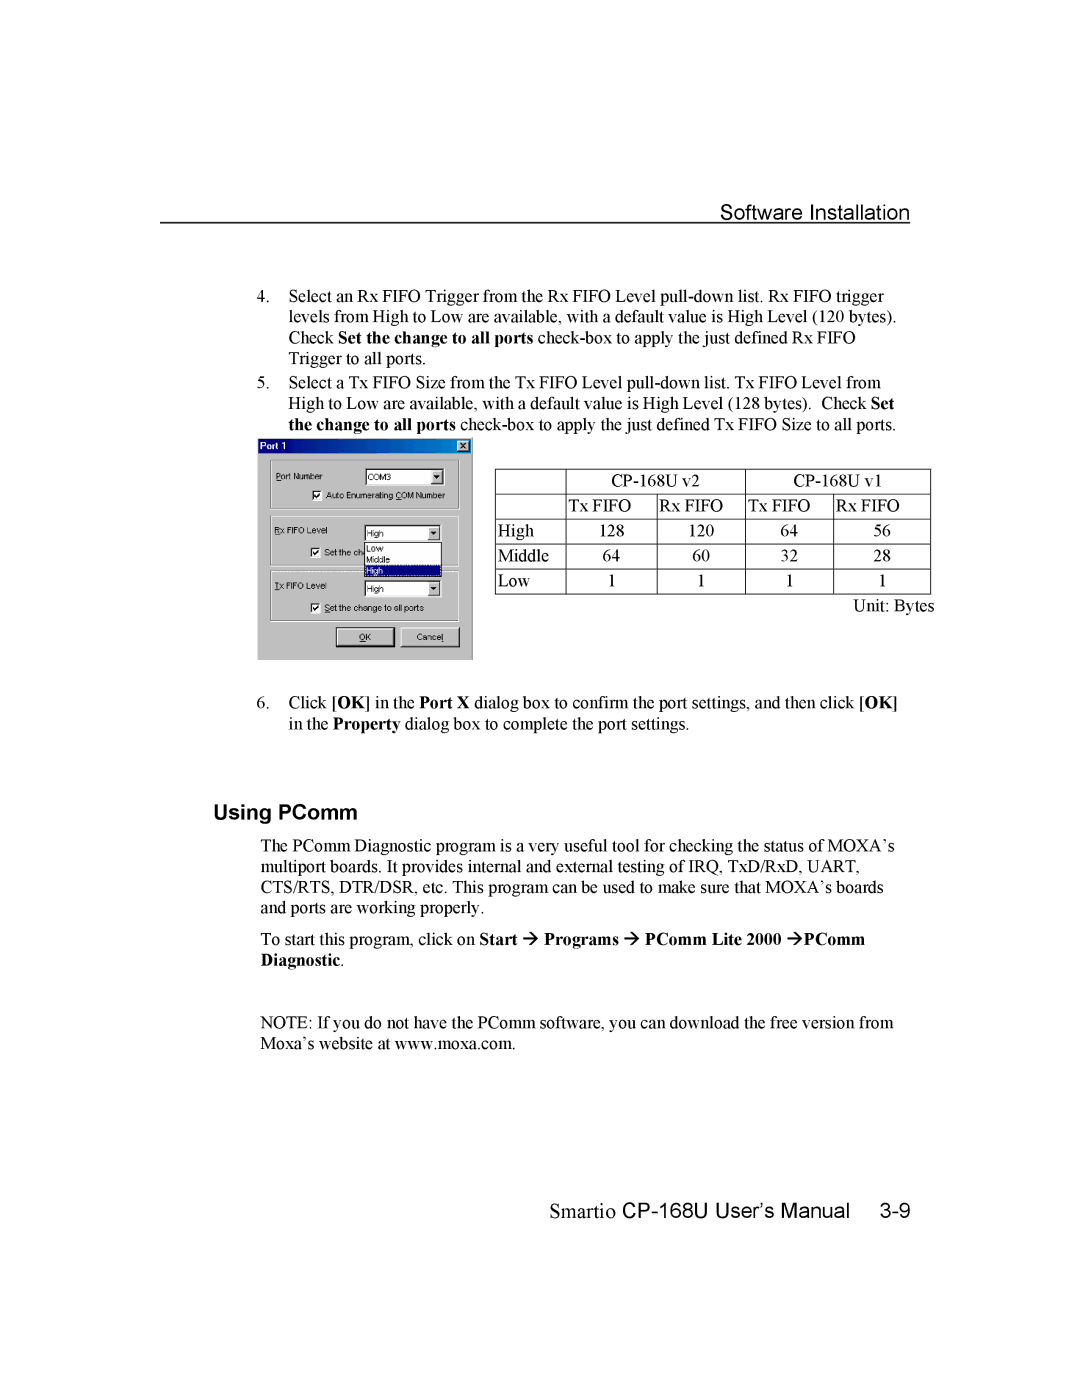
4.Select an Rx FIFO Trigger from the Rx FIFO Level
5.Select a Tx FIFO Size from the Tx FIFO Level
| ||||
| Tx FIFO | Rx FIFO | Tx FIFO | Rx FIFO |
High | 128 | 120 | 64 | 56 |
Middle | 64 | 60 | 32 | 28 |
Low | 1 | 1 | 1 | 1 |
Unit: Bytes
6.Click [OK] in the Port X dialog box to confirm the port settings, and then click [OK] in the Property dialog box to complete the port settings.
Using PComm
The PComm Diagnostic program is a very useful tool for checking the status of MOXA’s multiport boards. It provides internal and external testing of IRQ, TxD/RxD, UART, CTS/RTS, DTR/DSR, etc. This program can be used to make sure that MOXA’s boards and ports are working properly.
To start this program, click on Start " Programs " PComm Lite 2000 "PComm Diagnostic.
NOTE: If you do not have the PComm software, you can download the free version from Moxa’s website at www.moxa.com.