Top Features
2
1 |
|
STATUS |
|
POWER |
|
ON/ |
|
STAND | BY |
|
C | 3 |
CONTROL | |
| |
| AUDIO |
VIDEO
S-
VIDEO
4
59
SOURCE |
| 8 |
| AUTO | ADJUST |
|
| |
|
| M |
|
| E |
|
| N |
|
| U |
T | SELECT |
E |
|
N |
|
E |
|
R |
|
RGB
CANCE L
6
7
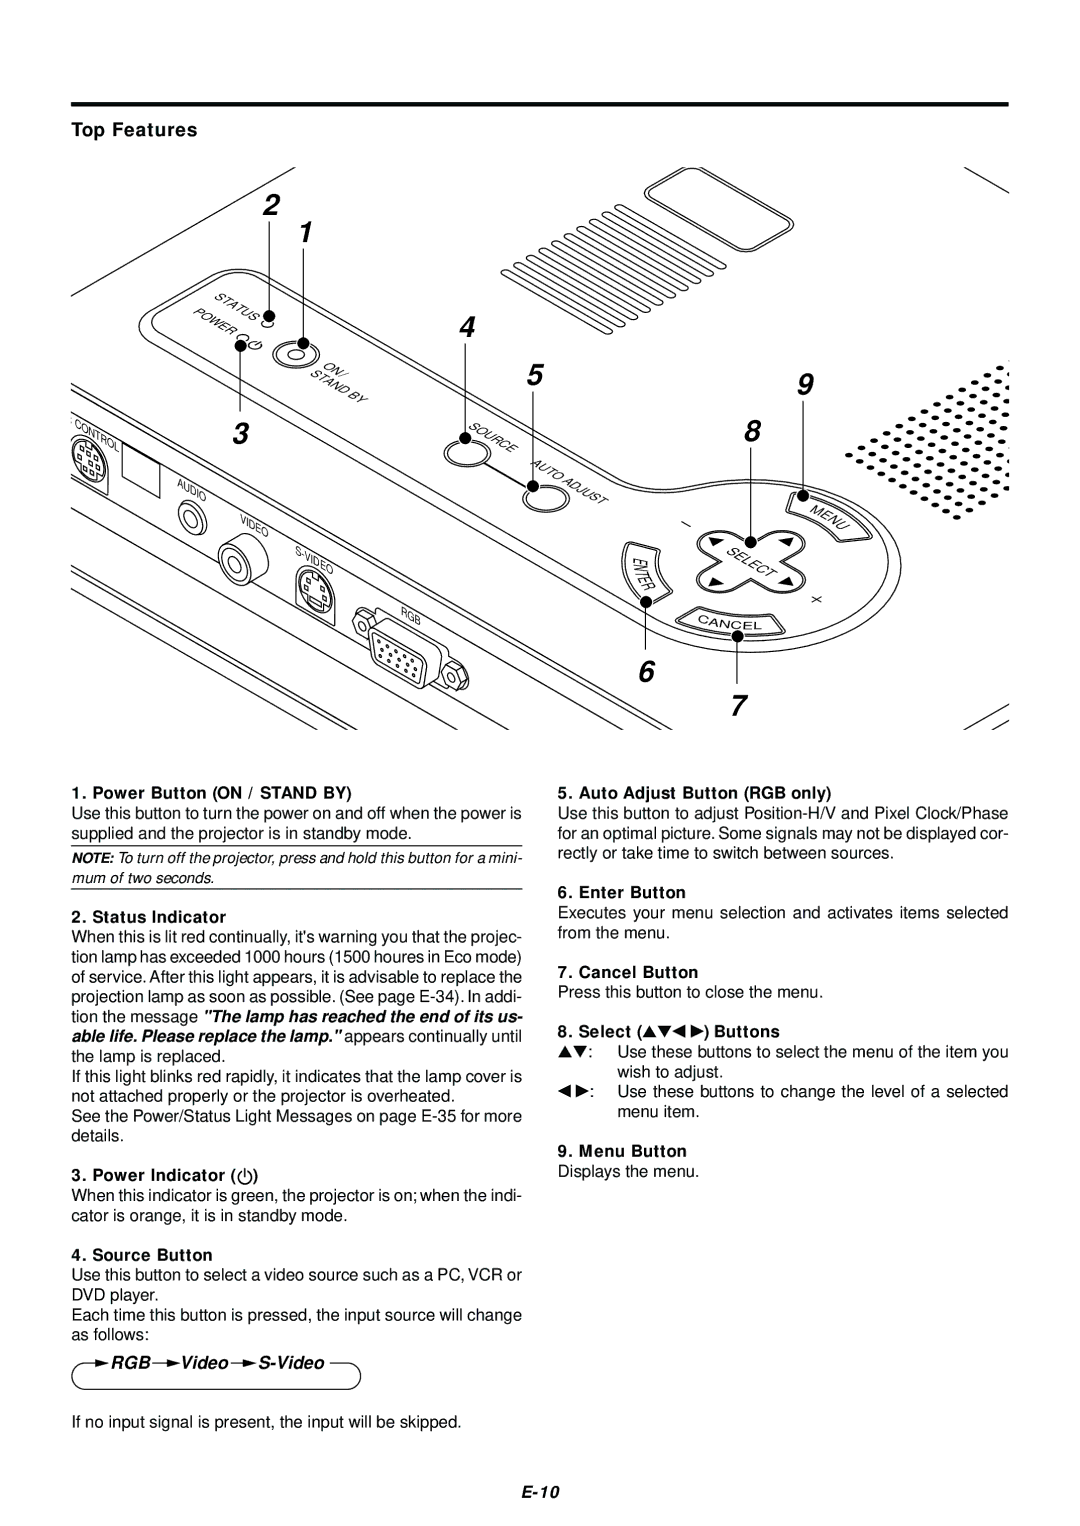
1. Power Button (ON / STAND BY)
Use this button to turn the power on and off when the power is supplied and the projector is in standby mode.
NOTE: To turn off the projector, press and hold this button for a mini- mum of two seconds.
2. Status Indicator
When this is lit red continually, it's warning you that the projec- tion lamp has exceeded 1000 hours (1500 houres in Eco mode) of service. After this light appears, it is advisable to replace the projection lamp as soon as possible. (See page
If this light blinks red rapidly, it indicates that the lamp cover is not attached properly or the projector is overheated.
See the Power/Status Light Messages on page
3. Power Indicator ( )
)
When this indicator is green, the projector is on; when the indi- cator is orange, it is in standby mode.
4. Source Button
Use this button to select a video source such as a PC, VCR or DVD player.
Each time this button is pressed, the input source will change as follows:
 RGB
RGB  Video
Video  S-Video
5. Auto Adjust Button (RGB only)
Use this button to adjust
6. Enter Button
Executes your menu selection and activates items selected from the menu.
7. Cancel Button
Press this button to close the menu.
8. Select (▲▼ ◀ ▶) Buttons
▲▼ : Use these buttons to select the menu of the item you wish to adjust.
◀▶: Use these buttons to change the level of a selected menu item.
9.Menu Button
Displays the menu.
If no input signal is present, the input will be skipped.
