Press the Source button on the remote control or the projector cabinet to select “Video” (VCR, document camera, or laser disc player),
Or press the “Menu” button on the remote control or the cabi- net and use the menu to select your video source: “Video”, “S- Video” or “RGB” .
NOTE: If no input signal is available, the projector will display a blue background (factory preset).
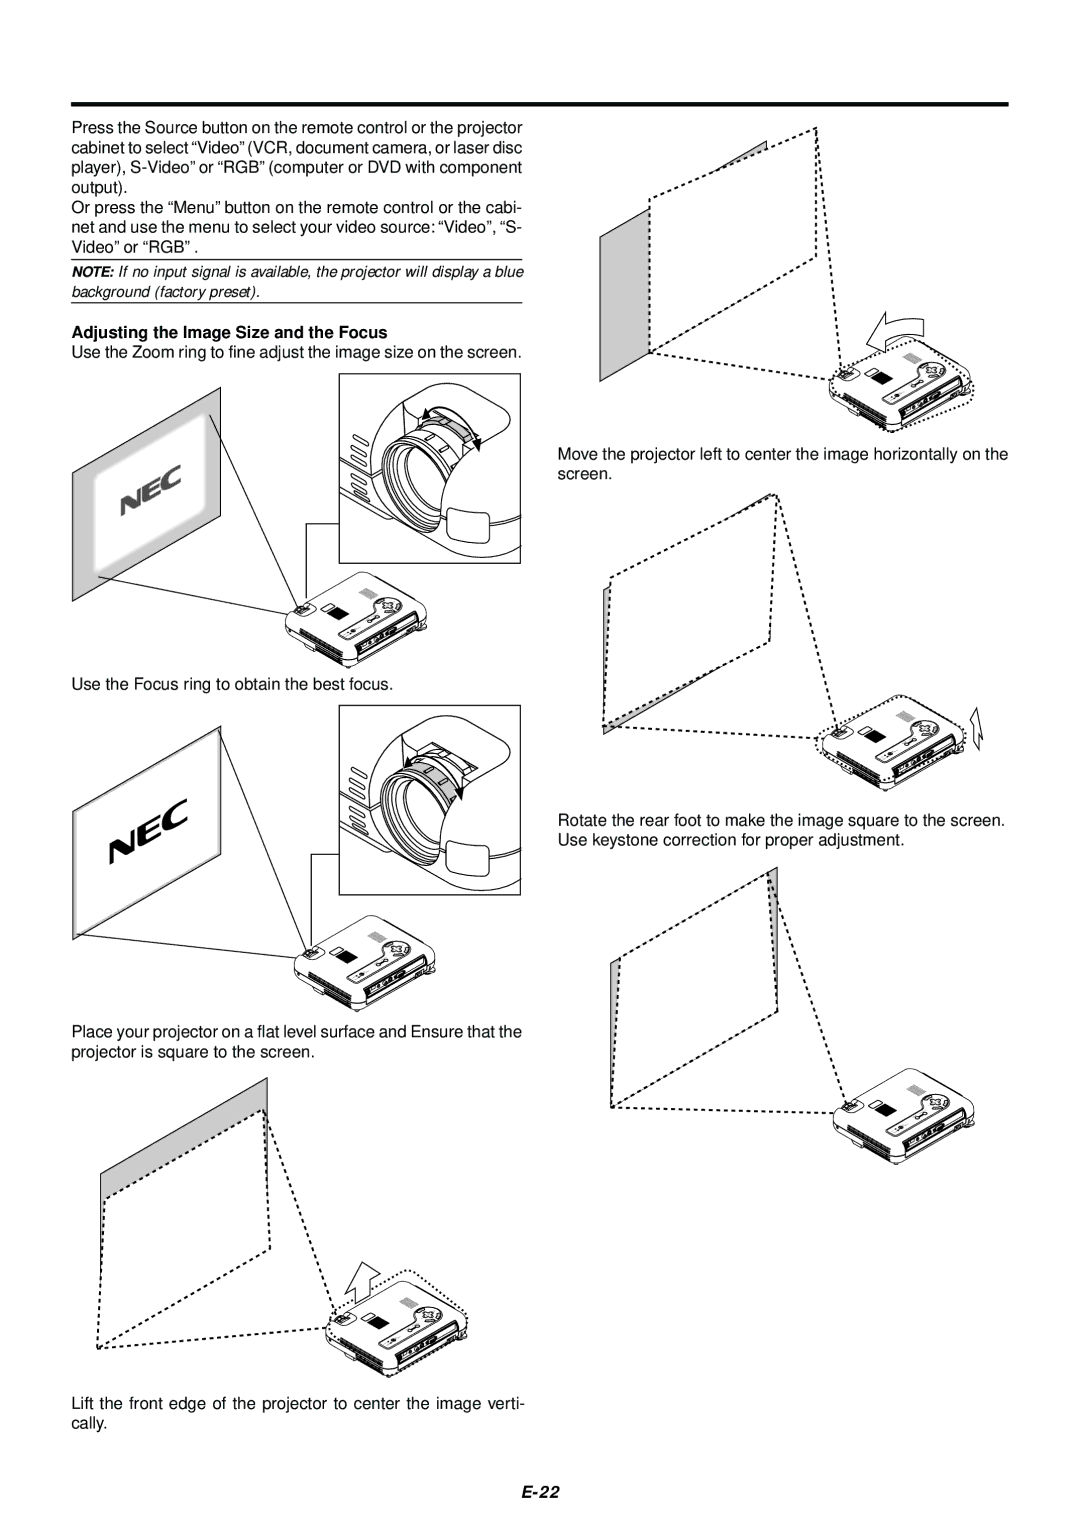
Adjusting the Image Size and the Focus
Use the Zoom ring to fine adjust the image size on the screen.
Use the Focus ring to obtain the best focus.
Place your projector on a flat level surface and Ensure that the projector is square to the screen.
Lift the front edge of the projector to center the image verti- cally.
Move the projector left to center the image horizontally on the screen.
Rotate the rear foot to make the image square to the screen. Use keystone correction for proper adjustment.