Part Names and Functions - continued
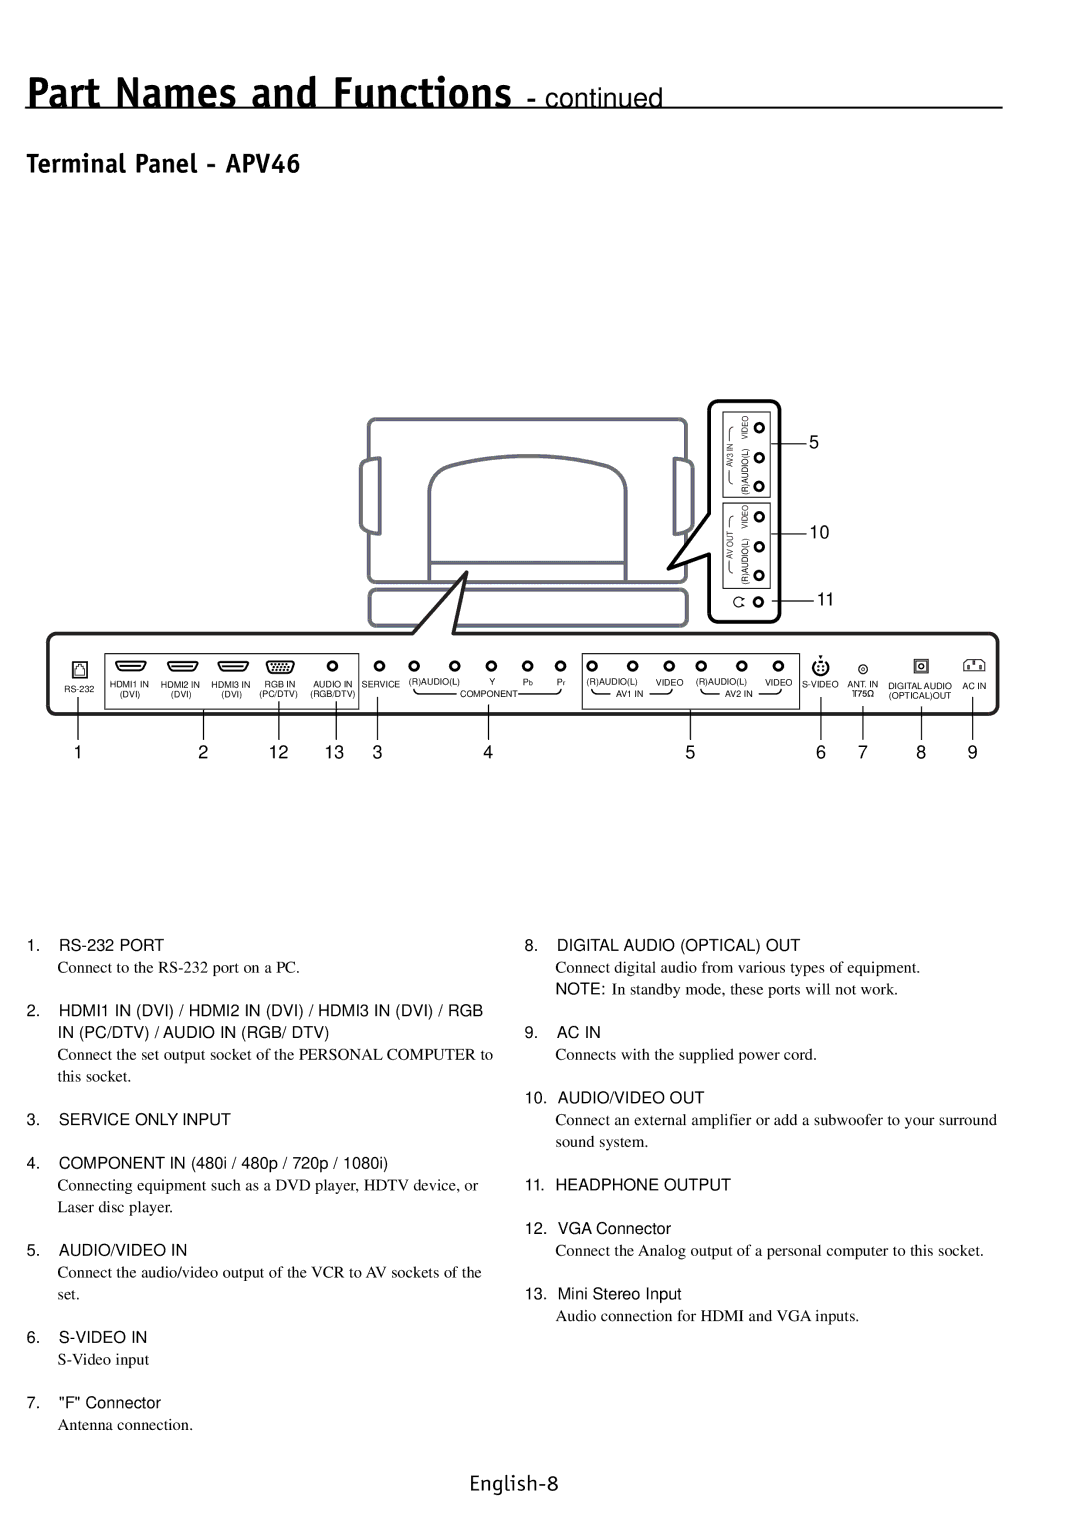
Terminal Panel - APV46
![]() AV OUTAV3 IN
AV OUTAV3 IN
VIDEO (R)AUDIO(L)
VIDEO (R)AUDIO(L)
5
10
11
HDMI1 IN | HDMI2 IN | HDMI3 IN | RGB IN | AUDIO IN | SERVICE (R)AUDIO(L) |
| Y | Pb | Pr | |||
(DVI) | (DVI) | (DVI) | (PC/DTV) | (RGB/DTV) |
|
| COMPONENT |
|
| |||
|
|
|
|
|
|
|
|
|
|
|
|
|
|
|
|
|
|
|
|
|
|
|
|
|
|
(R)AUDIO(L) | VIDEO (R)AUDIO(L) | VIDEO |
|
|
|
|
|
|
|
| |
|
|
|
|
|
|
|
| ||||
AV1 IN |
| AV2 IN |
|
|
|
| (OPTICAL)OUT |
| |||
|
|
|
|
|
|
|
|
|
|
|
|
|
|
|
|
|
|
|
|
|
|
|
|
1 | 2 | 12 | 13 | 3 | 4 |
1.
Connect to the
2.HDMI1 IN (DVI) / HDMI2 IN (DVI) / HDMI3 IN (DVI) / RGB IN (PC/DTV) / AUDIO IN (RGB/ DTV)
Connect the set output socket of the PERSONAL COMPUTER to this socket.
3.SERVICE ONLY INPUT
4.COMPONENT IN (480i / 480p / 720p / 1080i)
Connecting equipment such as a DVD player, HDTV device, or Laser disc player.
5.AUDIO/VIDEO IN
Connect the audio/video output of the VCR to AV sockets of the set.
6.
7."F" Connector Antenna connection.
5 | 6 | 7 | 8 | 9 |
8.DIGITAL AUDIO (OPTICAL) OUT
Connect digital audio from various types of equipment. NOTE: In standby mode, these ports will not work.
9.AC IN
Connects with the supplied power cord.
10.AUDIO/VIDEO OUT
Connect an external amplifier or add a subwoofer to your surround sound system.
11.HEADPHONE OUTPUT
12.VGA Connector
Connect the Analog output of a personal computer to this socket.
13.Mini Stereo Input
Audio connection for HDMI and VGA inputs.
