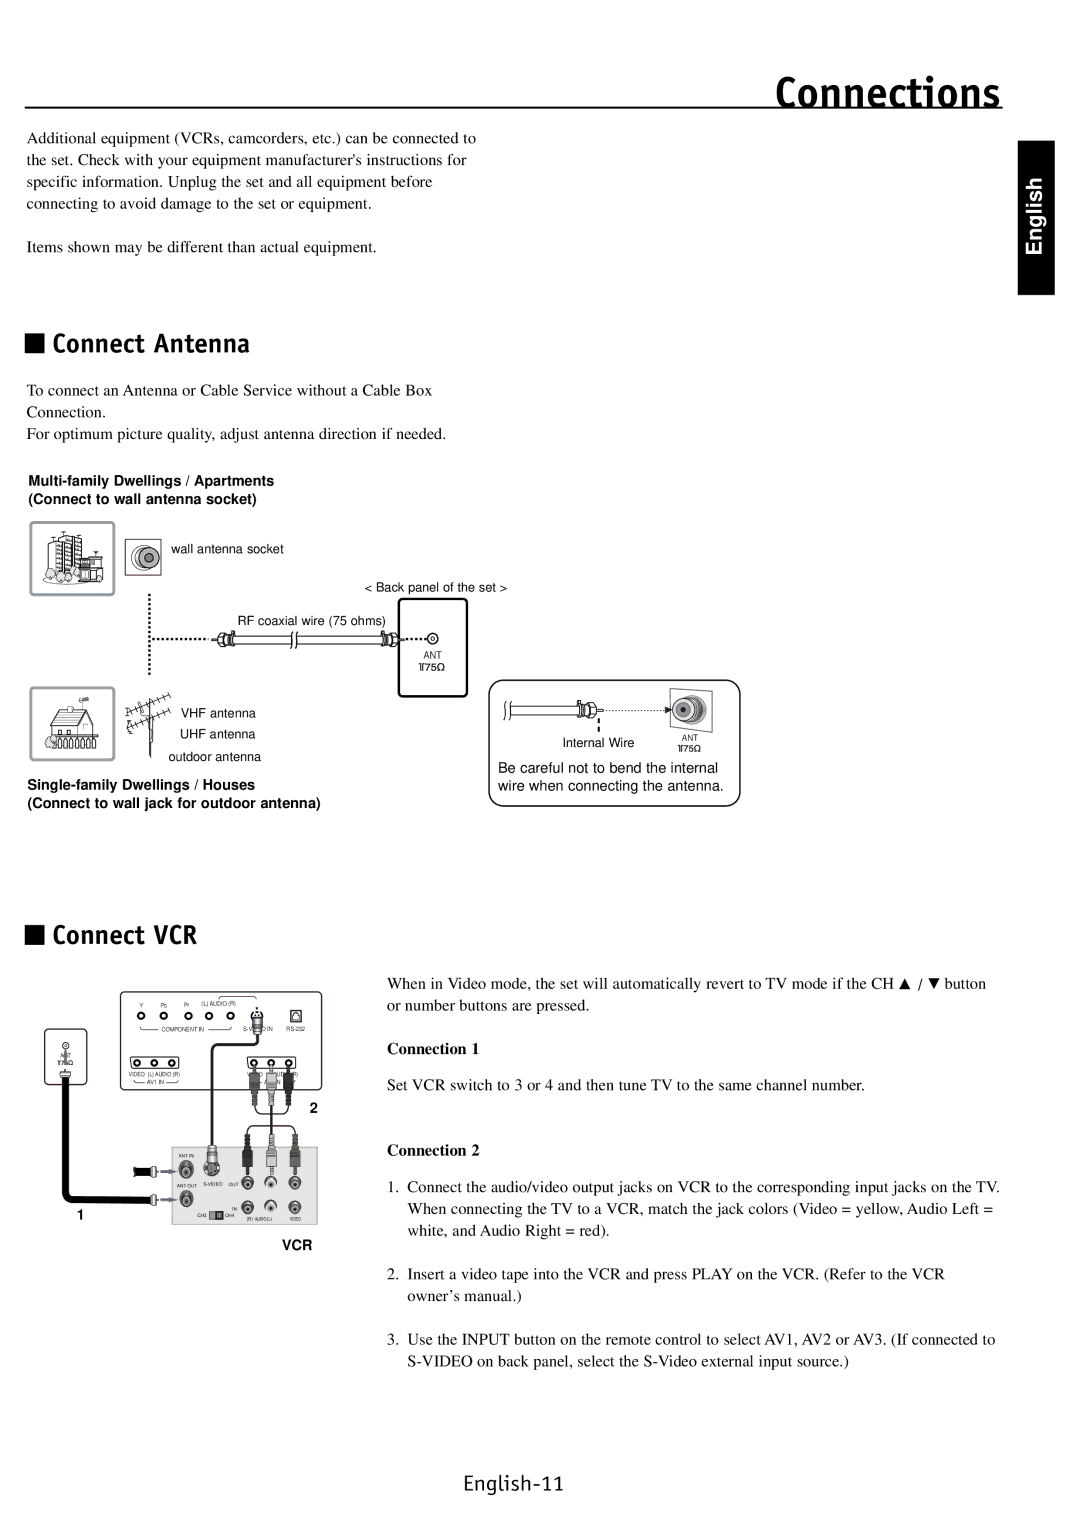
Additional equipment (VCRs, camcorders, etc.) can be connected to the set. Check with your equipment manufacturer's instructions for specific information. Unplug the set and all equipment before connecting to avoid damage to the set or equipment.
Items shown may be different than actual equipment.
 Connect Antenna
To connect an Antenna or Cable Service without a Cable Box Connection.
For optimum picture quality, adjust antenna direction if needed.
wall antenna socket
< Back panel of the set >
RF coaxial wire (75 ohms)
Connections
English
![]()
![]()
![]()
![]()
![]()
![]() VHF antenna UHF antenna outdoor antenna
VHF antenna UHF antenna outdoor antenna
ANT
Internal Wire |
| ANT |
Be careful not to bend the internal wire when connecting the antenna.
 Connect VCR
Y | Pb | Pr | (L) AUDIO (R) |
| |
| COMPONENT IN | ||||
ANT |
|
|
|
|
|
VIDEO (L) AUDIO (R) |
|
| AUDIO (R) | ||
| AV1 IN |
|
| A | IN |
|
|
|
|
| 2 |
|
| ANT IN |
|
|
|
|
| ANT OUT | OUT |
| |
1 |
|
|
| IN |
|
|
| CH3 | CH4 | VIDEO | |
|
|
| (R) AUDIO(L) | ||
VCR
When in Video mode, the set will automatically revert to TV mode if the CH D / E button or number buttons are pressed.
Connection 1
Set VCR switch to 3 or 4 and then tune TV to the same channel number.
Connection 2
1.Connect the audio/video output jacks on VCR to the corresponding input jacks on the TV. When connecting the TV to a VCR, match the jack colors (Video = yellow, Audio Left = white, and Audio Right = red).
2.Insert a video tape into the VCR and press PLAY on the VCR. (Refer to the VCR owner’s manual.)
3.Use the INPUT button on the remote control to select AV1, AV2 or AV3. (If connected to
