Section 5:
Connecting the DSL Gateway
Ethernet LAN connection method (wired LAN)
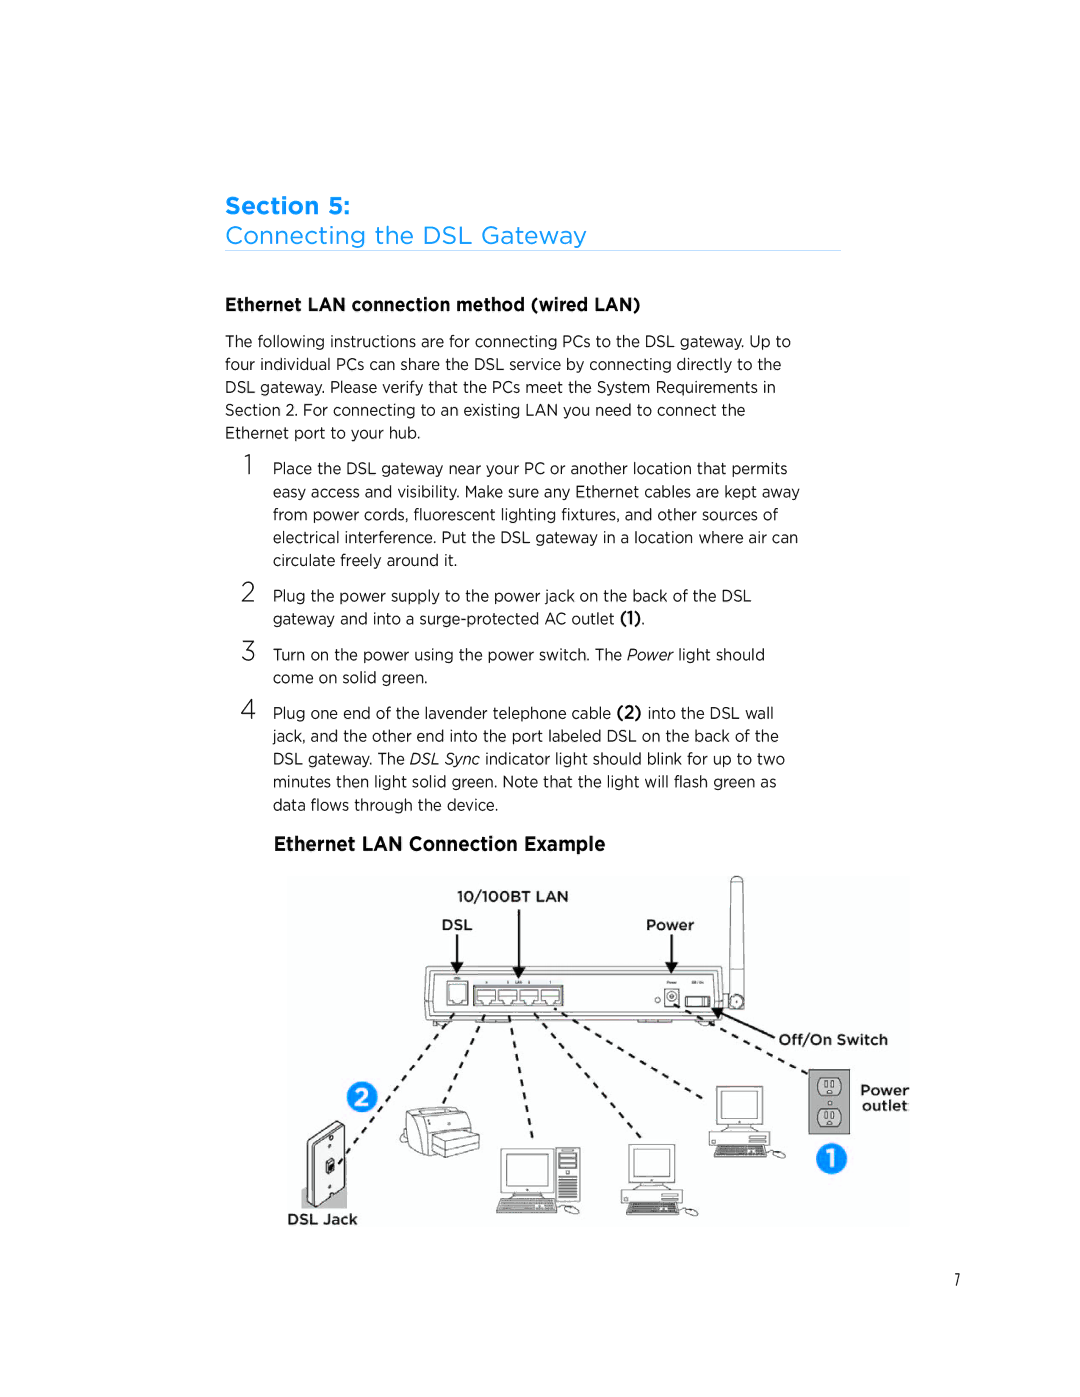
The following instructions are for connecting PCs to the DSL gateway. Up to four individual PCs can share the DSL service by connecting directly to the DSL gateway. Please verify that the PCs meet the System Requirements in Section 2. For connecting to an existing LAN you need to connect the Ethernet port to your hub.
1 Place the DSL gateway near your PC or another location that permits easy access and visibility. Make sure any Ethernet cables are kept away from power cords, fluorescent lighting fixtures, and other sources of electrical interference. Put the DSL gateway in a location where air can circulate freely around it.
2
3
4 Plug one end of the lavender telephone cable (2) into the DSL wall jack, and the other end into the port labeled DSL on the back of the DSL gateway. The DSL Sync indicator light should blink for up to two minutes then light solid green. Note that the light will flash green as data flows through the device.
Ethernet LAN Connection Example
7
