Installing the Base Station / 23
Before you start
•Ensure there is an AC power outlet within 1.5 meters (5 feet) of the base station location.
•Ensure that the telephone lines from your system have been installed to the base station location.
Mounting and Connecting the Base Station
Follow these steps to mount and connect each base station.
1.Use the mounting bracket as a template to position the base station and mark the screw positions.
2.Use screws to attach the mounting bracket to a wall or ceiling.
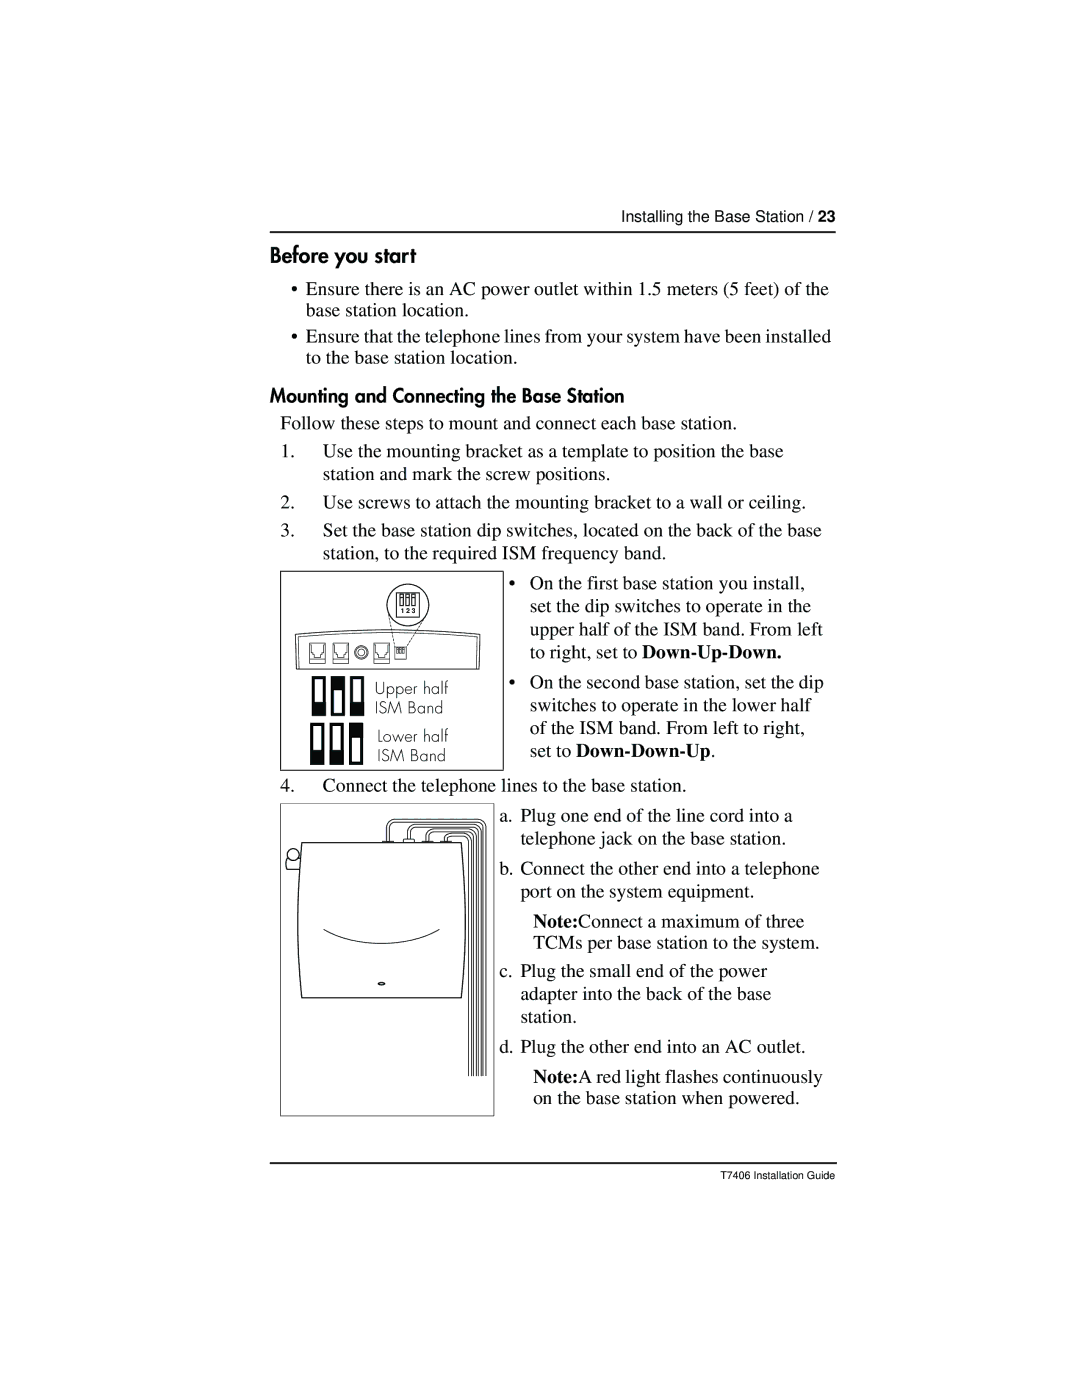
3.Set the base station dip switches, located on the back of the base station, to the required ISM frequency band.
1 2 3 |
Upper half |
ISM Band |
Lower half |
ISM Band |
•On the first base station you install, set the dip switches to operate in the upper half of the ISM band. From left to right, set to
•On the second base station, set the dip switches to operate in the lower half of the ISM band. From left to right, set to
4.Connect the telephone lines to the base station.
a. Plug one end of the line cord into a telephone jack on the base station.
b. Connect the other end into a telephone port on the system equipment.
Note:Connect a maximum of three
TCMs per base station to the system.
c.Plug the small end of the power adapter into the back of the base station.
d.Plug the other end into an AC outlet.
Note:A red light flashes continuously on the base station when powered.
T7406 Installation Guide
