Step 2 – Install Boards in available PCI Bus-slots
IMPORTANT: Software must be installed before installing hardware.
CAUTION
Turn off power to, and UNPLUG the host PC and externally connected equipment prior to removing the PC’s cover and installing the DaqBoard. Electric shock or damage to equipment can result even under
Take ESD precautions (packaging, proper handling, grounded wrist strap, etc.)
Use care to avoid touching board surfaces and onboard components. Only handle boards by their edges (or ORBs, if applicable). Ensure boards do not come into contact with foreign elements such as oils, water, and industrial particulate.
IMPORTANT: Bus Mastering DMA must be Enabled.
For a DaqBoard/500 Series board to operate properly, Bus Mastering DMA must be Enabled on the PCI slot [for which the board is to be installed]. Prior to installation, verify that your computer is capable of performing Bus Mastering DMA for the applicable PCI slot. Note that some computers have BIOS settings that enable [or disable] Bus Mastering DMA. If your computer has this BIOS option, ensure that Bus Mastering DMA is Enabled on the appropriate PCI slot.
Refer to your PC Owner's Manual for additional information regarding your PC and enabling Bus Mastering DMA for PCI slots.
1.Turn off power to, and UNPLUG the host PC and externally connected equipment.
2.Remove the PC’s cover. Refer to your PC Owner’s Manual as needed.
3.Choose an available PCI
4.Carefully remove the DaqBoard from its
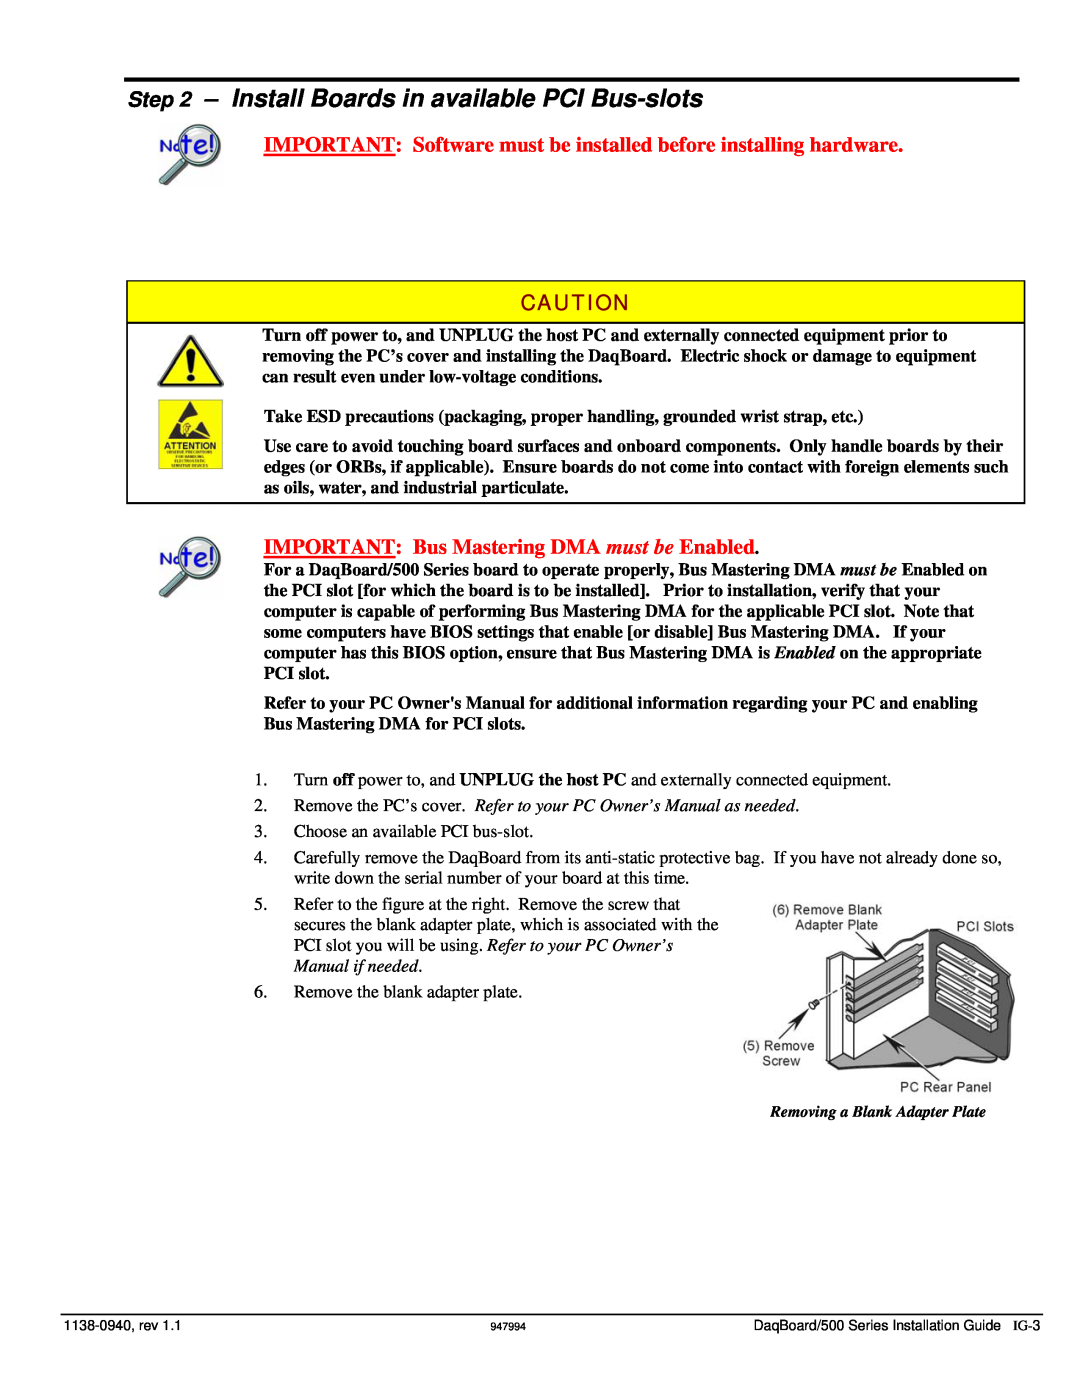
5.Refer to the figure at the right. Remove the screw that secures the blank adapter plate, which is associated with the PCI slot you will be using. Refer to your PC Owner’s Manual if needed.
6.Remove the blank adapter plate.
Removing a Blank Adapter Plate
947994 | DaqBoard/500 Series Installation Guide |