Connecting the DV-CP704—Continued
Digital Connection
Use an optical (or coaxial) digital audio cable to connect the
![]() Signal flow
Signal flow
OPTICAL
COA
XIAL
Connect one or the other
COAXIALOPTICAL
Optical digital cable
Coaxial digital
cable
(supplied)
Notes:
•Be sure to set the Audio menu, Digital/HDMI Audio Out setting to “PCM” (see page 45). Otherwise an unpleasant digital noise may be heard, which may damage your equipment.
•Never connect the
Connecting a Component with an HDMI Input
This section shows how to connect the
What is HDMI?
HDMI (High Definition Multimedia Interface) is a new connection format that can carry uncompressed, stan- dard or high definition digital video and up to eight chan- nels of digital audio. Until now, several separate video and audio cables have been required to connect AV com- ponents together. With HDMI, a single cable is all that’s necessary to achieve the best picture and audio quality. HDMI video is compatible with DVI (Digital Visual Interface). To send HDMI video to a DVI input requires an
Using HDMI
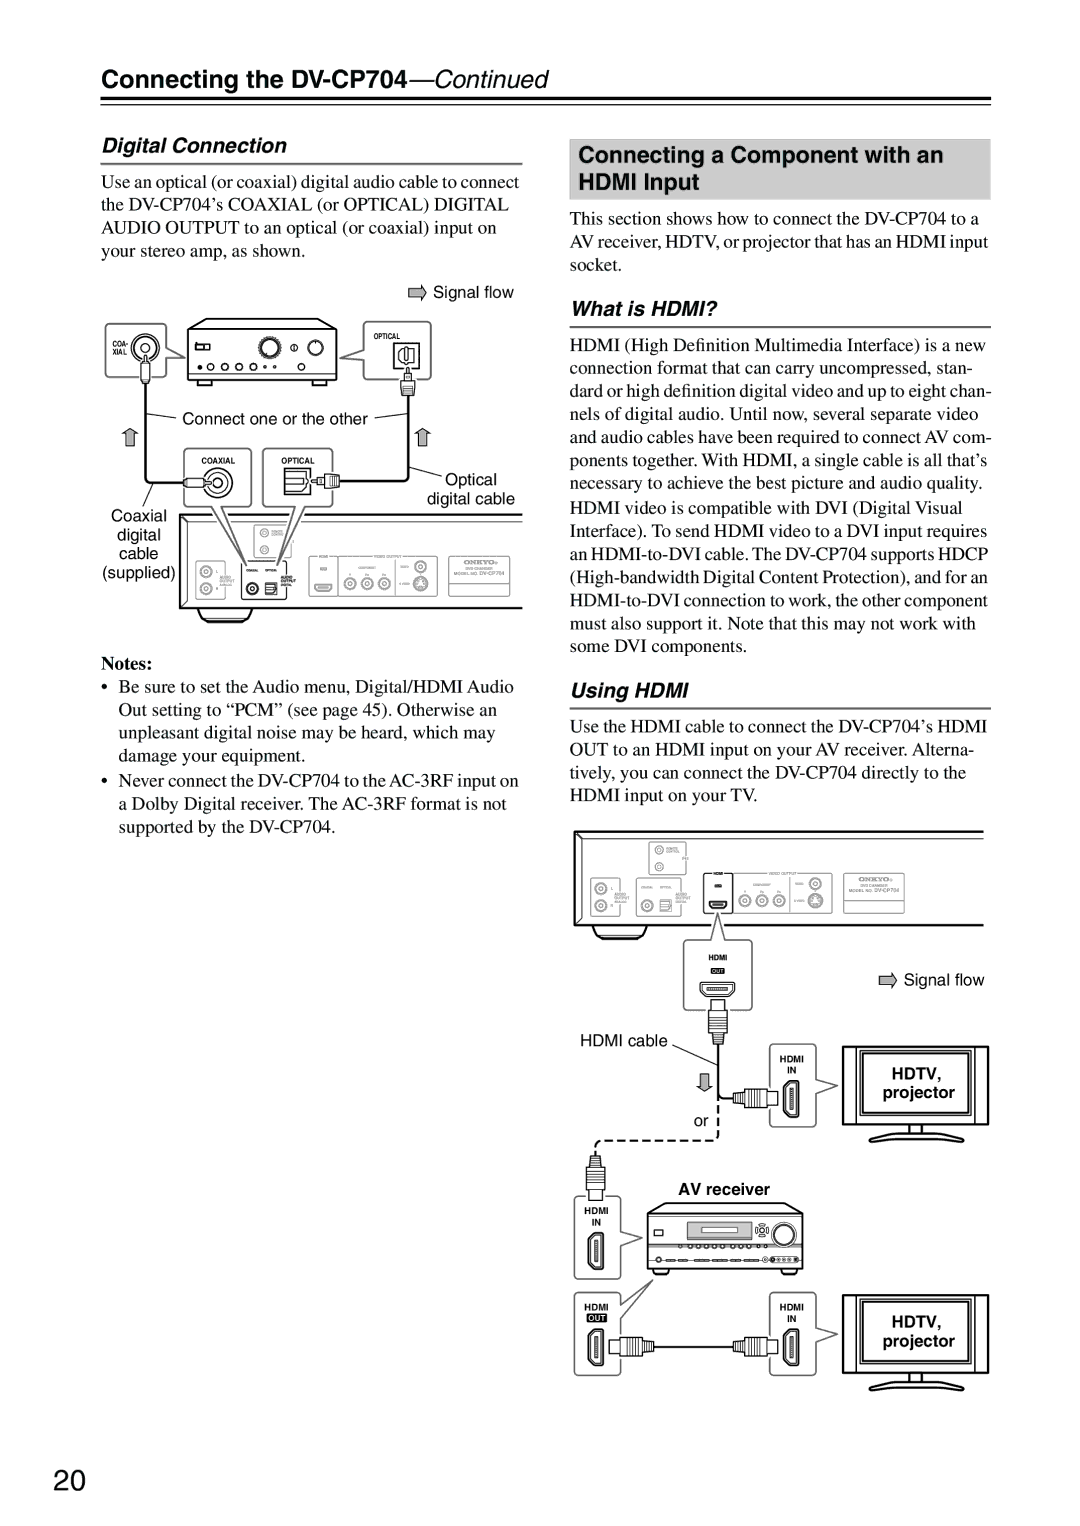
Use the HDMI cable to connect the
HDMI cable
| HDMI |
| IN |
| or |
| AV receiver |
HDMI |
|
IN |
|
HDMI | HDMI |
| IN |
![]() Signal flow
Signal flow
HDTV, projector
HDTV, projector
20