Index to parts and controls
Front panel |
|
|
1 2 | 3 456 78 9 0 - = | ~ |
! @ #$
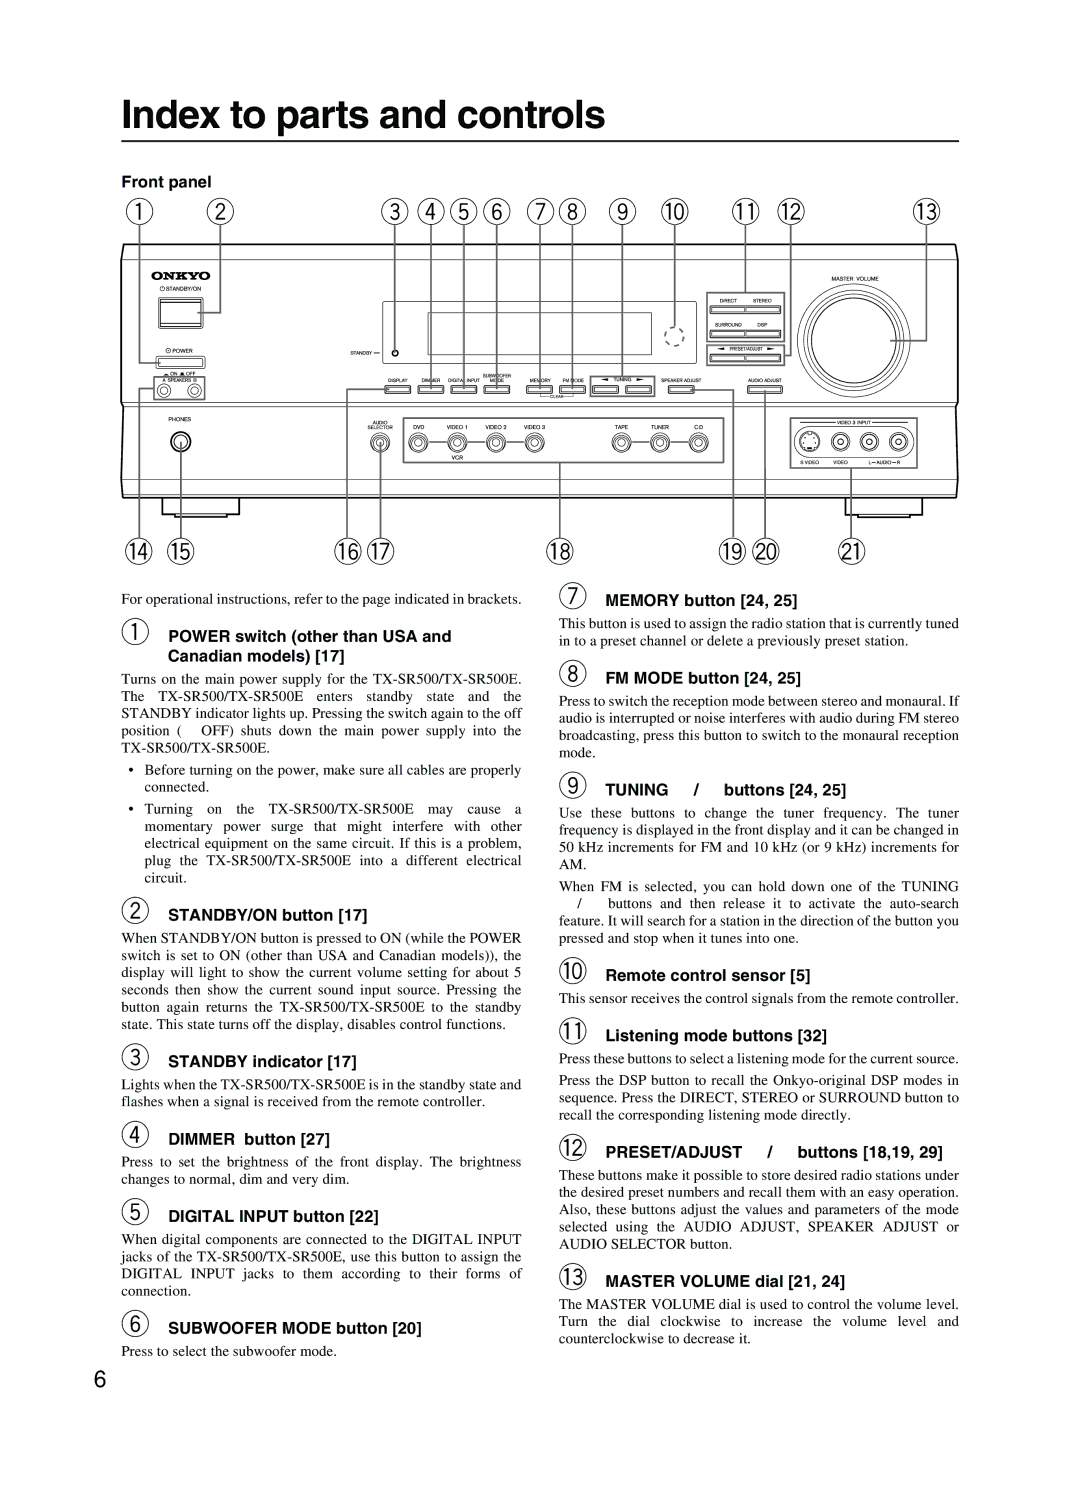
For operational instructions, refer to the page indicated in brackets.
1POWER switch (other than USA and Canadian models) [17]
Turns on the main power supply for the
•Before turning on the power, make sure all cables are properly connected.
•Turning on the
2STANDBY/ON button [17]
When STANDBY/ON button is pressed to ON (while the POWER switch is set to ON (other than USA and Canadian models)), the display will light to show the current volume setting for about 5 seconds then show the current sound input source. Pressing the button again returns the
3STANDBY indicator [17]
Lights when the
4DIMMER button [27]
Press to set the brightness of the front display. The brightness changes to normal, dim and very dim.
5DIGITAL INPUT button [22]
When digital components are connected to the DIGITAL INPUT jacks of the
6SUBWOOFER MODE button [20]
Press to select the subwoofer mode.
%^& *
7MEMORY button [24, 25]
This button is used to assign the radio station that is currently tuned in to a preset channel or delete a previously preset station.
8FM MODE button [24, 25]
Press to switch the reception mode between stereo and monaural. If audio is interrupted or noise interferes with audio during FM stereo broadcasting, press this button to switch to the monaural reception mode.
9TUNING ™/£ buttons [24, 25]
Use these buttons to change the tuner frequency. The tuner frequency is displayed in the front display and it can be changed in 50 kHz increments for FM and 10 kHz (or 9 kHz) increments for AM.
When FM is selected, you can hold down one of the TUNING ™/£ buttons and then release it to activate the
0Remote control sensor [5]
This sensor receives the control signals from the remote controller.
-Listening mode buttons [32]
Press these buttons to select a listening mode for the current source.
Press the DSP button to recall the
=PRESET/ADJUST ™/£ buttons [18,19, 29]
These buttons make it possible to store desired radio stations under the desired preset numbers and recall them with an easy operation. Also, these buttons adjust the values and parameters of the mode selected using the AUDIO ADJUST, SPEAKER ADJUST or AUDIO SELECTOR button.
~MASTER VOLUME dial [21, 24]
The MASTER VOLUME dial is used to control the volume level. Turn the dial clockwise to increase the volume level and counterclockwise to decrease it.
6