Notes:
•The VCR can record only one broadcast at a time. If you set the VCR’s timer to record broadcasts on different channels that start at the same time, the VCR only records the broadcast that has the lowest timer num- ber (see “Checking/Changing Timers” on Page 40).
•If two timer settings overlap, the one that starts first has priority. The VCR begins recording the second broadcast after the set time for the first broadcast is over.
•The VCR must be off at the start time you set for it to begin an automatic timer recording.
•If there is a power failure of more than 30 minutes during a timer recording, the recording does not resume after power is restored.
•If there is a power failure of more than 30 minutes before a start time, the VCR loses the clock setting and therefore does not start automatic timer recording. However, if you have an EDS channel in your area and have set the VCR to automatically set the clock from the EDS signal, the clock is reset within 10 minutes after power is restored and you turn on the VCR, and the VCR records at the set time(s).
Setting a Timer
Note: If you use a TV/monitor that is connected to the VCR’s
1.Turn on the VCR and the TV.
2.Set the TV to the same channel as 3 CH. 4 on the back of the VCR.
3.Repeatedly press TV/VCR until VCR appears.
38
4.(Model 63 only) Set the audio recording mode to the desired setting. See “Receiv- ing/Recording Stereo/SAP Broadcasts (Model 63 Only)” on Page 33.
5.Load a blank cassette, or one that you want to record over, into the VCR.
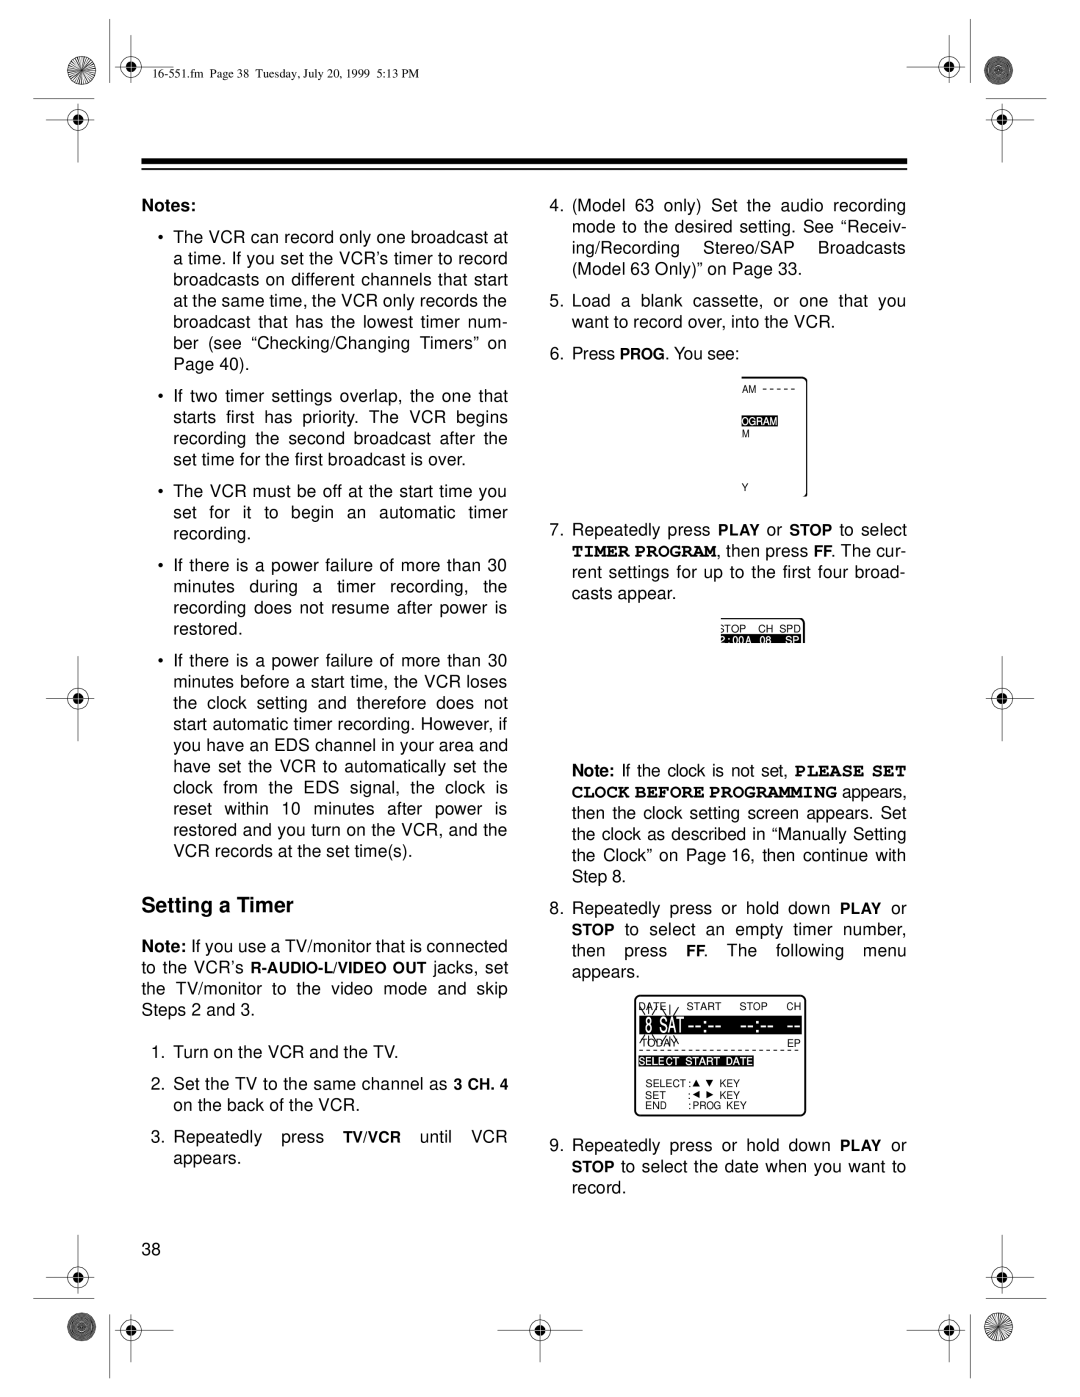
6.Press PROG. You see:
AM
OGRAM
M
Y
7.Repeatedly press PLAY or STOP to select TIMER PROGRAM, then press FF. The cur- rent settings for up to the first four broad- casts appear.
STOP CH SPD
2 : 00A 08 SP
Note: If the clock is not set, PLEASE SET CLOCK BEFORE PROGRAMMING appears, then the clock setting screen appears. Set the clock as described in “Manually Setting the Clock” on Page 16, then continue with Step 8.
8.Repeatedly press or hold down PLAY or STOP to select an empty timer number, then press FF. The following menu appears.
DATE |
|
| START | STOP | CH | |||
| ||||||||
|
|
|
|
|
|
|
|
|
8 SAT | ||||||||
| TODA |
| Y |
|
|
|
| EP |
|
|
|
|
|
| |||
|
|
|
|
|
|
|
| |
|
|
|
|
|
| |||
SELE CT START DATE |
| |||||||
SELECT : | KEY |
|
|
| ||||
SET | : | KEY |
|
|
| |||
END | : PROG KEY |
| ||||||
9.Repeatedly press or hold down PLAY or STOP to select the date when you want to record.
