18a
Note: The Combine From Disk fea- ture enables you to combine all of your images at once without having to open each image which saves sys- tem memory.
2. The Combine From Disk win- |
dow will appear (Figure 19). For |
Align Mode, choose Manual 1 |
star – shift only. (If you have field |
rotation due to a poor polar align- |
ment or if you are using a motor- |
ized |
you can use the Manual 2 stars |
align mode.) In the Output box, |
select Average. Make sure the |
Use Centroid and Auto Next |
boxes are checked. |
Figure 17. The Convert Raw to Color window converts your raw StarShoot Pro images to RGB color.
2. | Select Convert Raw to Color in |
| the Process menu. |
3. | Select StarShoot Pro High |
| Quality in the Camera Type pull |
| down menu (Figure 17). |
4. | Click OK and the image should |
| appear in color. You can make |
| several adjustments to the Color |
18b
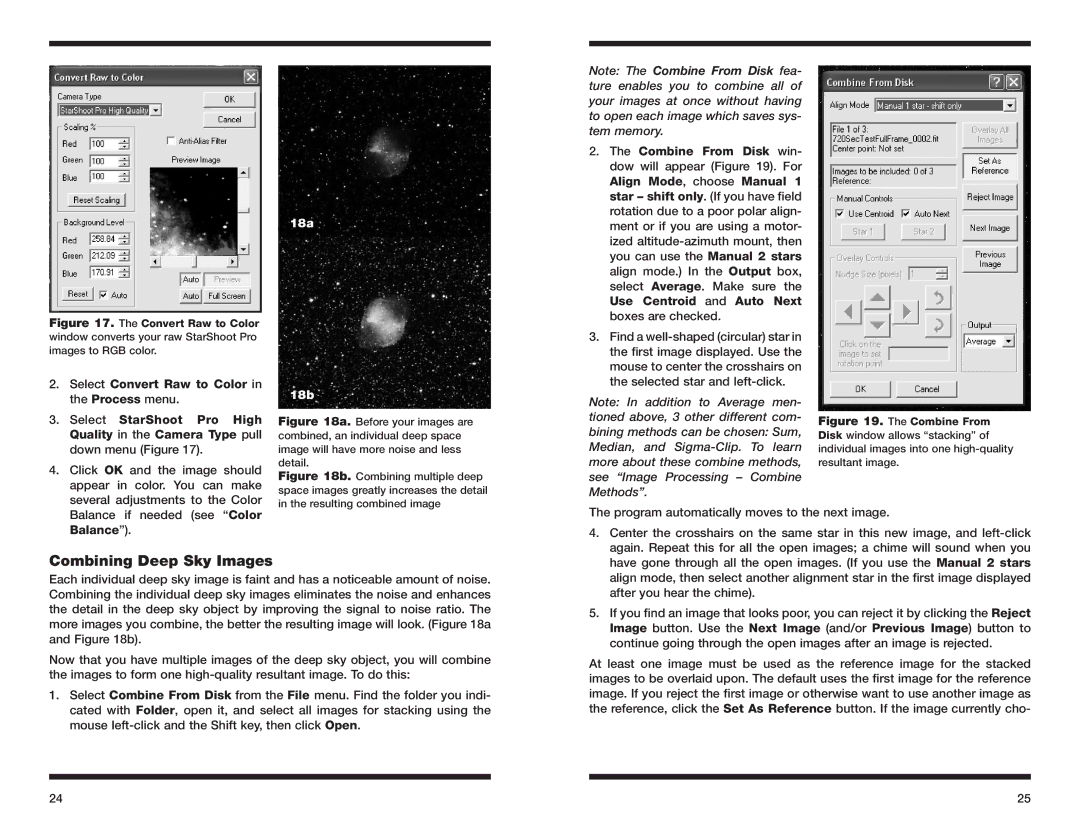
Figure 18a. Before your images are combined, an individual deep space image will have more noise and less
detail.
Figure 18b. Combining multiple deep space images greatly increases the detail in the resulting combined image
3. Find a |
the first image displayed. Use the |
mouse to center the crosshairs on |
the selected star and |
Note: In addition to Average men- tioned above, 3 other different com- bining methods can be chosen: Sum, Median, and
Figure 19. The Combine From Disk window allows “stacking” of individual images into one high-quality resultant image.
Balance if | needed (see “Color |
Balance”). |
|
The program automatically moves to the next image.
4. Center the crosshairs on the same star in this new image, and |
again. Repeat this for all the open images; a chime will sound when you |
Combining Deep Sky Images
Each individual deep sky image is faint and has a noticeable amount of noise. Combining the individual deep sky images eliminates the noise and enhances the detail in the deep sky object by improving the signal to noise ratio. The more images you combine, the better the resulting image will look. (Figure 18a and Figure 18b).
Now that you have multiple images of the deep sky object, you will combine the images to form one
1.Select Combine From Disk from the File menu. Find the folder you indi- cated with Folder, open it, and select all images for stacking using the mouse
have gone through all the open images. (If you use the Manual 2 stars |
align mode, then select another alignment star in the first image displayed |
after you hear the chime). |
5. If you find an image that looks poor, you can reject it by clicking the Reject |
Image button. Use the Next Image (and/or Previous Image) button to |
continue going through the open images after an image is rejected. |
At least one image must be used as the reference image for the stacked images to be overlaid upon. The default uses the first image for the reference image. If you reject the first image or otherwise want to use another image as the reference, click the Set As Reference button. If the image currently cho-
24 | 25 |
