Adjusting the White Balance/Black Balance
3 Place the white pattern over a location with the same conditions as the light source illuminat- ing the subject and zoom up to project white on the screen.
A white object (white cloth, white wall) near the subject can also be used. The white area required is as shown below.
White cloth
1/4 or more of the screen width
1/4 or more of the screen height Notes{
ÁTake care not to allow
ÁAdjust the white cloth to the center of the screen.
4 Adjust the iris of the lens.
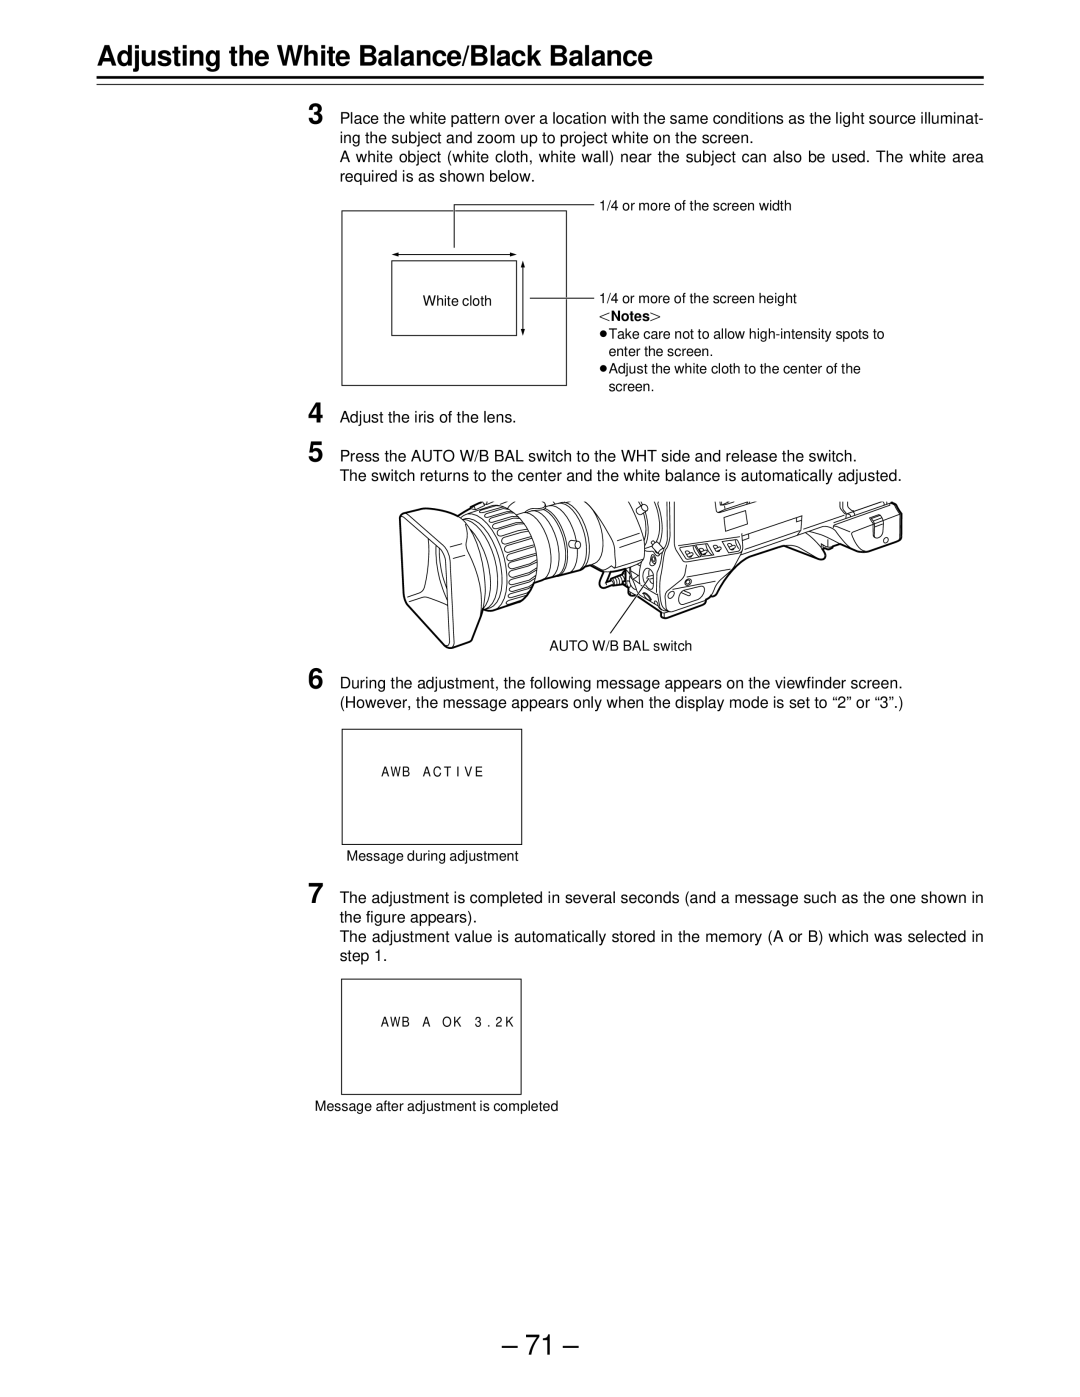
5 Press the AUTO W/B BAL switch to the WHT side and release the switch.
The switch returns to the center and the white balance is automatically adjusted.
AUTO W/B BAL switch
6 During the adjustment, the following message appears on the viewfinder screen. (However, the message appears only when the display mode is set to “2” or “3”.)
AWB A C T I V E
Message during adjustment
7 The adjustment is completed in several seconds (and a message such as the one shown in the figure appears).
The adjustment value is automatically stored in the memory (A or B) which was selected in step 1.
AWB A O K 3 . 2 K
Message after adjustment is completed
– 71 –