Operating Instructions
3.3.1Using Operation Bar
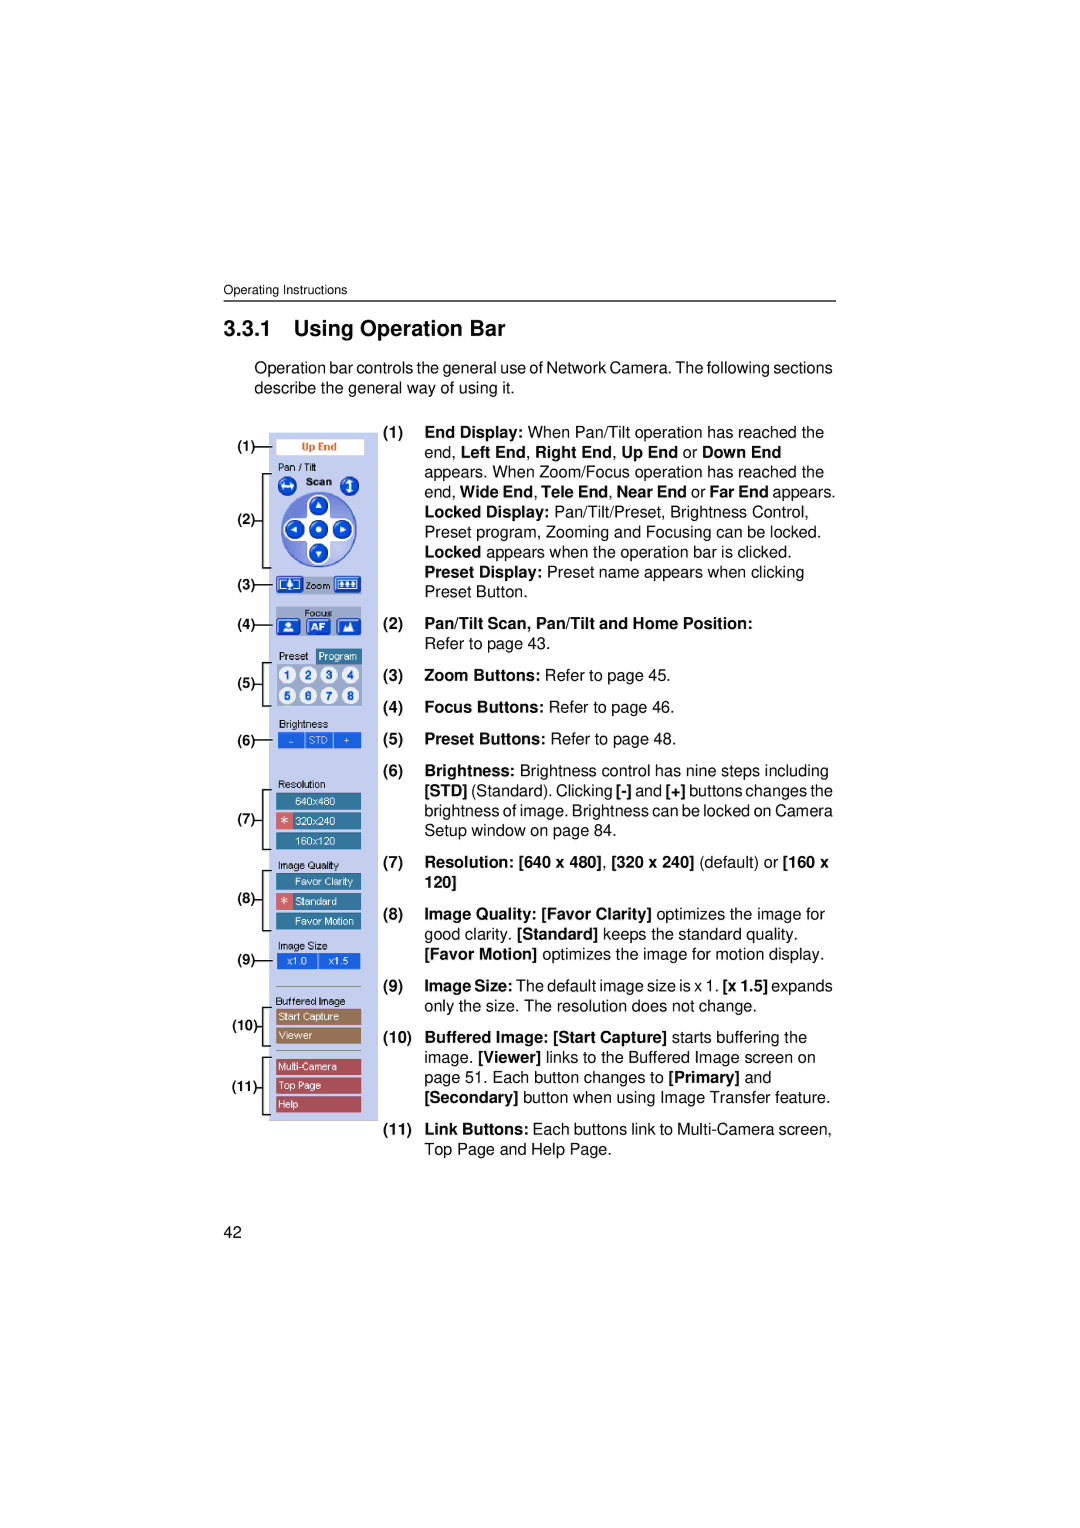
Operation bar controls the general use of Network Camera. The following sections describe the general way of using it.
(1)
(2)
(3)
(4)
(5)
(6)
(7)
(8)
(9)
(10)
(11)
(1)End Display: When Pan/Tilt operation has reached the end, Left End, Right End, Up End or Down End appears. When Zoom/Focus operation has reached the end, Wide End, Tele End, Near End or Far End appears. Locked Display: Pan/Tilt/Preset, Brightness Control, Preset program, Zooming and Focusing can be locked. Locked appears when the operation bar is clicked. Preset Display: Preset name appears when clicking Preset Button.
(2)Pan/Tilt Scan, Pan/Tilt and Home Position: Refer to page 43.
(3)Zoom Buttons: Refer to page 45.
(4)Focus Buttons: Refer to page 46.
(5)Preset Buttons: Refer to page 48.
(6)Brightness: Brightness control has nine steps including [STD] (Standard). Clicking
(7)Resolution: [640 x 480], [320 x 240] (default) or [160 x 120]
(8)Image Quality: [Favor Clarity] optimizes the image for good clarity. [Standard] keeps the standard quality. [Favor Motion] optimizes the image for motion display.
(9)Image Size: The default image size is x 1. [x 1.5] expands only the size. The resolution does not change.
(10)Buffered Image: [Start Capture] starts buffering the image. [Viewer] links to the Buffered Image screen on page 51. Each button changes to [Primary] and [Secondary] button when using Image Transfer feature.
(11)Link Buttons: Each buttons link to
42